 Goblin
goblin is Goblin's command for Terminal. It does from the command line what the Projects tab does in the window: list the dev servers running on your Mac, open them, stop them and restart them. It also reaches the firewall, Keep Awake and the clipboard, and it's how AI apps talk to Goblin. Running it never opens a window or adds anything to the menu bar.
Install the goblin command#
The command is optional and off until you install it. Installing it adds one small file and changes nothing else.
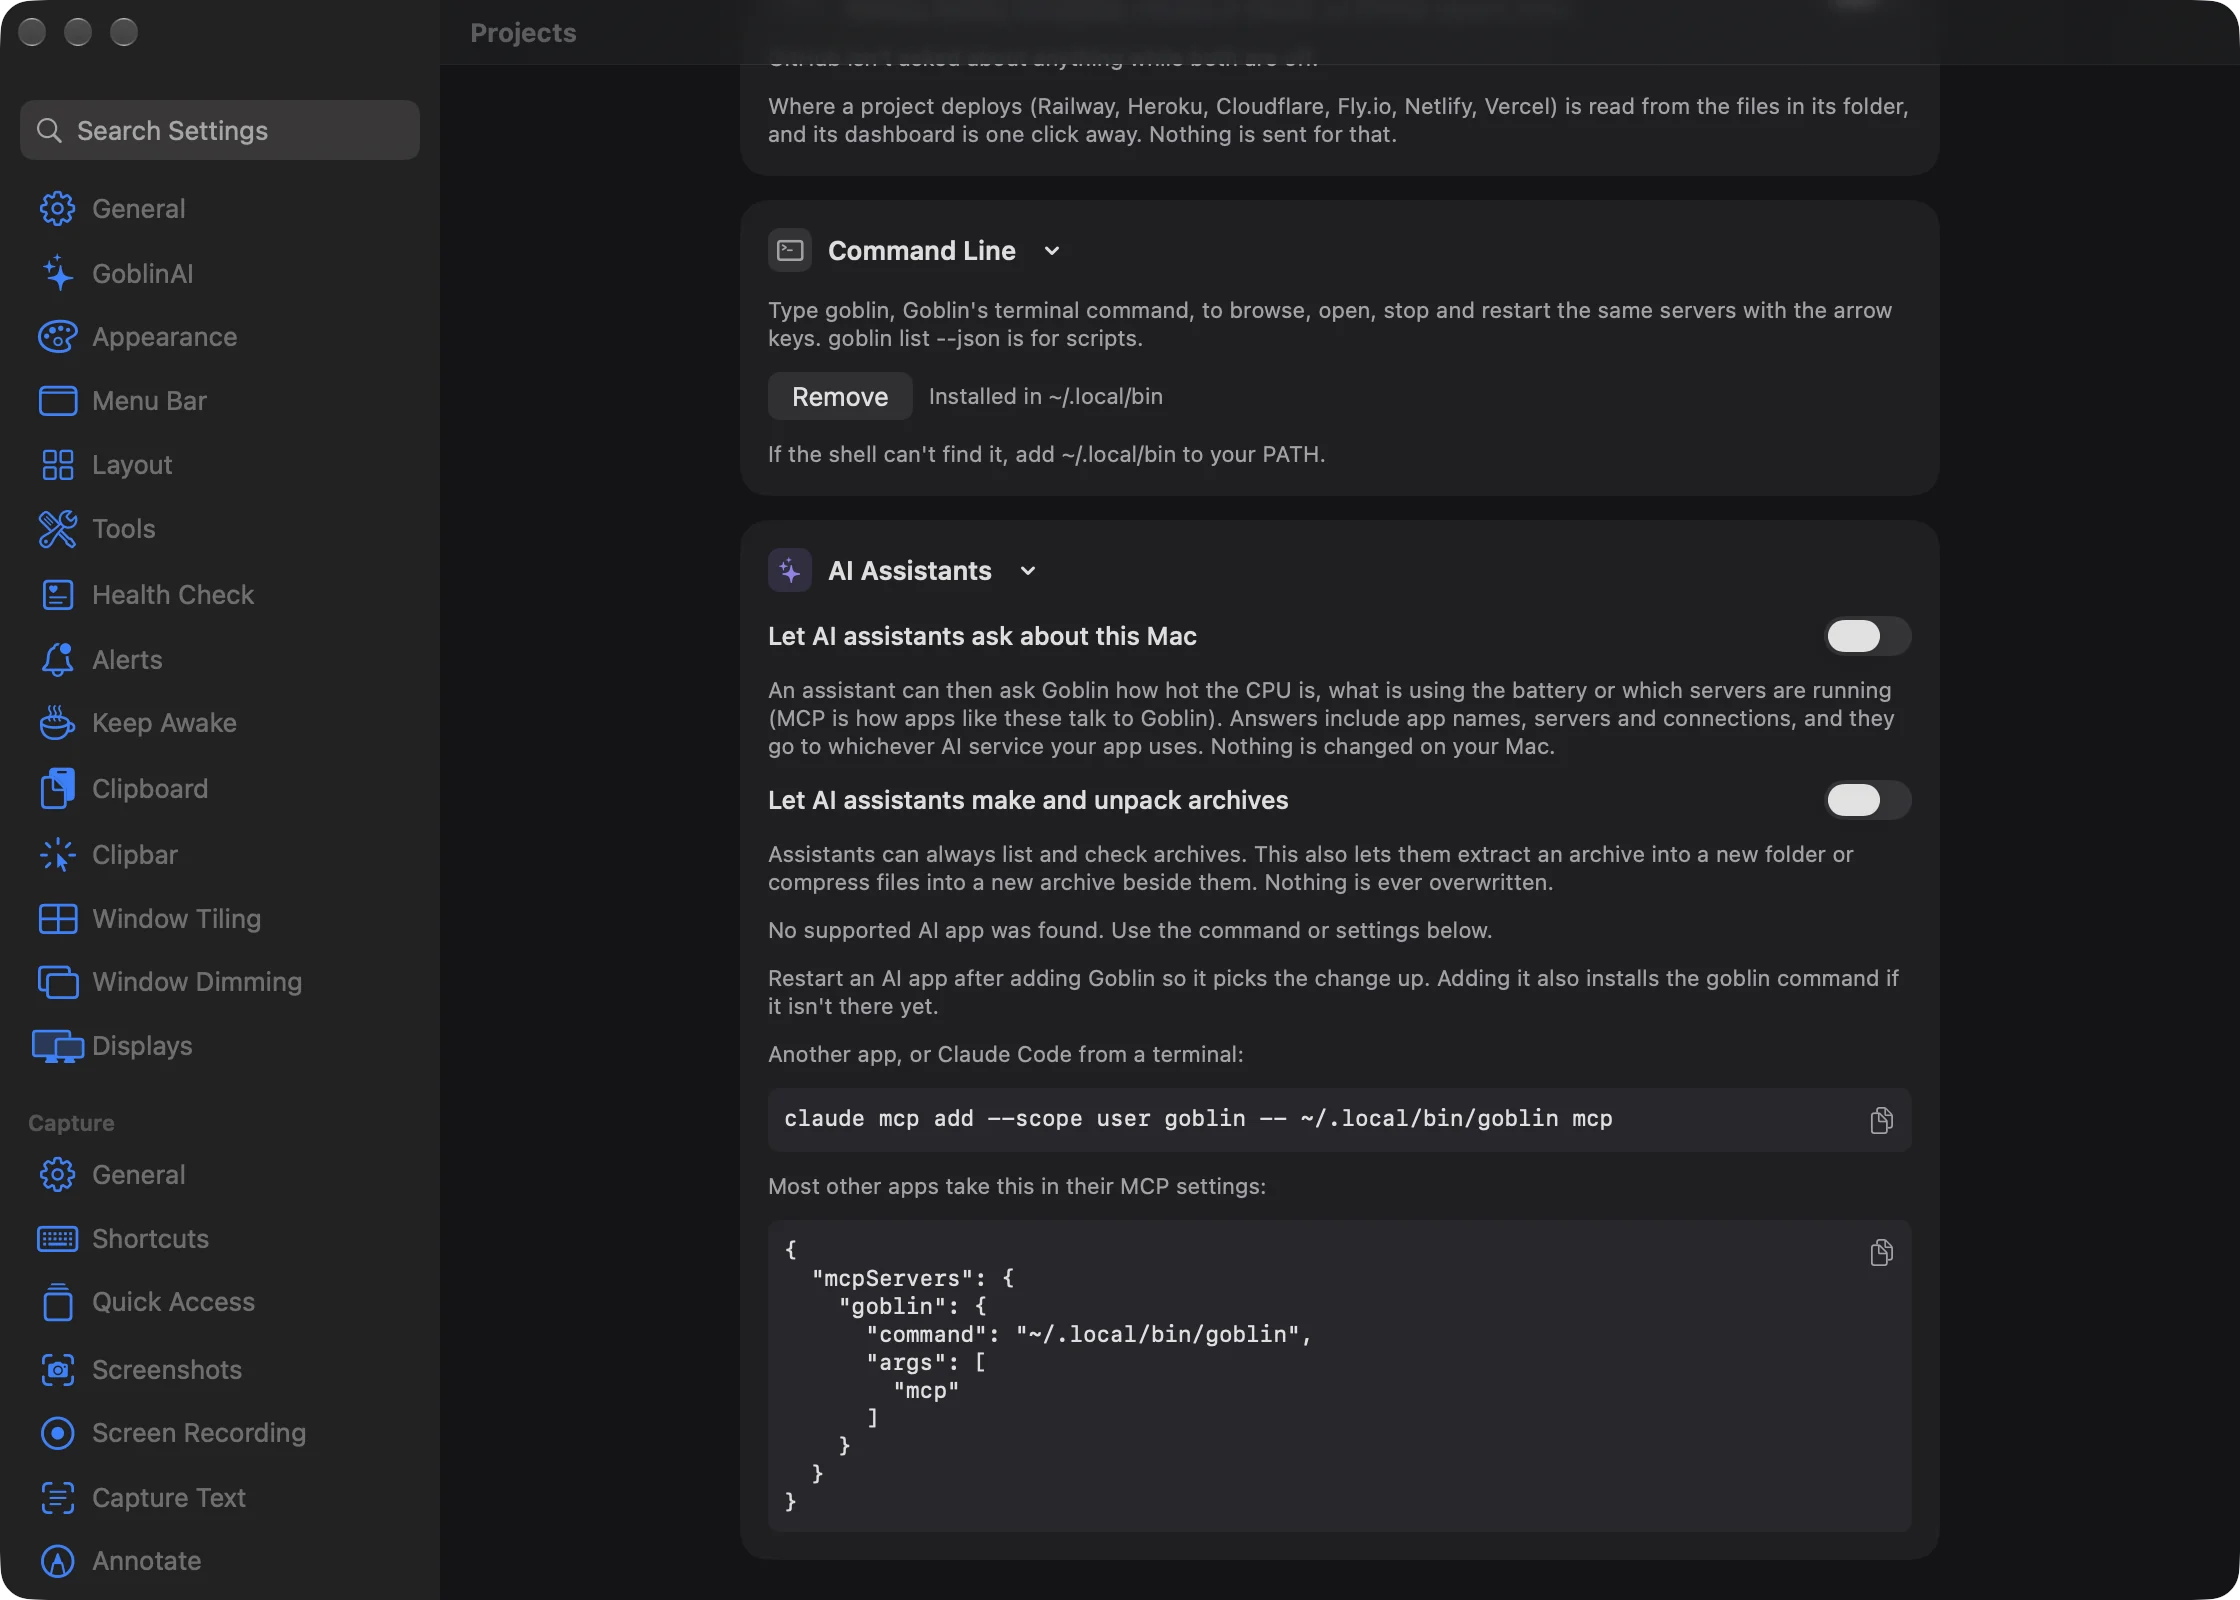
- Open Settings›Projects: right-click Goblin's menu bar item, choose Settings… (⌘,), and click Projects in the sidebar.
- Scroll to the Command Line card.
- Click Install goblin Command.
The button turns into Remove, and the card says "Installed in ~/.local/bin".
- Open a new Terminal window and check it works:
goblin versionThis prints Goblin's version number, for example 1.1. If it prints command not found, follow Fix "command not found".
Goblin puts a small script at ~/.local/bin/goblin that runs Goblin itself. If you move Goblin.app later, the script finds it again. If it can't, it says "Goblin.app wasn't found" and asks you to install the command again.
To take the command away, click Remove on the same card. Adding Goblin to an AI app installs the command too, and Uninstall Goblin… removes it.
Fix "command not found"#
~/.local/bin isn't on your PATH, the list of folders your shell searches. For zsh, the Mac's standard shell, add it:
echo 'export PATH="$HOME/.local/bin:$PATH"' >> ~/.zshrcThis adds one line to the end of ~/.zshrc and prints nothing. Open a new Terminal window (or run source ~/.zshrc) and try goblin version again.
All commands#
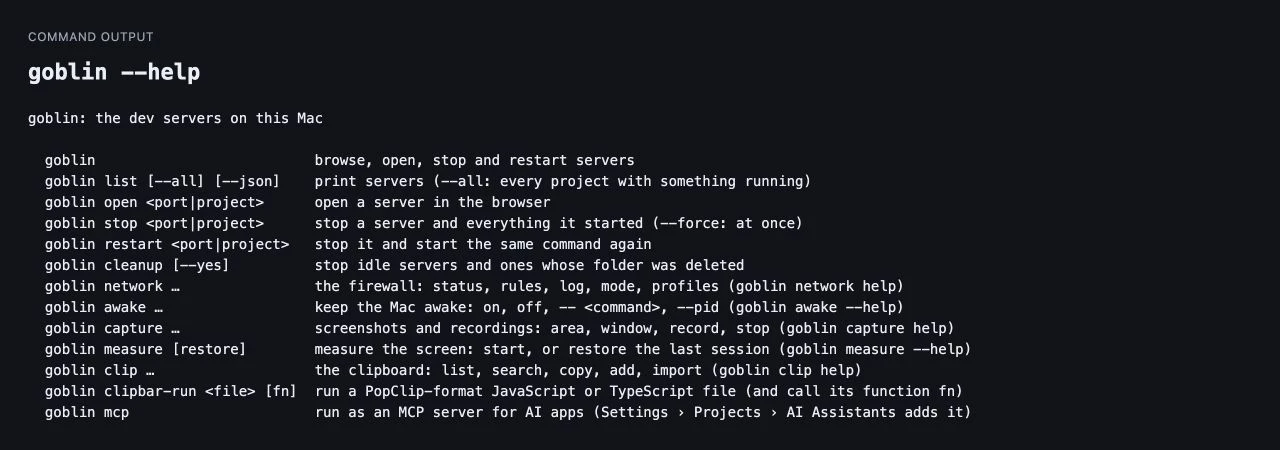
Type goblin help to print this list in Terminal.
goblin                          browse, open, stop and restart servers
goblin list [--all] [--json]    print servers (--all: every project with something running)
goblin open <port|project>      open a server in the browser
goblin stop <port|project>      stop a server and everything it started (--force: at once)
goblin restart <port|project>   stop it and start the same command again
goblin cleanup [--yes]          stop idle servers and ones whose folder was deleted
goblin network …                the firewall
goblin awake …                  keep the Mac awake
goblin clip …                   the clipboard history and pinboards
goblin capture …                screenshots and recordings
goblin measure [restore]        measure the screen
goblin clipbar-run <file> [fn]  run a selection-bar extension script
goblin mcp                      run as an MCP server for AI apps
goblin version                  print Goblin's version
goblin help                     print the help
Several commands have a shorter name: ls for list, kill for stop, clean for cleanup, net or firewall for network.
The dev server commands use your settings from Settings › Projects: when a server counts as idle, which processes are protected, the port range, the memory leak limits and whether coding agents are linked.
Browse servers: goblin#
Type goblin on its own in Terminal for a full-screen list of your dev servers. It refreshes every 2 seconds.
The header counts the servers and the memory they use. Each server shows its folder, the command that started it, the coding agent session it belongs to (with the command to resume it), and where it deploys. Leaking servers show in amber.
| Key | What it does |
|---|---|
| ↑ ↓ or K J | Move between servers |
| O or Return | Open the server in your browser (http://localhost:<port>) |
| S | Stop it, after you confirm |
| F | Force stop it at once |
| R | Restart it |
| C | Clean up idle servers |
| Q, Esc or ⌃C | Quit |
Stop, restart and clean up ask first with Y or N. Goblin warns "(a database!)" before stopping a protected server. A restarted server runs in the background from then on, and its output goes to ~/Library/Logs/Goblin rather than the Terminal tab it started in.
If you pipe goblin's output somewhere, or add --json, it prints the list instead, like goblin list.
To stop, restart or open a server from this screen, move to it with the arrow keys and press S, R or O. Answer Y when it asks you to confirm. Press Q when you're done.
List your dev servers#
goblin listThis prints one line per server, the ones using the most memory first, with the columns PORT, PROJECT, KIND, BRANCH, MEMORY, CPU, UP and STATUS.
The STATUS column says running, working, idle, barely used, protected, folder deleted, worktree removed or leaking (several can apply). With nothing running it says "No dev servers are running."
| Option | What it does |
|---|---|
--all | Also lists projects that are running something without a listening port. |
--json | Prints a JSON array for scripts: each server's name, folder, ports, URLs, memory, CPU, status, whether it's protected or leaking, its processes, deploy targets, branch, framework, command, start time, and linked coding agent sessions. |
For example, to print the URL of every server (this uses the jq tool, which isn't part of macOS):
goblin list --json | jq -r '.[].urls[]'It prints one address per line, such as http://localhost:5173.
Open, stop and restart a server#
open, stop and restart each take a port or a project name. A number matches a port; text matches a project name exactly, or failing that, part of one. If the text matches more than one project, Goblin names them and asks you to use a port. Find the port or name with goblin list.
Open a dev server in the browser#
goblin open 5173This opens http://localhost:5173 in your default browser and prints nothing.
Stop a dev server#
- Run
goblin listand note the PORT or PROJECT of the server. - Stop it:
goblin stop shop-webThis stops the server and every process it started, politely, waits for them to finish, then prints Stopped shop-web.
If it won't close, force it. This stops it at once without waiting, and anything it hadn't saved is lost:
goblin stop shop-web --force-f works too, and so does a port number instead of a name. Goblin refuses a name that matches no server (goblin: no server matches 'shop-web'., exit code 1).
Restart a dev server#
goblin restart shop-webThis stops the server, then runs the same command again in the same folder, in the background. It prints Restarted shop-web. Output: followed by the log file, in ~/Library/Logs/Goblin. If Goblin can't tell how the server was started, it says couldn't read how shop-web was started. and leaves it running.
Clean up idle dev servers#
Run:
goblin cleanupIt lists the idle servers and the ones whose folder or worktree was deleted (never protected ones), each with why and how much memory it uses, then asks Stop these? [y/N]. Type y and press Return to stop them; anything else leaves them. It finishes with Stopped 2 servers. With nothing to stop it prints Nothing to clean up.
Add --yes (or -y) to skip the question, for example in a script:
goblin cleanup --yesgoblin network#
The firewall from Terminal: its status, rules, logs and traffic, and changes such as the mode or profile. Type goblin network help for the full help. goblin net and goblin firewall work too.
Look at the firewall#
These only read, so they always work. For example:
goblin network statusThis prints the mode, whether filtering is on, the active profile, the number of rules and blocklists, and whether the network extension is running and how many connections it has seen and denied. The full list of reading commands:
goblin network status                    mode, filtering, profile, rule and blocklist counts, the extension
goblin network restrictions              what the Security settings allow
goblin network rules [--json]            list rules, in the order they're checked
goblin network log [-l 30m] [-s] [-p predicate] [-j]
                                         Goblin's own log (-s: follow; -j: JSON)
goblin network log-traffic [-b date] [-e date] [--follow] [--denied] [--summary] [-j]
                                         connections as the firewall decides them
goblin network capture-traffic [-p] [-v via] [--seconds n] <program path> [<output file>]
                                         record one program's packets (asks for your password via sudo)
goblin network export [file]             the whole configuration as JSON
goblin network list-preferences [--json] the firewall preferences and their values
goblin network read-preference <key>     one preference's value
Dates for log-traffic can be 2026-10-02, "2026-10-02 14:30", or how long ago, such as 90s, 30m, 2h or 3d. The extension only holds recent connections; --summary adds up the saved 30-day traffic history per app instead.
Let the command change the firewall#
Commands that change something are off until you allow them. Nothing about the firewall can be changed from Terminal until you do this once:
- Open Settings›Firewall and click Security.
- If rule or settings editing is locked, unlock it first. Goblin asks for Touch ID or your password.
- In the Other section, switch on Allow access via Terminal.
- Make sure Goblin is running. These commands pass the change to the running Goblin app.
Now they work. For example, this switches the firewall to Silent Deny mode and prints the new mode:
goblin network mode silent-denyIf the switch is off, or Goblin isn't running, the command fails with an explanation and a non-zero exit code. The full list of commands that change something:
goblin network mode alert|silent-allow|silent-deny
goblin network filter on|off
goblin network profile <name>|none
goblin network rulegroup enable|disable <name>
goblin network blocklist enable|disable <name>
goblin network update                    update every blocklist and rule group now
goblin network update-rule-groups [-a|-t]
                                         rebuild the built-in groups (-a: Apple apps only, -t: third-party only)
goblin network write-preference [-r] <key> [<value>]
                                         set a preference (-r: back to its default)
goblin network restore <file>            replace the configuration with a backup
Allow access via Terminal is off by default, since any program you run could use the command. The Security switches themselves can only be changed in Settings. See Firewall settings and The firewall.
goblin awake#
New in 1.1: Keep Awake, and the goblin awake command.
Starts, ends and extends Keep Awake sessions, or keeps the Mac awake while a command runs. For example, this starts a two-hour session and then checks it:
goblin awake on --for 2h
goblin awake
The first command prints something like Keep Awake is on: 2h left, until 8:30 PM. The second prints the same line while the session runs (and exits 0), or Keep Awake is off. (and exits 1) when it doesn't. goblin awake off ends the session and prints Keep Awake is off.
All the forms:
goblin awake                       is a session running, and until when (exit 0 if on, 1 if off; --json)
goblin awake on [--for 2h] [--until 18:30] [--file path] [--display-sleep] [--lid] [--label text]
goblin awake off                   end the session
goblin awake toggle [on's options] on when off, off when on
goblin awake extend --by 30m       add time to the session
goblin awake -- <command> [args]   stay awake exactly as long as the command runs (--display: and the screen)
goblin awake --pid <pid>           stay awake until that process exits
start and stop work as well as on and off. See Keep Awake basics for what each option does.
Keep the Mac awake while a command runs#
Put -- and your command after goblin awake. The Mac stays awake until the command finishes, then goes back to normal, with no cleanup to do:
goblin awake -- make releaseThis runs make release as usual, showing its output, and exits with the command's own exit code. Add --display to keep the screen on too. To wait for a program that's already running, use its process ID instead:
goblin awake --pid 4242This prints nothing and returns when process 4242 exits. If there's no such process it says goblin awake: no process with ID 4242. These two forms work with Goblin closed and don't show in the Keep Awake card.
--file keeps the Mac awake while that file finishes downloading, the same as Choose File… in the card's Start menu. Give it instead of --for or --until, not with them. ~ works, and a path that doesn't start with / is taken from the folder you're in. The times goblin awake prints follow the Clock choice in Keep Awake settings.
goblin clip#
New in 1.1: The clipboard, and the goblin clip command.
Reads and changes your clipboard history and pinboards from Terminal. goblin clip --help prints this list:
goblin clip list [--pinboard NAME] [--limit N] [--json]   newest first; a pinboard shows in its own order
goblin clip search TEXT [--pinboard NAME] [--limit N] [--json]
goblin clip copy ID|N [--pinboard NAME] [--plain]         put an item on the clipboard (N: its place in list)
goblin clip add TEXT [--pinboard NAME]                    a new text item (no TEXT: read standard input)
goblin clip pin ID --pinboard NAME                        pin an item (it stays in history too)
goblin clip pinboards [--json]                            the pinboards and how many items each holds
goblin clip show [--pinboard NAME]                        open the strip in Goblin
goblin clip pause [15m|1h|3h|…]                           stop recording for a while, or until resume
goblin clip resume
goblin clip trash [list [--json]]                         what was deleted and can still come back
goblin clip trash put-back ID                             bring one back
goblin clip trash empty [--yes]                           delete everything in the Trash for good
goblin clip export [--pinboard NAME]… DIR                 pinboards to a folder: one file per item + pinboard.json
goblin clip import DIR                                    pinboards from such a folder
goblin clip import [--pinboards-only] …                   from a supported clipboard app (see --help)
Turn Clipboard on in Settings › Clipboard first; until there's a history, the command says "there's no clipboard history yet". goblin clip on its own is the same as goblin clip list.
Lists and searches#
list prints the newest 20 items, one per line: its place, a short ID (8 characters), its kind, how long ago it was copied, the app it came from, and a preview. Items in a pinboard show its name in brackets. Passwords and other secrets show as ••••••••. --limit takes 1 to 10000. With --pinboard, the list is that pinboard in its own order.
search looks through history and every pinboard, unless you name one with --pinboard. It prints "No matches." and exits with 1 when nothing matches, so scripts can test for it.
--json gives scripts each item's place, ID, kind, title, dates, app, pinboard and character count, plus the text, link, file names, image size or color for anything that isn't a secret or locked.
goblin clip search invoice --limit 5
goblin clip list --pinboard Work --json | jq -r '.[].text'
The first prints up to five items that match "invoice", newest first, one per line. The second prints the text of every item in the Work pinboard, one per line (this uses the jq tool, which isn't part of macOS).
Copy, add and pin#
Find an item with goblin clip list, then use the short ID or its place in the list:
goblin clip copy 3
pbpaste | goblin clip add --pinboard Notes
goblin clip pin 4f9a2c1e --pinboard Work
The first puts the third item in the list on the clipboard, ready to paste with ⌘V, and prints Copied: followed by a preview. The second saves whatever is on the clipboard as a new item in the Notes pinboard (the pinboard must exist) and prints Added with the new item's short ID. The third pins that item to Work and prints Pinned to Work. The item stays in history too.
copyputs an item back on the clipboard, ready to paste. Give its ID (the 8 characterslistprints, at least 4 of them, or the whole ID) or its place in the list, such asgoblin clip copy 3.--plaincopies text only, without formatting.addsaves text as a new item. With no text it reads standard input, sopbpaste | goblin clip addorcat notes.txt | goblin clip add --pinboard Noteswork. The limit is 100,000 characters. The pinboard has to exist.pinputs an item in a pinboard. It stays in history too.pinboardslists your pinboards with their color and how many items each holds.
To pass text that starts with --, put -- in front of it: goblin clip add -- --verbose.
Pause, the Trash, and moving pinboards#
showopens the clipboard strip, on history or a pinboard. It starts Goblin if it isn't running.pausestops Goblin recording what you copy, for a length such as15m,1hor3h(up to a week), or untilgoblin clip resume.trashlists what you deleted that can still be put back;trash put-back IDbrings one back.trash emptydeletes everything in the clipboard Trash for good, after asking. In a script, add--yes; without it, the command refuses rather than empty the Trash unasked.exportwrites pinboards to a folder, one file per item plus apinboard.json. With no--pinboard, it writes every pinboard; repeat--pinboardto pick several.importreads such a folder back.goblin clip importcan import from supported clipboard apps; rungoblin clip import --helpto see which. It brings in your history unless you add--pinboards-only. See Import and export.
What the command doesn't do#
Locked pinboards stay locked. Their items show as "Locked" in lists and can't be copied, and export skips the pinboard. Asking for a locked pinboard by name gets "Its clips can only be opened in Goblin, with Touch ID or your password." See Locked pinboards.
list, search, copy and export read the clipboard files directly, so they work with Goblin closed. show, pause and resume go through Goblin and do nothing while Clipboard is off.
Note: Unlike Shortcuts and AI assistants, goblin clip copy does copy a secret if you ask for it by ID or place. It prints "Copied a secret item." instead of a preview.
goblin capture#
Starts screenshots and recordings, opens the annotation editor, lists recent captures and more. goblin capture help prints every action. Most actions go through the running Goblin, which holds the Screen Recording permission, and start it if it isn't running. For example:
goblin capture area
goblin capture record screen
goblin capture stop
The first lets you drag a box on screen to take a screenshot. The second starts recording the whole screen, and the third ends the recording. See Automating capture.
goblin measure#
goblin measure
goblin measure restore
The first starts measuring the screen, the same as the Measure shortcut. The second starts with the guides and measurements from your last session. Measure has to be turned on in Settings first. See Measure.
goblin clipbar-run#
goblin clipbar-run <file> [function] runs a JavaScript or TypeScript file written for the selection bar, the way an extension would run it, calls the function you name (if any), waits for it to finish and prints what it returns. The file can reach the network and run scripts. Anything it would do to the screen, such as pasting or pressing keys, is only reported, not done. The exit code is 0 when the file loads and the function finishes, 1 if not, and 64 when you give no file. It is for people writing their own extensions.
goblin mcp#
Runs Goblin's MCP server, which AI apps start for you. You don't need to run it yourself. See AI assistants.
Exit codes#
| Code | Meaning |
|---|---|
| 0 | It worked. |
| 1 | It didn't: no server matched, you answered no, or the action failed. |
| 64 | The command was wrong: an unknown command, or a missing port or project name. |
| 127 | The script couldn't find Goblin.app. |
Errors go to standard error and start with goblin:.