 Goblin
Settings›Measure controls measuring on your screens: distances, objects and alignment, in points, pixels or physical units. Use it when you want an exact size or gap from something already on screen, such as a design, a window or a video frame.
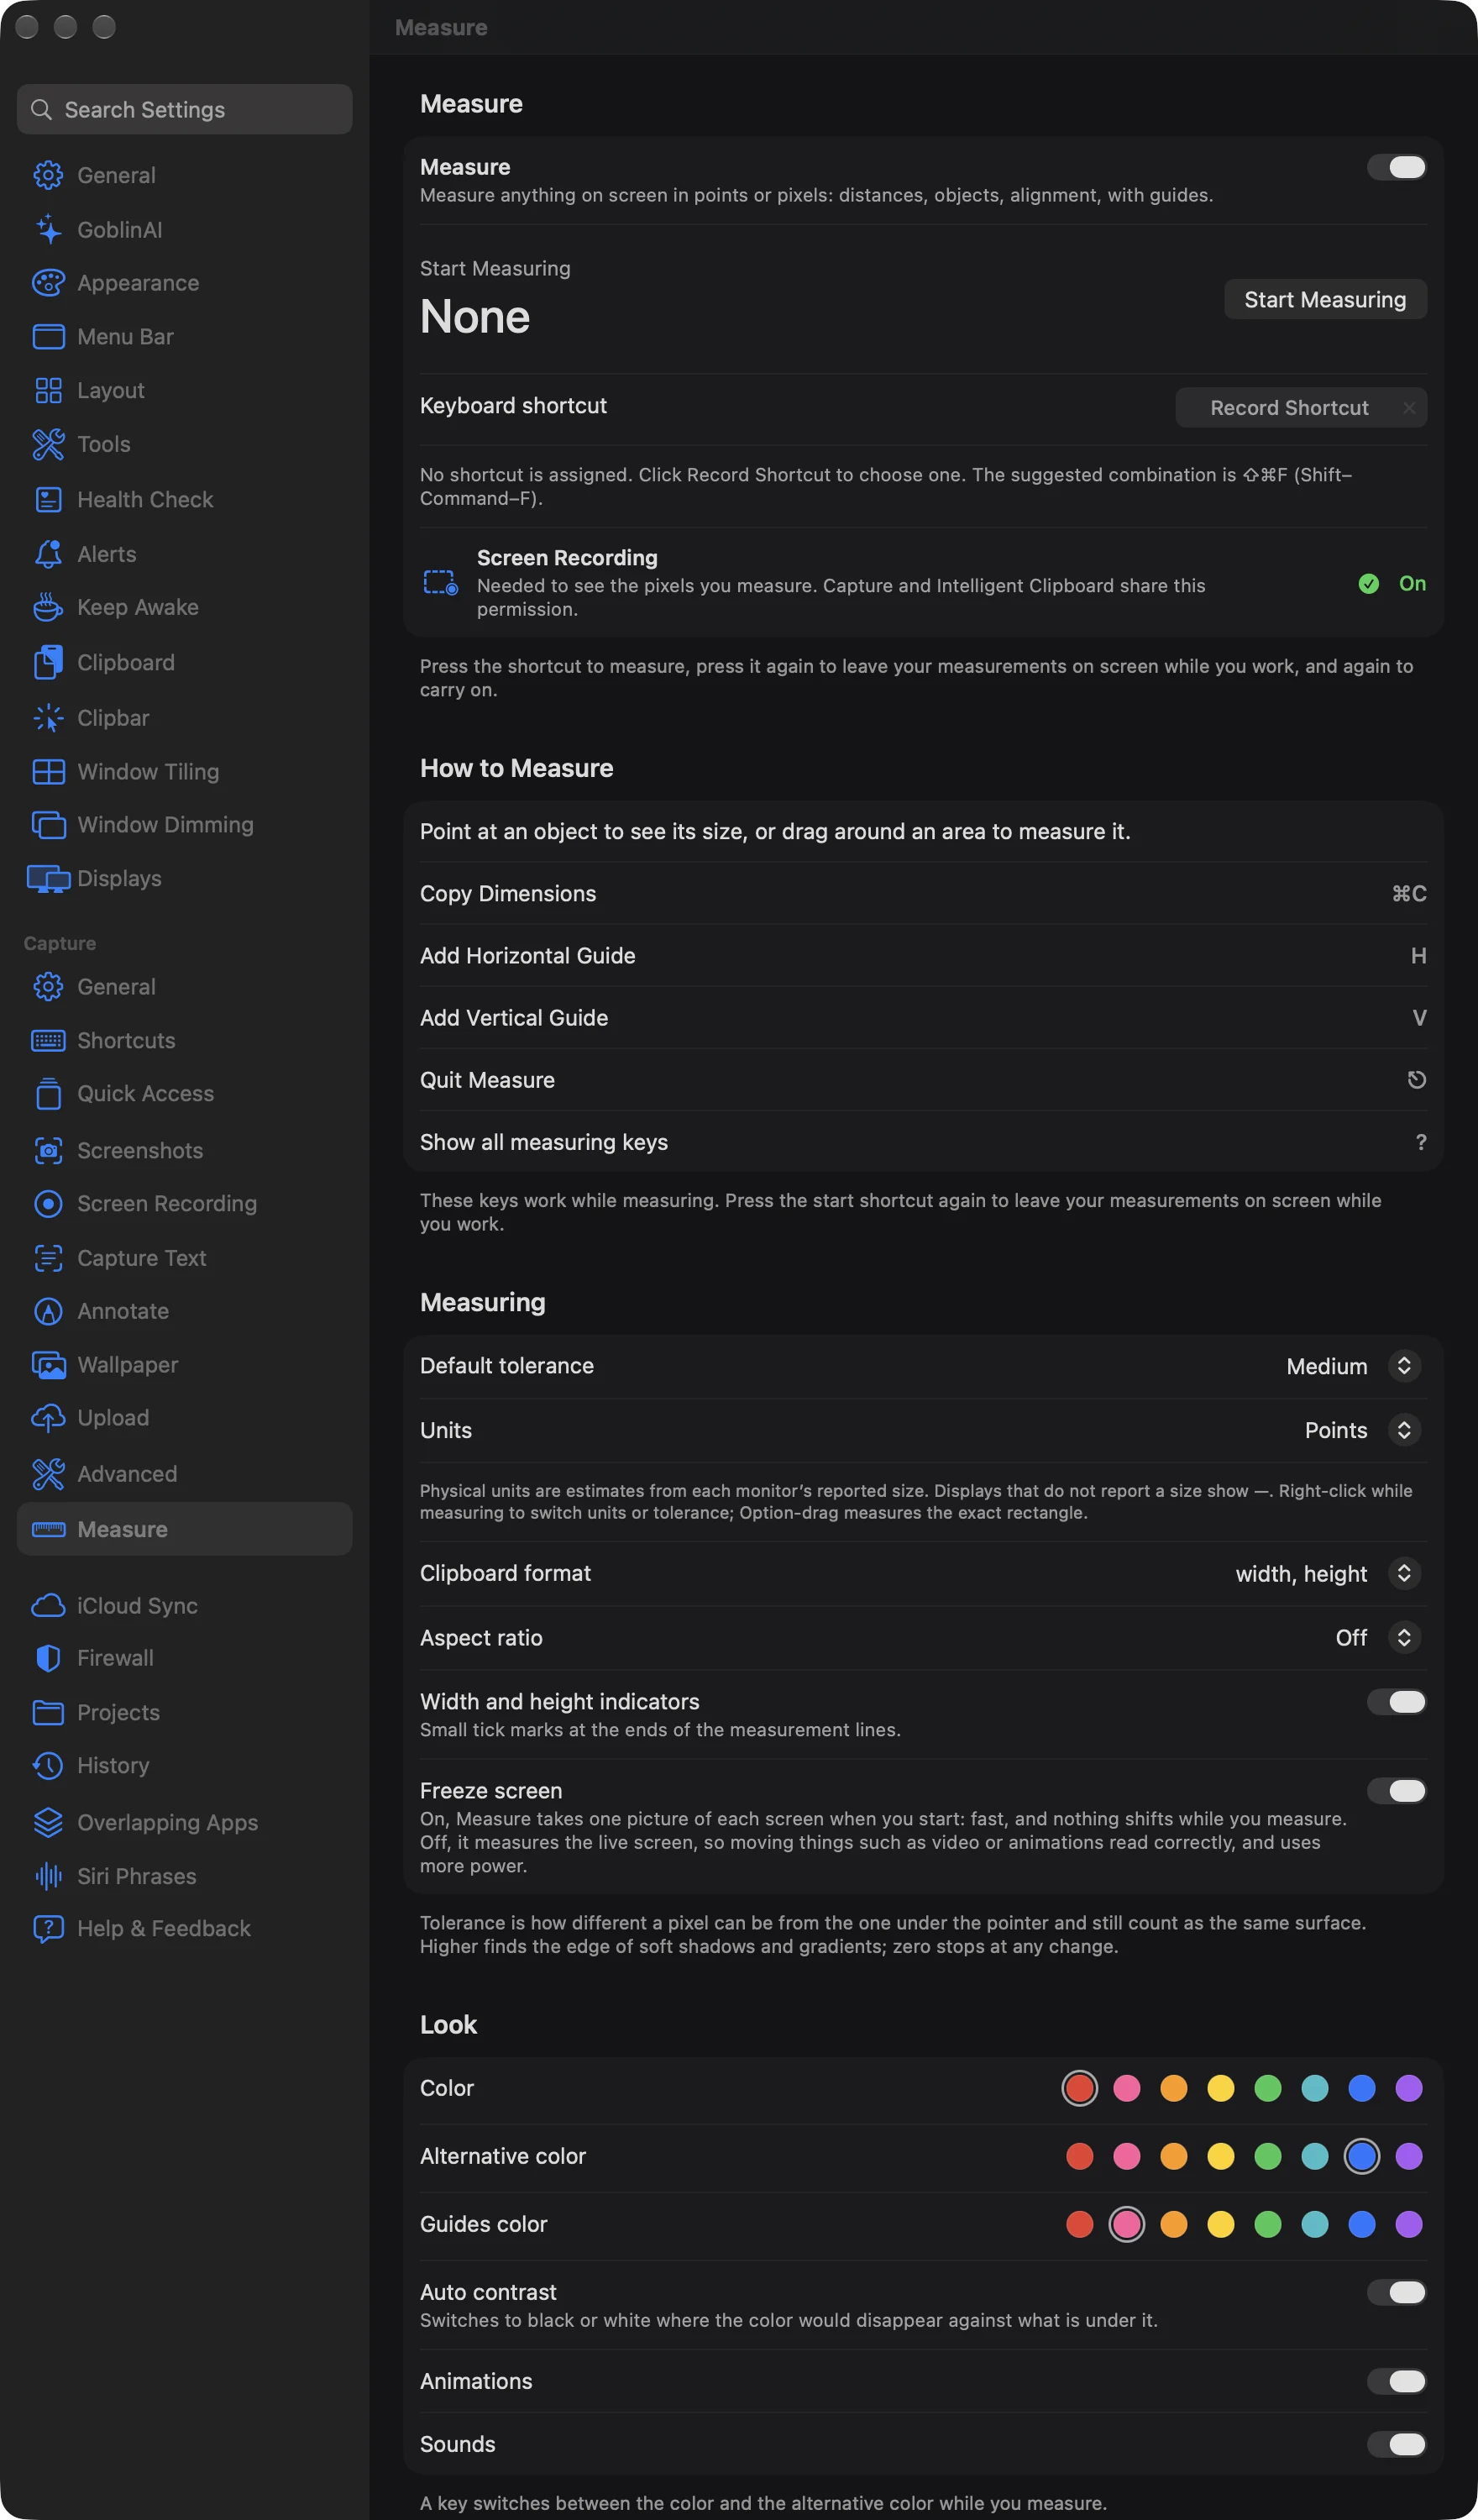
Turn on Measure#
Measure starts off, and nothing reads your screen until you turn it on.
- Open Settings›Measure.
- Switch on Measure.
- Under Start Measuring, click the shortcut field next to Keyboard shortcut and press the combination you want. If no shortcut is assigned, the pane suggests ⇧⌘F. Pick another if Capture already uses yours: the pane names the clash in red.
- In the Screen Recording row, click Allow… and approve Goblin in System Settings. Measure needs this to see the pixels you measure. Capture and Intelligent Clipboard share the same permission, so one grant covers them all.
- Click Start Measuring to try it. No Accessibility grant is needed just to read screen pixels.
Measure something on screen#
- Press your Start Measuring shortcut, or click Start Measuring in the pane.
- Point at an object. Lines run out to its nearest edges and a pill shows its size.
- To measure an area, drag around it. The box shrinks to fit what is inside. Hold ⌥ while you drag to measure the exact rectangle you drew.
- Press H or V to drop a horizontal or vertical guide at the pointer, or ⇧H or ⇧V to hold the distance under the pointer.
- Press ⌘C to copy the size under the pointer or of the selected object.
- To leave the measurements on screen while you work, press the start shortcut again. Clicks pass through to your apps. Press it a third time to resume measuring.
- Press Esc to finish.
Press ? while measuring to show the list of keys. The right-click menu has most of the same actions.
Keys while measuring#
These work only while measuring is active. The pane lists them all under Keys while measuring.
| Key | Action |
|---|---|
| ⌘C | Copy the hovered or selected dimensions in your Clipboard format. |
| H / V | Add a horizontal/vertical guide at the pointer. |
| ⇧H / ⇧V | Hold a horizontal/vertical distance. |
| X | Toggle the crosshair. |
| ⌘+ / ⌘- / T | Increase, decrease or cycle the tolerance. |
| C | Switch to the alternative color or back. |
| S | Open the screenshot tool. |
| B | Enter background mode. |
| R | Restore the last session. |
| ⌫ / ⌦ | Delete the hovered item or selected objects. |
| ⌘⌫ | Clear all measurements. |
| Arrow keys / ⇧ + arrow | Move the pointer 1 px / 10 px. |
| ? | Show the key list. |
| Esc | Close the key list first if open, otherwise quit measuring. |
Change the units#
- Open Settings›Measure.
- In the Measuring section, choose a value for Units: Points, Points (rounded), Pixels (px), Centimeters (cm), Inches (in) or Millimeters (mm).
Physical units are estimates from each monitor's reported size. A display that doesn't report a size shows a dash. You can also right-click while measuring to switch units or tolerance.
Copy a measurement#
- Open Settings›Measure and choose how the numbers are written in Clipboard format: width, height; height, width; or CSS or SASS with width first or height first.
- While measuring, point at an object or select one and press ⌘C.
- Paste the numbers where you need them.
Measuring preferences#
| Setting | What it does | Default |
|---|---|---|
| Default tolerance | Zero, Low, Medium or High. How different a pixel can be from the one under the pointer and still count as the same surface. Higher finds the edge of soft shadows and gradients; Zero stops at any change. | Medium |
| Units | Points, Points (rounded), Pixels (px), Centimeters (cm), Inches (in) or Millimeters (mm). | Points |
| Clipboard format | width, height; height, width; CSS, width first; CSS, height first; SASS, width first; SASS, height first. | width, height |
| Aspect ratio | Off, Standard (16:9), Reduced (1.77:1) or Only common values. | Off |
| Width and height indicators | Small tick marks at the ends of the measurement lines. | On |
| Freeze screen | On, Measure takes one picture of each screen when you start: fast, and nothing shifts while you measure. Off, it measures the live screen, so video and animations read correctly, and it uses more power. | On |
Frozen mode takes a fresh picture when you return from background mode.
Change how measurements look#
| Setting | What it does | Default |
|---|---|---|
| Color | Red, Pink, Orange, Yellow, Green, Teal, Blue or Purple. | Red |
| Alternative color | A second measurement color you can switch to with C. | Blue |
| Guides color | The guide color, from the same palette. | Pink |
| Auto contrast | Switches to black or white where the color would disappear against what is under it. | On |
| Animations | Enables measuring animations. | On |
| Sounds | Enables measuring sounds. | On |
Stop Measure working in one app#
- Open Settings›Measure. Under Apps you'll see "Measure works in every app" until you add one.
- Click the plus button and choose one or more apps in Disable Measure in Apps, then click Disable.
- To take an app off the list, click its name and then click the minus button.
The start shortcut does nothing while an app on the list is in front. An app that's been deleted stays listed with Not installed.
Take a screenshot while measuring#
- While measuring, press S to open the screenshot tool.
- Select an area, then copy or save it.
Shots join your capture history like any other, and saved ones use the folder in Settings›Capture.
| Setting | What it does | Default |
|---|---|---|
| Scale Retina screenshots to 1× | A 200 pt selection saves as 200 px wide instead of 400. | Off |
| Show the pointer | Draws the mouse pointer into the screenshot. | Off |
Restore your last session#
Guides, held distances and selected objects are saved when you finish measuring.
- Open Settings›Measure.
- Click Restore Last Session. You can also press R while measuring.
The button is greyed out when there's nothing to restore or Measure is off.