 Goblin
Cloud upload puts a capture on storage you own and gives you a link to share. Goblin doesn't run an upload service: you bring a bucket or a Drive folder, so your pictures never pass through anyone else. Nothing is uploaded until you press an upload button.
Set it up#
- Open Settings›Capture›Upload.
- Choose a Provider: AWS S3, Cloudflare R2 or Google Drive.
- Fill in the fields for that provider (the table below).
- Optionally set a protection password (see below).
- Press Save & Test. Goblin checks the connection and says Connection verified successfully! or what went wrong.
| Provider | What you enter |
|---|---|
| AWS S3 | Under Credentials: Access Key ID and Secret Access Key. Under Storage: Bucket Name, Region (such as us-east-1), and optionally an Endpoint for S3-compatible storage and a Custom Domain for the link. |
| Cloudflare R2 | Under Credentials: Access Key ID and Secret Access Key. Under Storage: Bucket Name, the account Endpoint, and optionally a Custom Domain. |
| Google Drive | Client ID and Client Secret from a Desktop App OAuth client in your own Google Cloud Console, then Authorize with Google. Captures go into one folder (Folder Name, Goblin unless you change it). |
Credentials are kept in your Mac's Keychain. Once it is set up the page shows Edit, Import, Export and Reset, and a Cloud Status panel with the storage used, the number of objects and the lifecycle rule.
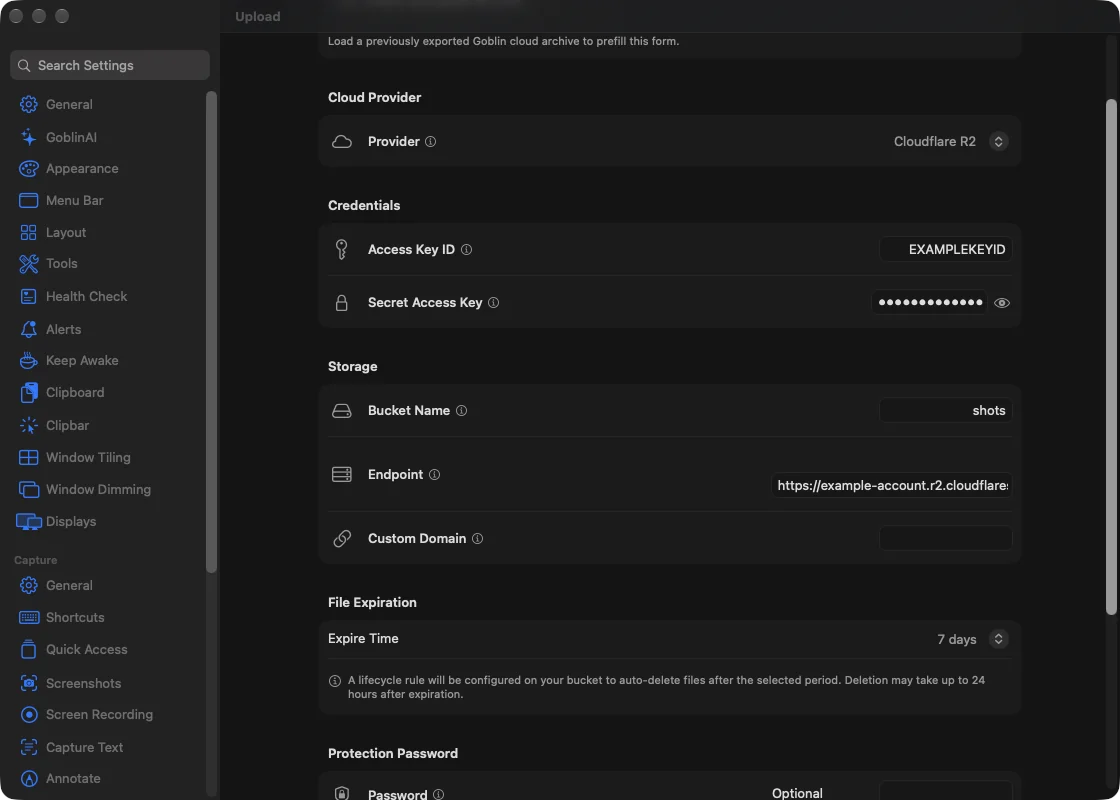
Protection password. You can set a password that is asked for before anyone views, edits, exports or imports the credentials. Without one, anyone with access to your Mac can view and change them. If you forget it, Forgot Password? Reset Configuration removes the credentials and you enter them again.
Choose how long uploads stay#
For S3 and R2, set File Expiration on the same page.
- Open Settings›Capture›Upload and find File Expiration.
- Choose Expire Time: 1, 3, 7, 14, 30, 60 or 90 days, or Permanent.
- Press Save & Test.
Goblin sets a lifecycle rule on the bucket that deletes files after that time. Deletion can take up to 24 hours after the files expire. If your credentials can't set a lifecycle rule, Goblin says so and files stay until you delete them yourself. Permanent sets no rule.
Move credentials to another Mac#
- On the first Mac, open Settings›Capture›Upload and press Export. Enter your protection password if you set one, choose a passphrase for the archive (Goblin doesn't store it) and a place to save the file.
- On the other Mac, open the same page and press Import (before setup it is Import Encrypted Archive under Transfer). Choose the file and enter the passphrase.
- Goblin loads the values into the form without saving them. Review them and press Save & Test.
Upload something#
- Take a screenshot or recording.
- On its Quick Access card, press Upload to Cloud (bottom right by default).
- Wait for the upload. The link is copied to your clipboard when it finishes. Paste it where you want it.
You can also:
- Press Upload to Cloud in the annotation editor. If the picture was uploaded before, Goblin asks before it replaces the file at the same link.
- Tick Upload & copy link in the After Capture grid (Settings›Capture›General), so every capture uploads itself.
- After exporting from the video editor, accept Goblin's offer to upload the video.
If cloud isn't set up yet, the card has no upload button, and the editor says so and sends you to Settings›Capture›Upload.
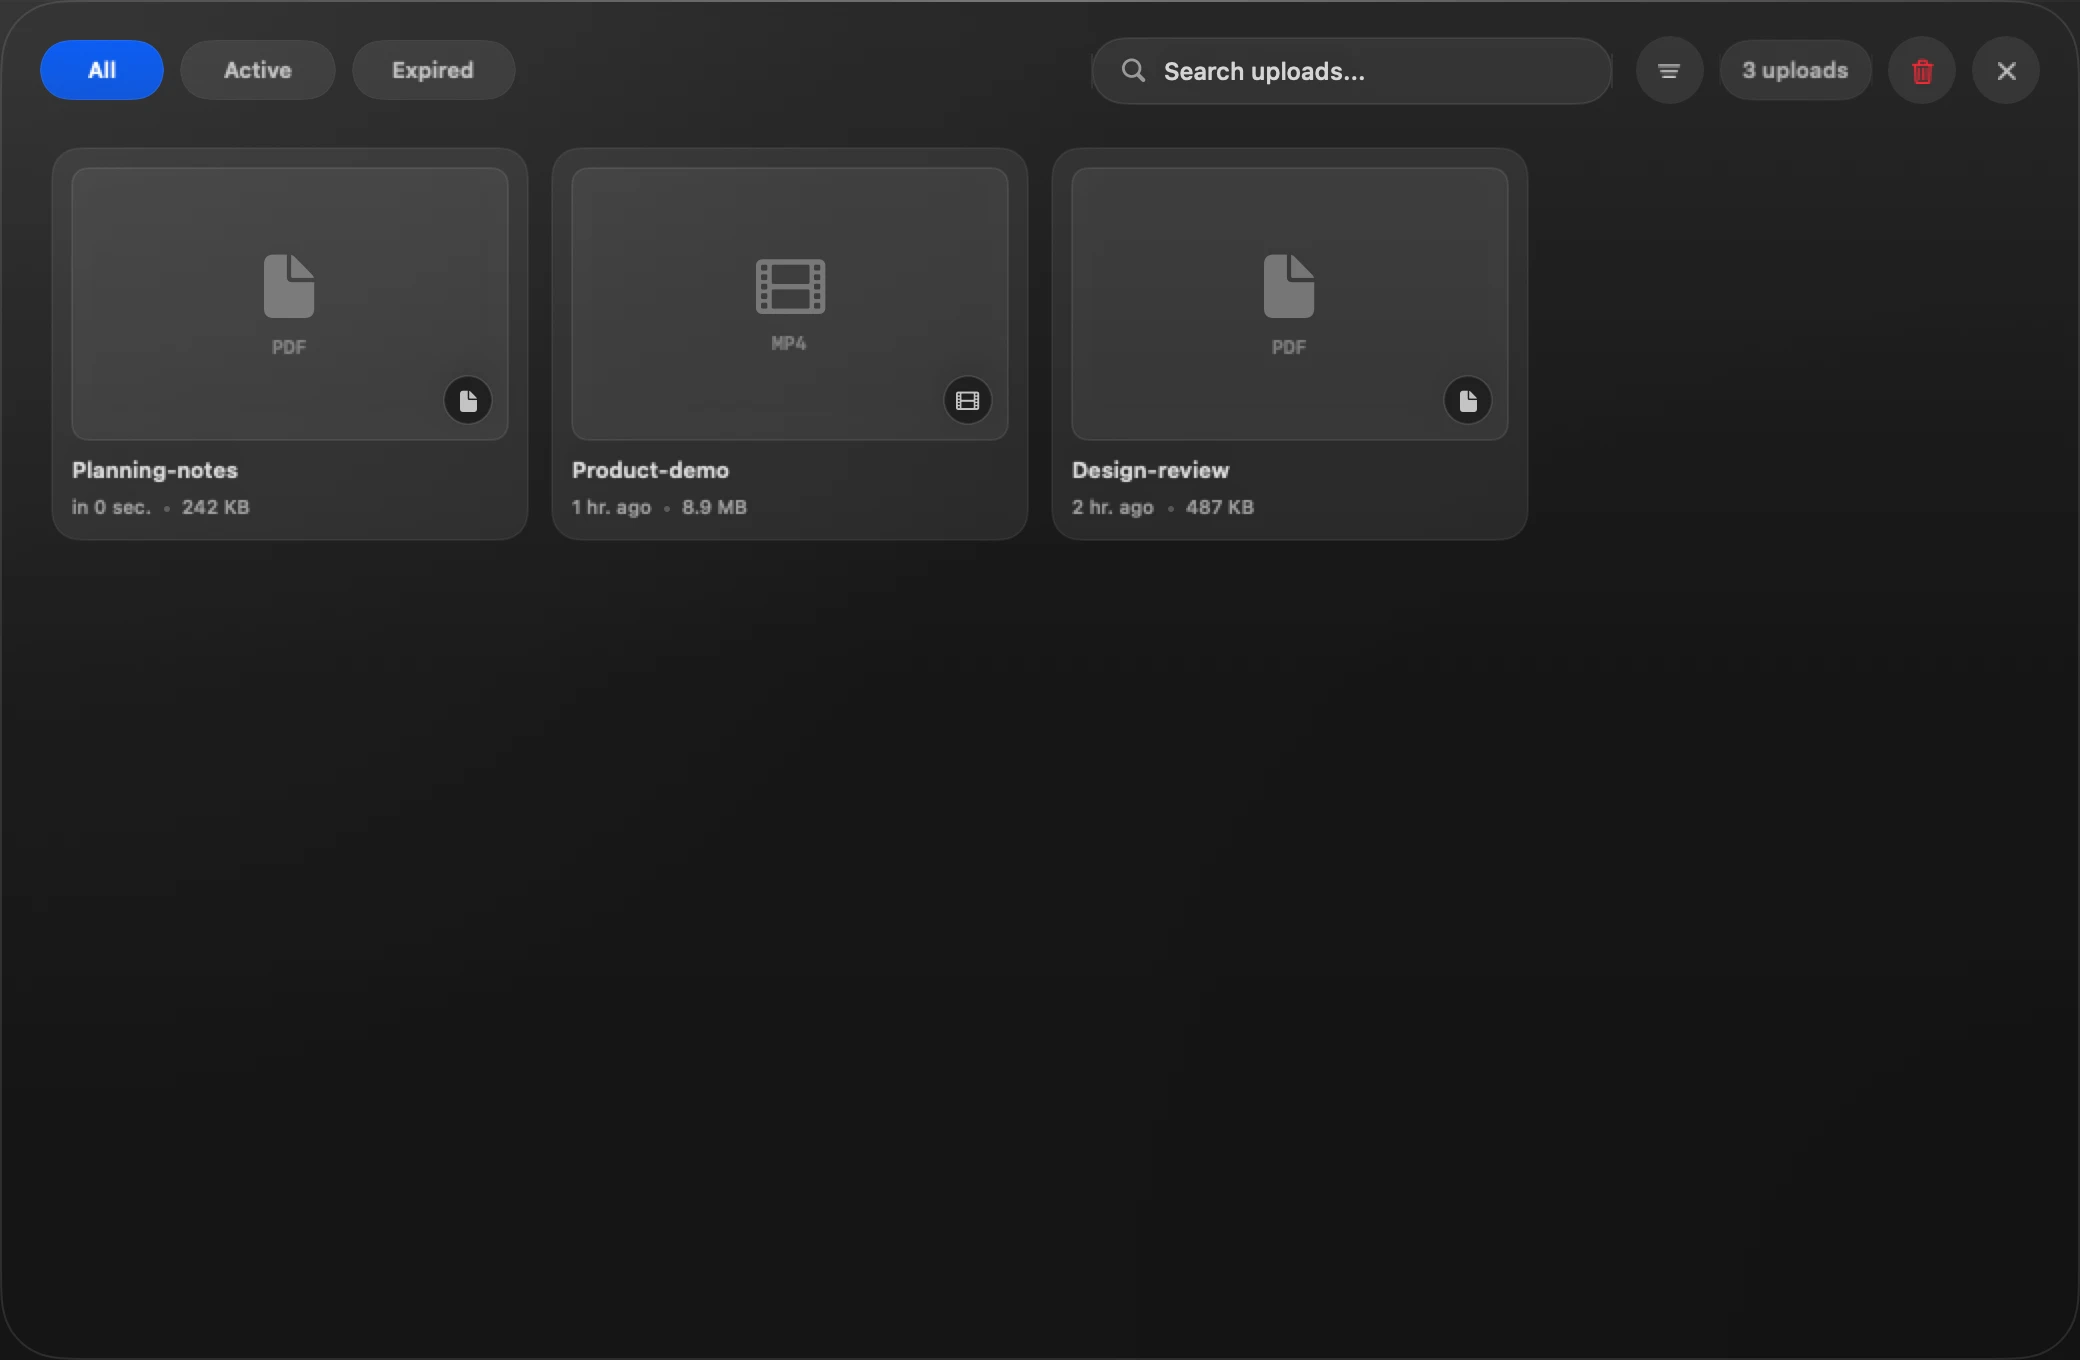
Recent uploads#
- Right-click Goblin's menu bar item and choose Image & PDF Tools›Show Recently Uploaded. (There is also the Show Recently Uploaded shortcut, and
goblin capture uploads.) - The Cloud Upload History window lists recent uploads with their provider and when each expires. Search, filter by status or provider, or sort by newest, oldest or size.
- Press Copy link on the one you want.
To clear the list, press Clear all history. Delete from Cloud & Clear removes the files from your storage as well; Clear History Only keeps the files. Floating Position under Uploads Window in the Upload settings sets where the window opens: top, center or bottom.