 Goblin
Settings›Window Dimming shades every window except the one you're working in, so your eyes stay on it. It's for focus: with several windows open, the active one stays clear and the rest fade back.
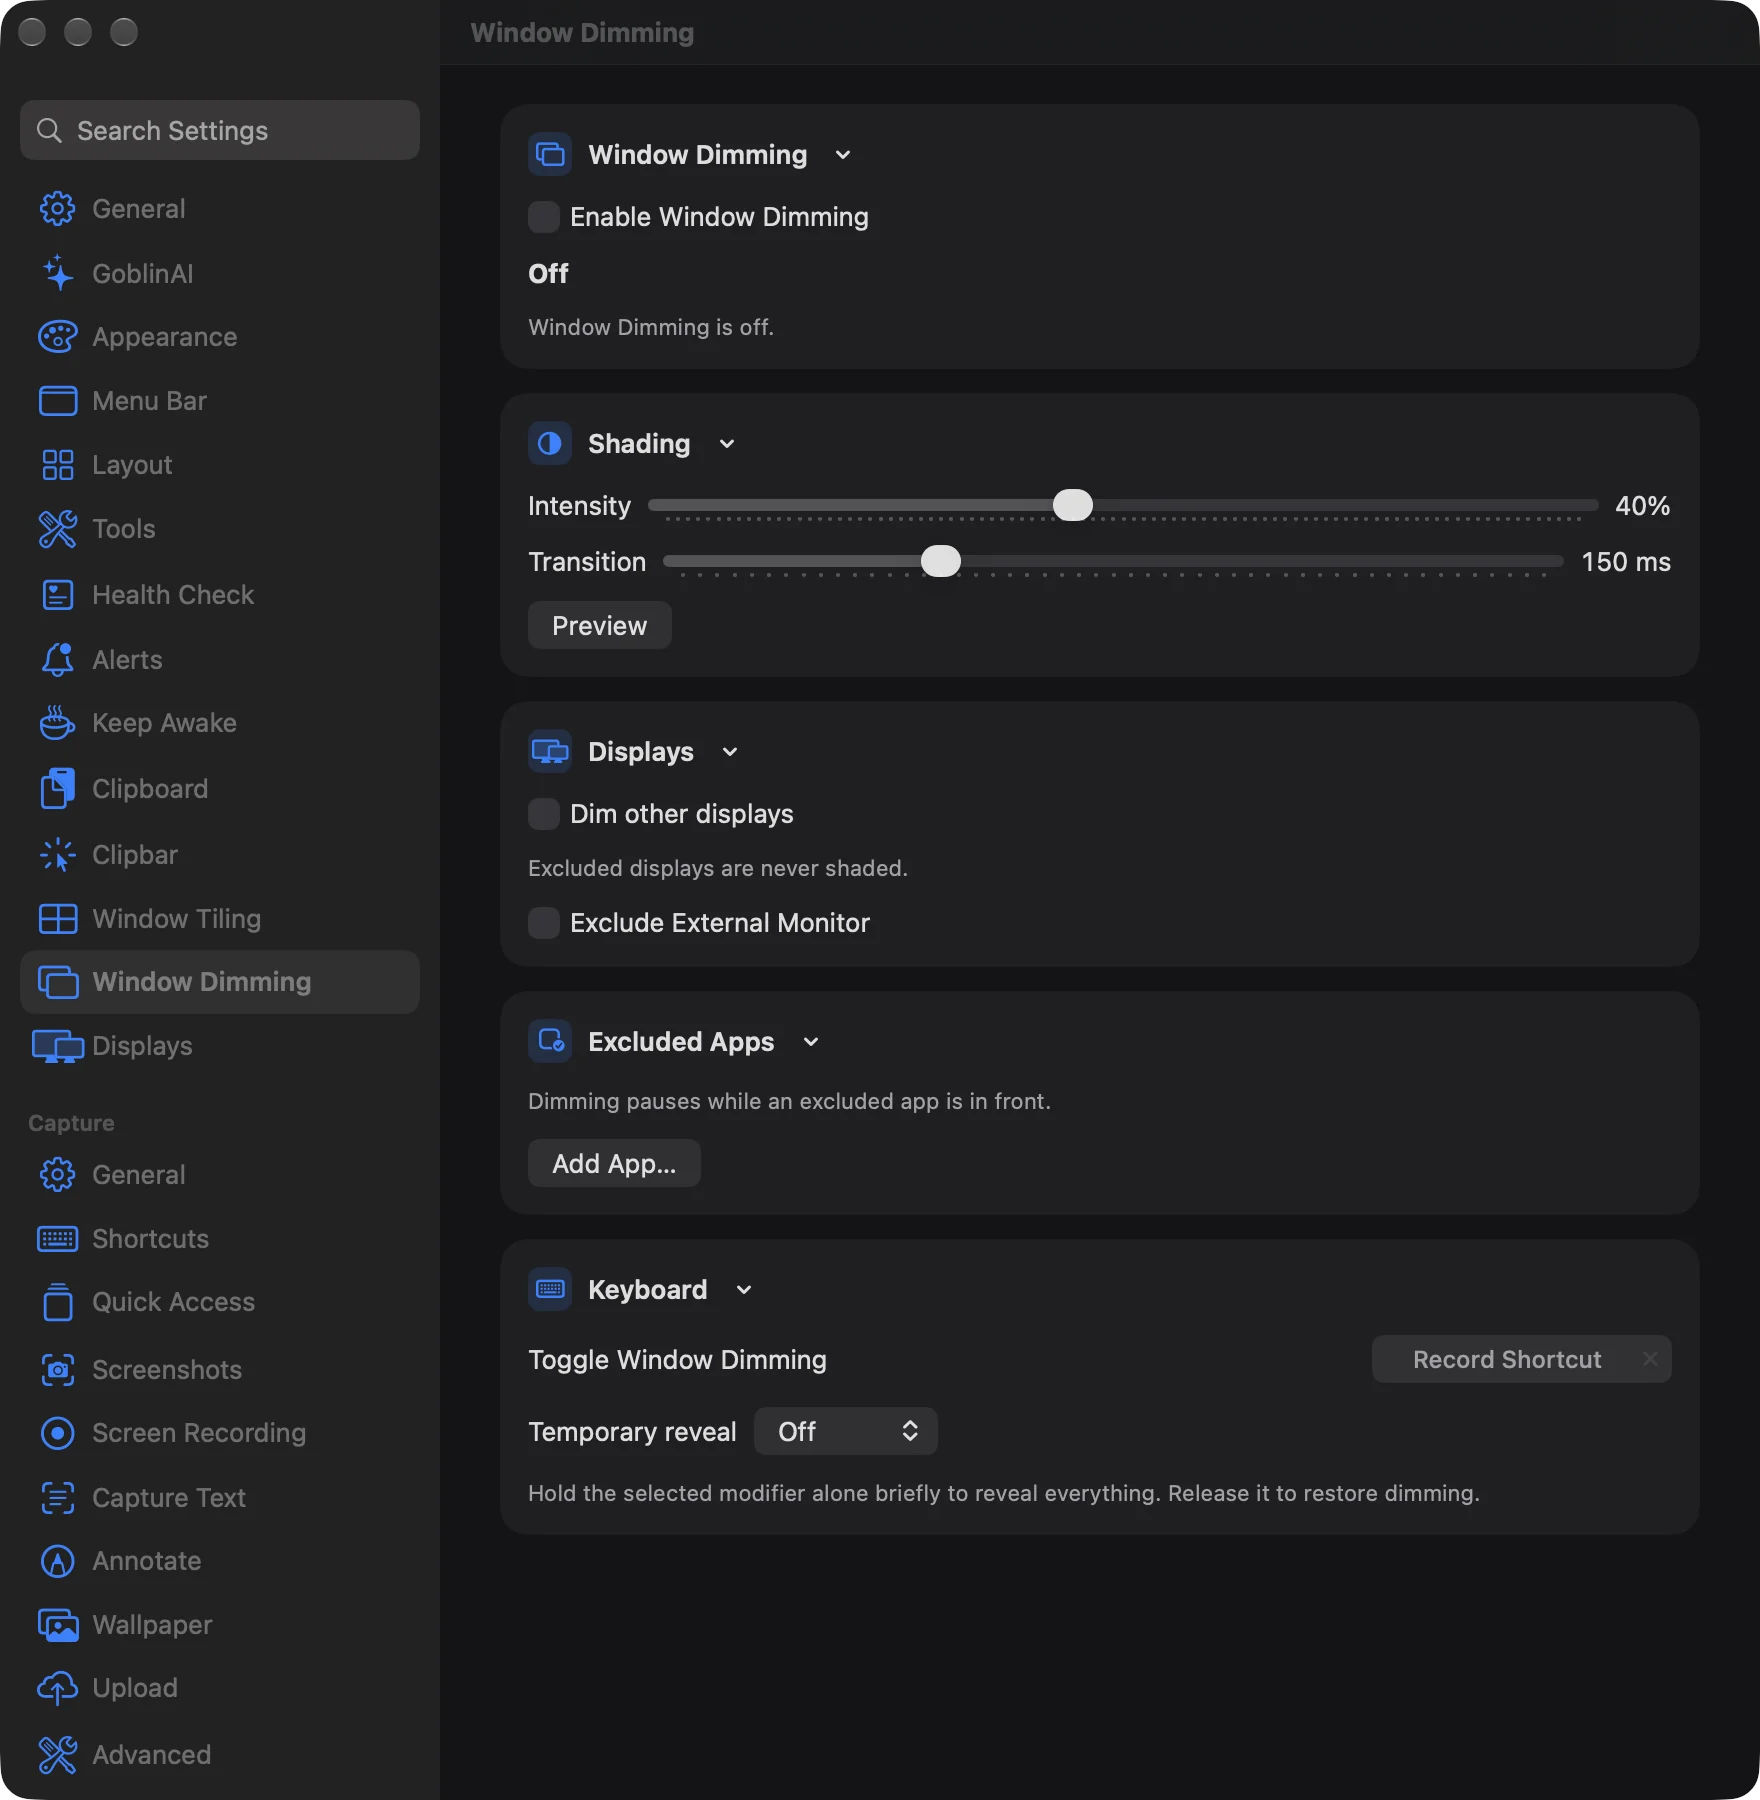
Dim inactive windows#
- Open Settings›Window Dimming, or right-click Goblin's menu bar item and choose Windows›Window Dimming. A check mark shows when it's on.
- In the Window Dimming card, switch on Enable Window Dimming.
- If the card shows Accessibility Required, click Allow Accessibility… and approve Goblin in System Settings. Accessibility lets Goblin follow window switches within an app and windows being moved or resized.
- Click Check Permission Again. The status changes to On, with the line "The active window stays clear."
To turn it off, switch Enable Window Dimming off or choose Windows›Window Dimming again.
The status in the card is one of Off, On, Temporarily Paused or Accessibility Required. A paused status says why under it. Your enabled choice and whether shading can show right now are separate: the switch can be on while dimming is paused.
Change how dark and how fast#
- In the Shading card, drag Intensity from 0% to 90%.
- Drag Transition from Instant to 500 ms to set how long a window takes to fade.
- Click Preview to see the result without leaving the pane. Click End Preview when you're done. Leaving the pane or changing a setting ends the preview too. Preview needs Accessibility permission.
With Reduce Motion on in macOS, transitions are instant. Your saved Transition is kept for when Reduce Motion is off.
Keep a display or app clear#
Leave a display clear#
- In the Displays card, turn on Exclude and the display's name (for example Exclude Studio Display).
- To shade the displays that don't hold the active window as well, turn on Dim other displays.
Excluded displays are never shaded. A disconnected display's saved exclusion stays listed as Disconnected display; click Remove if you no longer need it.
Leave an app clear#
- In the Excluded Apps card, click Add App….
- Choose the app in Exclude an App.
- To undo it, click Remove beside the app's name.
Dimming pauses while an excluded app is in front.
Set a shortcut and a peek key#
- In the Keyboard card, click the field next to Toggle Window Dimming.
- Press a combination that includes ⌘, ⌃ or ⌥. Press Esc to cancel. If it clashes with another shortcut, Goblin says so; choose another.
- To clear the shortcut, press ⌫ or use the clear button.
- Next to Temporary reveal, choose Control or Option.
Hold the chosen modifier by itself for a moment to reveal everything, then release it to bring the dimming back. A key press or mouse action before the delay cancels the reveal, and normal input still reaches your apps.
Settings#
| Setting | What it does | Default |
|---|---|---|
| Enable Window Dimming | Turns shading on or off. | Off |
| Intensity | Adjusts black shading from 0% to 90%. | 40% |
| Transition | Sets the fade duration from Instant to 500 ms. | 150 ms |
| Dim other displays | Includes displays without the active window. | Off |
| Exclude [display] | Never shades that display. | None |
| Excluded Apps | Pauses dimming while a selected app is in front. | None |
| Toggle Window Dimming | A global shortcut for turning dimming on or off. | Unassigned |
| Temporary reveal | A modifier you hold alone to reveal everything: Off, Control or Option. | Off |