 Goblin
 comes as a disk image from macgoblin.com. It's signed with Higher Bar Apps' Developer ID and notarized by Apple. There's no account to make.
The website currently provides the production download, version 1.1. Beta builds are separate from that public download.
What you need#
- macOS 15 Sequoia or later.
- An Apple silicon or Intel Mac.
Install Goblin#
- Download
Goblin.dmgfrom macgoblin.com. - Open the disk image. A window shows Goblin and your Applications folder side by side.
- Drag Goblin onto Applications.
- Eject the disk image: click the eject button beside it in Finder's sidebar.
- Open Goblin from Applications or Launchpad. Goblin's item appears in the menu bar and the main window opens.
Run Goblin from the Applications folder, not from the disk image or your Downloads folder. Goblin can only update itself when it can replace its own copy: a copy running from the disk image, from a folder you can't write to, or one macOS has quarantined in place (an app that was never moved out of Downloads) never installs updates. Settings shows a Download button instead. See Updates.
The first time you open it#
Goblin is a menu bar app, so it has no Dock icon unless you turn on Show in Dock in Settings › General. When you open it yourself, the main window opens. When it starts at login, it stays in the menu bar.
Go through the Welcome window#
The first time the main window opens, the Welcome to Goblin window appears over it. It walks through a few pages, one choice each. Every page after the first has a Back link at the top left (⌘[) so you can change a choice. If you quit partway, Goblin brings the window back where you left off.
- Welcome to Goblin. It counts the processes running on your Mac, then counts them down to the number of apps, because Goblin counts every helper process under the app it belongs to. Choose your options, then click Get Started (or press Return).
- Goblin Capture. Click Set Up Goblin Capture to step through a page each for the Clipboard, Clipbar and Screenshots & Recording, which all feed one history. Or click Skip to pass all three.
- Capture Text. Click Enable Capture Shortcuts (or Use Shortcut & Continue) to copy text out of images and videos, or Skip.
- Measure. Click Turn On Measure to measure anything on screen, or Skip.
- Know when something's wrong. Click Turn On Notifications, or Not Now.
- Window Tiling. Click Turn On Window Tiling, or Skip.
- Allow what you turned on. Goblin lists every macOS permission the choices above need, and asks for them in turn. See Give Goblin the permissions you chose.

Page 1 has these options:
| Setting | What it does | Default |
|---|---|---|
| Open Goblin at login | Starts Goblin in the menu bar each time you log in. You can change it later with Open at login in Settings › General. | On |
| Menu bar | How the menu bar item looks: Icon, Figure, Graph or Stacked. The preview uses your Mac's real readings. You can change it later in Settings › Menu Bar. | Figure |
Each choice can be changed later in Settings; choose which alerts send notifications in Settings › Alerts. If you used Goblin before 1.2, the Goblin Capture pages appear once as New in Goblin 1.2, leaving out any you've already turned on.
Give Goblin the permissions you chose#
The last Welcome page reads Allow what you turned on. Nothing before it asks macOS for anything; this page asks for each permission the earlier choices need, one after another:
- Accessibility, for the Clipboard, Clipbar and Window Tiling.
- Screen Recording, for screenshots, recordings, Capture Text and Measure. macOS may ask you to quit and reopen Goblin.
- Notifications, if you turned them on.
- Disk access, a choice about Full Disk Access (below).
- Finder Extension, listed as optional, adds Uninstall with Goblin to Finder's right-click menu.
For each row:
- Click the row's button (Allow…, Request Permission or Open System Settings).
- Allow it in the macOS prompt. If macOS sends you to System Settings, turn Goblin on there. Goblin comes back to this page by itself and asks for the next one.
- A row with a green On is done.
Done unlocks once everything needed is on and you've settled Full Disk Access. If you'd rather not give a permission, click Back and turn that feature off.
Full Disk Access#
Full Disk Access is the one Goblin recommends, and macOS can't show a prompt for it, so it takes a switch in System Settings. Goblin needs it to see your Trash, browser history and cookies, which apps can use your camera and microphone, Mail attachments, iPhone backups, other apps' leftovers, and projects on external drives.
On the permissions page, Disk access asks you to choose one:
- Allow… Full Disk Access. The steps are below.
- Rather not? Allow folders one at a time. Opens rows for Documents, Desktop and Downloads, each with an Allow… button for macOS's own prompt. That covers Projects, apps you run from those folders and Clipbar's download offer; the Trash, browser data and other apps' files still need Full Disk Access.
- Go without Full Disk Access. Tick it to continue without either. Goblin can't do the things in the list on that page, and you can allow it later in Settings›General.
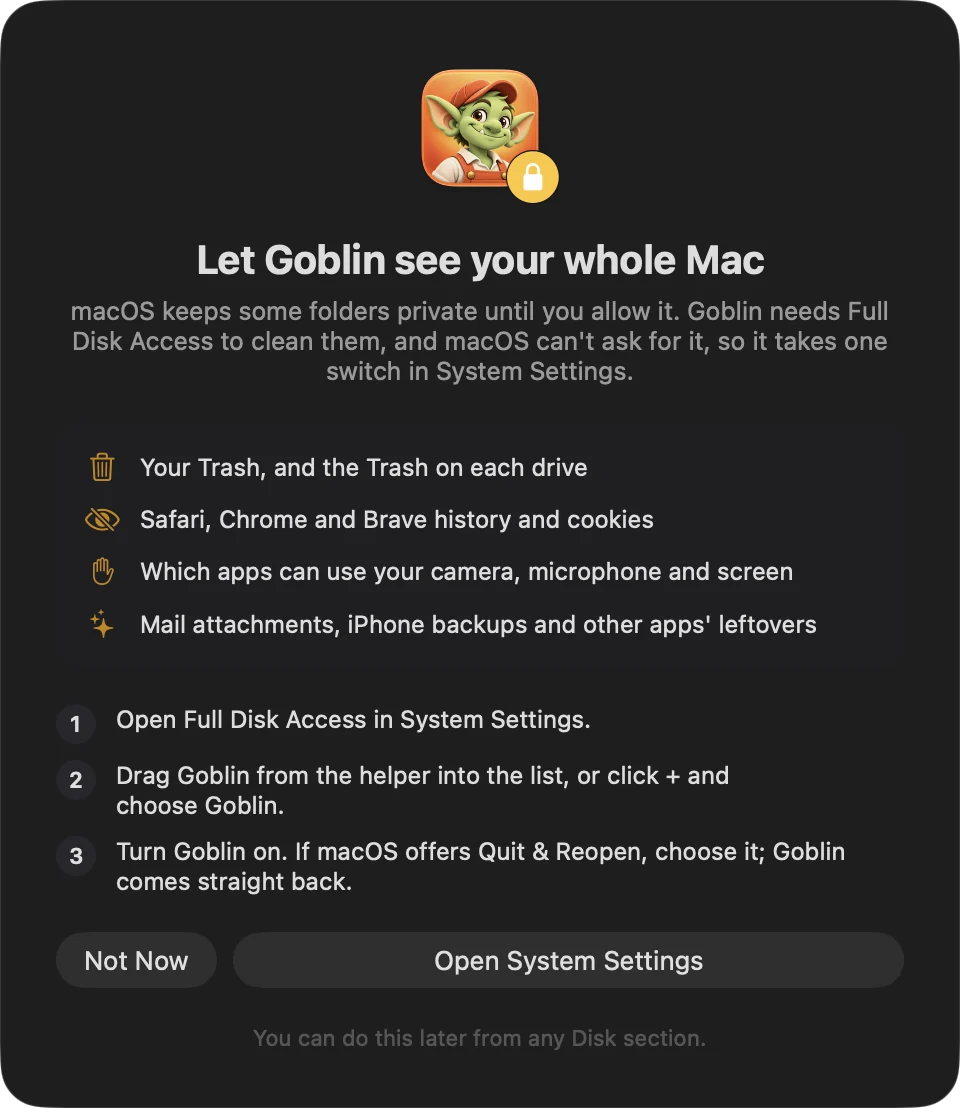
To give Goblin Full Disk Access:
- Click Allow… beside Full Disk Access. System Settings opens on Privacy & Security›Full Disk Access, with a small window beside it holding Goblin's icon.
- Drag Goblin from that small window into the list, or click + and choose Goblin.
- Turn Goblin's switch on. If macOS offers Quit & Reopen, choose it; Goblin comes straight back.
- Goblin notices by itself, closes the helper window and comes back to the front.
Goblin never looks inside Documents, Desktop or Downloads until you've allowed it, one way or the other, so macOS doesn't interrupt you with a folder prompt out of the blue.
If you update from an older version that didn't have this step, a sheet called Let Goblin see your whole Mac appears once, with Open System Settings, Continue and Not Now; it also appears when you run a scan that needs the access. Not Now is fine: you can do it later from any section of the Disk tab, or from Settings›General. See Permissions for everything else Goblin may ask for.
Quit Goblin#
Closing the main window leaves Goblin running in the menu bar. To quit it:
- Right-click (or Control-click) Goblin's menu bar item.
- Choose Quit Goblin.
Or click Quit at the bottom of the panel, or press ⌘Q in the main window. If Storage Explorer is removing files, scanning a disk, or holding files you selected but haven't removed, Goblin asks first.