 Goblin
The Sound page of the Tools tab puts your audio in one place: which speakers and microphone the Mac uses and how loud they are, which apps are listening through the microphone, and a volume slider for each app that's playing. Per-app volume is the part macOS doesn't have: turn a noisy video down without touching your music, or boost a quiet call above 100%.
New: Coming in the next update. Sound used to be a tab of its own. It is now a page of Tools, under Devices, and a Sound card also appears on the Tools tab's home page and, if you pin it, on the Overview. Anywhere that remembered the old Sound tab opens this page.
Open the Sound page#
- Click Tools in the tab bar of the main window, or press ⌘0.
- In the sidebar, under Devices, click Sound.
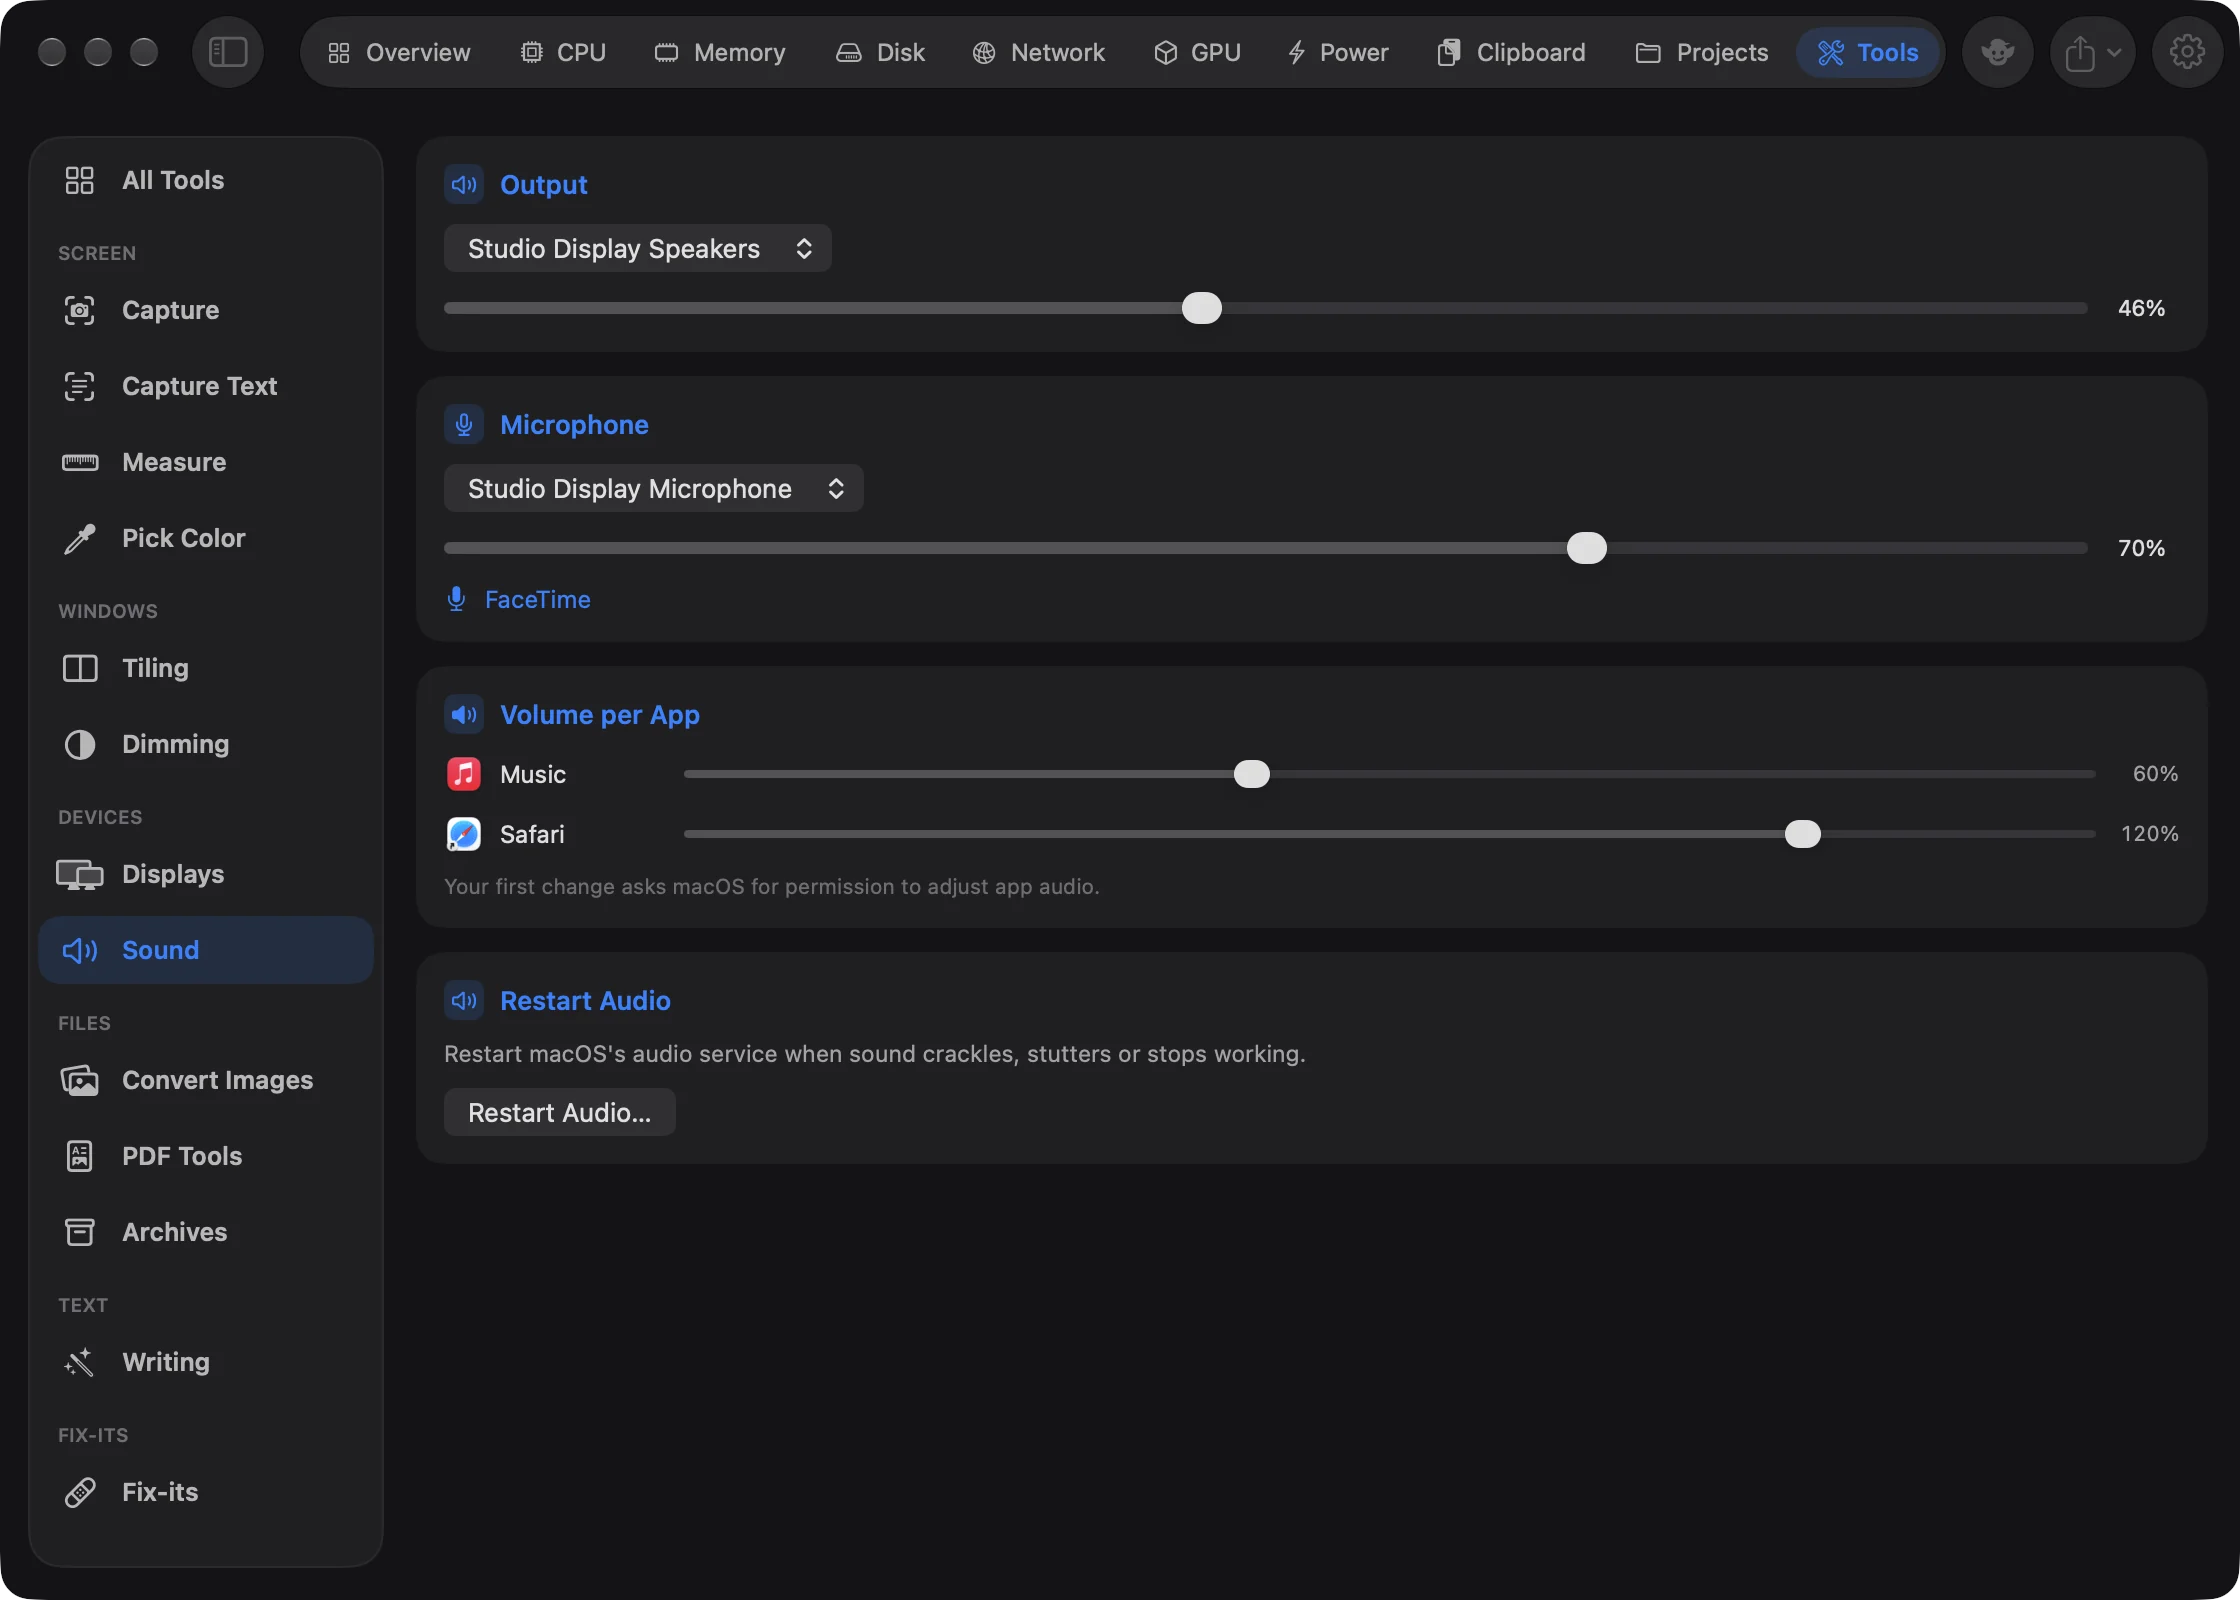
The page has four cards: Output, Microphone, Volume per App and Restart Audio. The menu bar panel's Tools tab shows the same controls in a smaller space.
Change the speakers or microphone#
- Open the Sound page as above.
- In the Output card, open the device menu and choose the speakers, headphones, AirPods or display you want. For the microphone, use the menu in the Microphone card.
- Drag the slider under the menu to set that device's level, from 0 to 100%.
When it worked, the whole Mac switches at once, the same as choosing in Control Center. The slider moves live as you drag. For the microphone, the level is its input gain.
Some devices, such as certain HDMI and USB audio adapters, control their own volume; for those the card says "This device manages its own level." If macOS refuses a change, you'll see "Couldn't change this device." or "This device's level can't be changed." in red. These messages stay until you leave the page and come back.
See which apps are using the microphone#
- Open the Sound page.
- Look under the level slider in the Microphone card.
Goblin lists every app that is using the microphone right now, each with a microphone icon. When none are, it says "No apps are using the microphone." The list refreshes every few seconds while Goblin is on screen. Goblin doesn't track the camera here.
Turn one app up or down#
- Start the app playing sound.
- Open the Sound page and find the app in the Volume per App card.
- Drag its slider. It goes from 0% to 150%. Above 100% boosts the app; anything that would go past full volume is clipped.
- To put it back, double-click the percentage next to the slider. It returns to 100%.
The card shows one row for each app that's playing sound, plus any app whose volume you've changed, in alphabetical order. macOS's own processes and Goblin are left out. When nothing is playing, the card says "Nothing is playing." The same card can sit on the Overview, where it only appears while something is playing; its header brings you here.
The first time#
The first time you change an app's volume, macOS asks whether Goblin may adjust app audio. The card reminds you: "Your first change asks macOS for permission to adjust app audio." macOS's prompt says "Goblin changes the volume of individual apps. Sound is adjusted live and never recorded."
If the change doesn't take, the card shows a red message such as "Couldn't create app audio controls (Core Audio error …). Your saved levels are kept. If this continues, check Goblin's Screen & System Audio Recording permission." Turn Goblin on under System Settings›Privacy & Security›Screen & System Audio Recording and try again. See Permissions.
How it works#
At 100% Goblin leaves an app alone. At any other level, Goblin quietly takes over that app's sound: it mutes the app's own output and plays the same sound through your current output device at the level you chose. Nothing is recorded or saved. Put the app back to 100% and Goblin lets go.
- If you change the output device, Goblin moves every adjusted app over to the new one.
- If you quit Goblin, every app's sound goes back to normal. Goblin remembers your levels and applies them again the next time it runs and the app plays sound.
- When Goblin is in the background, an app that starts playing can be at 100% for up to about 30 seconds before Goblin catches it and applies your level.
Reset every app#
To put every app back to 100% at once:
- Open Settings (⌘,) and click History.
- Find the App Volumes card. It says how many apps you've changed ("3 apps changed"), or "All at 100%".
- Click Reset All.
The button is greyed out when every app is already at 100%. More on Settings › History.
Restart Audio when sound crackles or stops#
The Restart Audio card, at the bottom of the page, restarts macOS's audio service. Sound and microphones disconnect for a moment, including in calls and other apps, and macOS may ask for an administrator password. The steps, and what it says afterward, are in Restart Audio. Your app volumes are put back afterward.
Note: Goblin's own sound effects, for finished scans, ejected drives and the like, have nothing to do with this page. They have their own Sound effects switch in Settings › General.