 Goblin
History is for everything you copy, and it forgets old things after a while. A pinboard is for the clips you want to keep: your address, a code snippet, the replies you send every week, the logos for a project. Pinboards have a name and a color, show up as tabs in the strip, and keep their clips for as long as you want them. This page also covers the Trash, where deleted clips wait, and how long History keeps things.
Make a pinboard#
- Open the strip with ⇧⌘V.
- Click + at the end of the tabs, or press ⇧⌘N. (On the Clipboard page of Goblin's window, click New Pinboard at the foot of the sidebar.)
- Type a name. The new pinboard is called "Untitled" and its name is already selected, so you can type straight over it.
- Press Return.
Each new pinboard takes the next color along: red, orange, yellow, green, blue, purple, pink, grey, then red again.
To make a pinboard and fill it in one go, select some clips and choose Pin›Create Pinboard… from the card menu (or New Pinboard… from the Pin to menu on the Clipboard page). The clips go into the new pinboard and you stay where you were, with the new name ready to type.
Rename, recolor and reorder pinboards#
- Right-click the pinboard: its tab in the strip, its row in the Clipboard page's sidebar, or its chip in the menu bar panel.
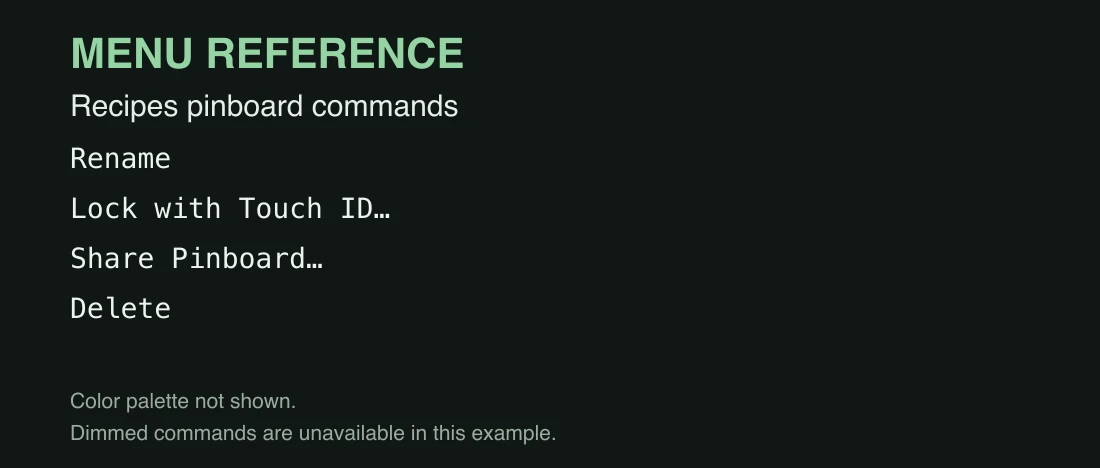
- Choose Rename and type a new name, or click one of the eight colors at the bottom of the menu.
- Press Return to save a name.
| Item | What it does |
|---|---|
| Rename | Edits the name in place. Return saves; Esc cancels in the strip. An empty name keeps the old one. |
| Lock with Touch ID… | Hides the pinboard's clips until you unlock it. A locked pinboard has Lock Now or Unlock, and Remove Lock…, instead. See Locked pinboards. |
| Share Pinboard… / Manage Sharing… | Shares the pinboard with other people through iCloud. See Syncing and sharing. |
| Delete or Delete… | Deletes the pinboard. See Delete a pinboard. |
| The row of colors | Red, Orange, Yellow, Green, Blue, Purple, Pink, Grey. The current one has a ring; click another to change it. |
A smart pinboard's menu also has Edit Search… and Pin All to, and no lock. A pinboard someone else shared with you only offers the sharing items.
The color shows as a dot on the tab and as the header color of every card inside the pinboard.
To reorder pinboards, drag a tab onto another tab in the strip, or a row onto another row in the window's sidebar. The chips in the menu bar panel follow the same order but can't be dragged.
The History tab can be renamed too: right-click Clipboard History and choose Rename. Leave the name empty to go back to "Clipboard History".
Add clips to a pinboard#
- Select one or more cards in the strip.
- Right-click and choose Pin, then the pinboard. (Or press ⌘P to open the same Pin menu where the pointer is.)
The pinboard a clip is already in has a tick. Other ways to do the same thing:
- Drag cards onto a pinboard's tab in the strip, its row in the window's sidebar, or its chip in the menu bar panel. The target is outlined in blue.
- On the Clipboard page, use Pin to in the bar under the cards, or Pin in the inspector.
New clips go at the end of the pinboard. Pinning doesn't take a clip out of History: it shows in both places, and a pinned clip is still in History's search results.
A clip is in one pinboard at a time. Pinning it to a different pinboard moves it there.
Files are copied when you pin them. A copied file is normally only a pointer to the file on disk. When you pin it, Goblin keeps its own copy, so the pin still works if you move, rename or delete the original. Folders and files over 250 MB aren't copied; their pin points at the original, and stops working if it goes.
Nothing can be pinned into a smart pinboard, since its search decides what it shows. Pinning into or out of a locked pinboard asks you to unlock it first.
Take a clip out of a pinboard#
The strip has no Unpin button. A clip leaves a pinboard in only two ways:
- Move it. Pin it to another pinboard.
- Delete it. Select it and press ⌫. It goes to the Trash and leaves History as well, since it's the same clip. You can put it back.
Goblin AI and Siri can also take a clip out of its pinboard and leave it in History: see Siri phrases for Unpin Clipboard Item.
Reorder clips in a pinboard#
- Open the pinboard in the strip or on the Clipboard page.
- Drag a card onto another card. Dragged to the right, it lands after that card; dragged to the left, before it.
This doesn't work while you're searching, or in History, the Trash or a smart pinboard, which have their own order.
Pinboards keep clips forever#
Nothing removes a pinned clip by itself. Keep History, the per-app times in Privacy, Erase History… and clearing history when Goblin quits all leave pinned clips alone. A pinned clip goes only when you delete it, and even then it waits in the Trash first.
Deleting a selection that includes a pinned clip asks before it does anything: "Delete this pinned item?" and Move to Trash. Unpinned clips go to the Trash without asking.
Pin everything a smart pinboard shows#
A smart pinboard shows search results that come and go with History. To keep what it shows now:
- Open the smart pinboard.
- Click Pin All to… at the top of the strip (or the window's toolbar, or the panel's line above the list), or choose Pin All to from its tab's menu.
- Pick an ordinary pinboard.
Everything it shows that isn't pinned already goes into that pinboard. Over 25 clips, Goblin asks first ("Pin 40 clips to …?" and Pin All).
Delete a pinboard#
- Right-click the pinboard.
- Choose Delete (or Delete… when it holds clips).
- If Goblin asks, click Delete.
- An empty pinboard is removed at once, without asking. It doesn't go to the Trash.
- A pinboard with clips says Delete…, and Goblin asks: "Delete the pinboard "Name"? It holds 5 items. They move to the Trash together, and you can put them back from there." The pinboard and its clips go to the Trash as one.
- A smart pinboard goes to the Trash without asking. Its clips stay where they are.
- A pinboard you share asks "“Name” is shared." Deleting it stops sharing for the people you shared it with; you keep its items in the Trash. The button reads Stop Sharing and Delete.
To undo deleting a pinboard that had clips, press ⌘Z. A smart pinboard comes back with Put Back in the Trash.
The Trash#
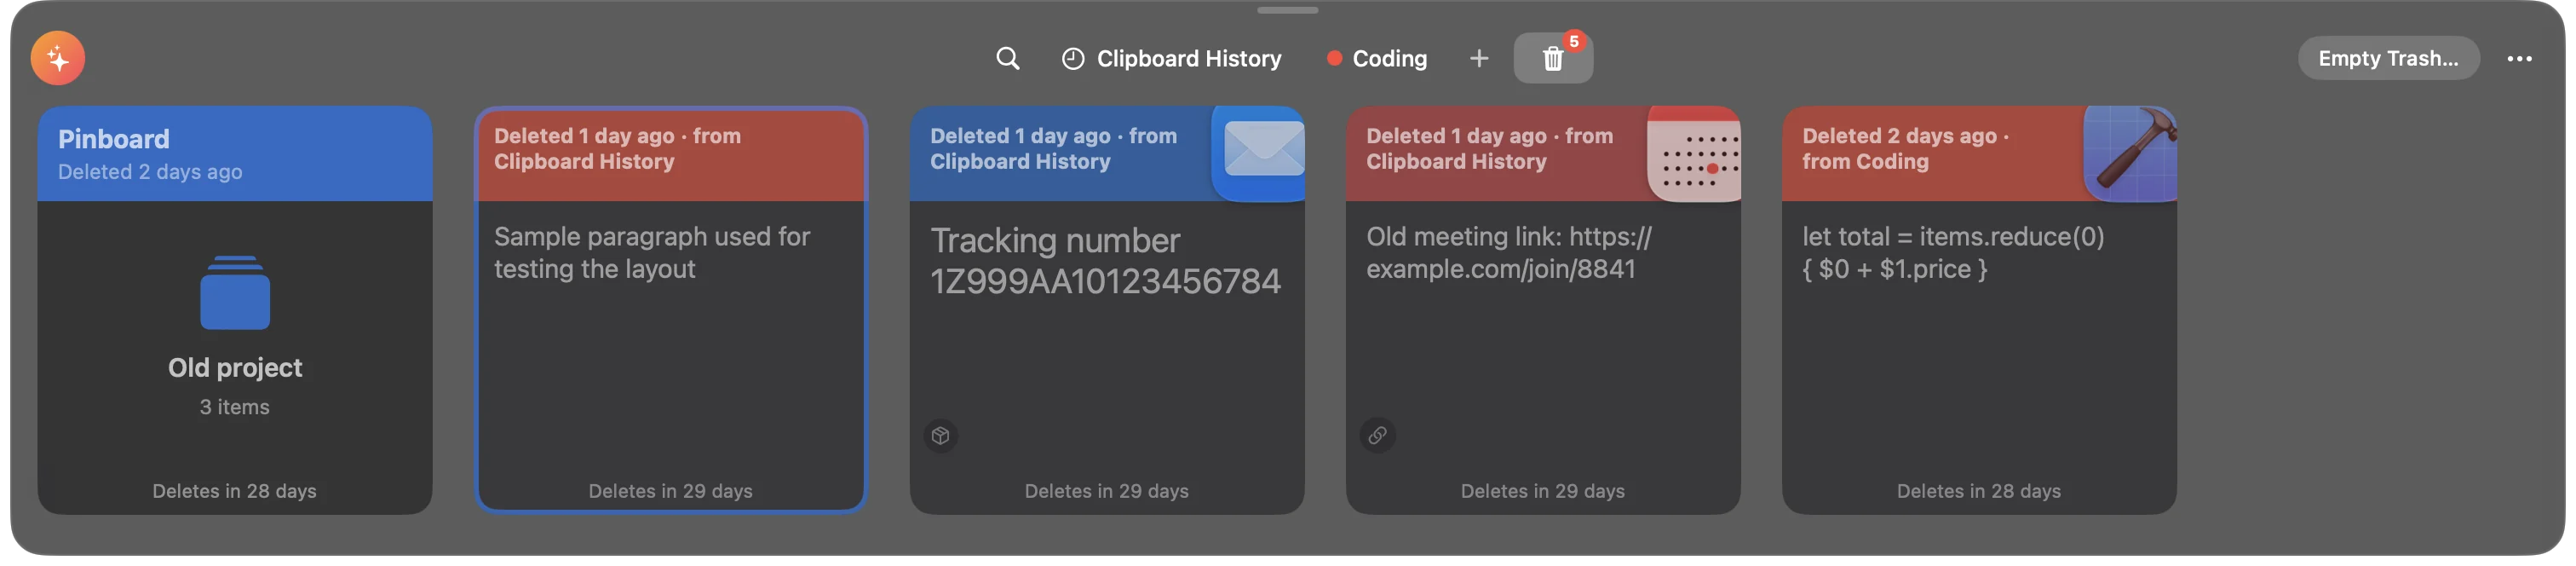
Deleted clips and pinboards wait in the Trash before they're gone for good. Open it with the Trash tab in the strip, Show Trash in the ⋯ menu, the Trash row in the window's sidebar, or the Trash chip in the menu bar panel. The tab shows a red count while anything is in it.
- Deleted pinboards come first, each as one stacked card with its name and how many items it holds (or "A search" for a smart pinboard). Their clips aren't listed separately.
- Deleted clips follow, most recently deleted first, dimmed. Each header says when it was deleted and where from: "Deleted 3 days ago · from Coding". Each footer says when it will be deleted for good: "Deletes in 27 days".
Searching in the Trash searches only the Trash. Clips there can be copied and previewed, but not renamed or edited.
Put back from the Trash#
- Open the Trash.
- Select the clips or the pinboard.
- Press Return, double-click, or choose Put Back from the right-click menu.
Each clip goes back to the pinboard it came from, or to History if it came from History. If its pinboard was deleted too, the pinboard comes back with all the clips that went with it. If the pinboard no longer exists at all, the clip goes to History.
⌘Z in the strip or the window puts back the last thing you deleted, until you quit Goblin.
Delete permanently#
- Open the Trash and select the clips.
- Press ⌫, or choose Delete Permanently….
- Click Delete Permanently when Goblin asks.
For a deleted pinboard, Goblin warns that its items go with it.
Warning: This can't be undone.
Empty the Trash#
- Open the Trash.
- Click Empty Trash… at the right of the strip's top bar. (On the Clipboard page it's in the header; in the menu bar panel it's in the line above the list; you can also right-click Trash in the sidebar or panel.)
- Goblin shows how many items and how much space, then asks "Empty the Trash?". Click Empty Trash.
Warning: This deletes everything in the Trash for good, pinboards and their clips included.
The Trash also empties itself: anything deleted more than 30 days ago is removed. To change this, open Settings›Clipboard, find Empty Trash automatically in the Keep History section, and choose After 7 days, After 30 days, After 60 days, After 90 days or Never. With Never, nothing leaves the Trash until you empty it. See Clipboard settings.
What skips the Trash#
These are deleted for good straight away:
- clips that age out under Keep History or an app's own time (below),
- passwords and keys when their time is up (Privacy),
- an empty pinboard you delete,
- a New Text Item you cancel without typing,
- history cleared on quit when that setting deletes for good (Privacy).
Erase History#
- Right-click Clipboard History: the tab in the strip, the row in the window's sidebar, or the chip in the menu bar panel. (Or open Settings›Clipboard and click Erase History… in the Keep History section.)
- Choose Erase History….
- Goblin asks "Erase Clipboard History?". Click Erase History.
Every clip that isn't pinned moves to the Trash, where you can still put it back. Pinboards aren't touched.
How long History is kept#
To change it:
- Open Settings›Clipboard (⌘, in the strip).
- In the Keep History section, drag the slider to Day, Week, Month, Year or Forever, or click a word.
- If the new time is shorter and some clips are older, Goblin counts them and asks "Delete older items?". Click Delete N Items to go ahead, or Cancel.
| Keep History | Clips go after |
|---|---|
| Day | 1 day |
| Week | 7 days |
| Month (the default) | 30 days |
| Year | 365 days |
| Forever | Never |
- It counts from the last time you used a clip, not when you first copied it. Pasting an old clip, copying it again with ⌘C, or copying the same thing again in another app starts its time over.
- Old clips are deleted for good, not moved to the Trash.
- Goblin checks once an hour, and when the clipboard turns on.
- There's no limit on how many clips History holds; only time removes them.
- An app can have its own time instead, longer or shorter, such as one hour for a chat app. See Privacy.
Pinned clips are never removed by any of this.
Goblin AI and Siri#
Goblin AI and Siri can create, rename, recolor, reorder and delete pinboards, move or unpin clips, and put items back from the Trash. They work from full item and board IDs (a long code such as 5E0C…), never from names, and anything that deletes asks you to confirm in Goblin first. List Clipboard Boards gives the IDs. The actions are in Siri phrases.