 Goblin
Settings›Tools controls how Goblin's helper tools show up. The Tools tab in the main window is where the tools live; this pane decides which tool cards it shows and in what order, whether a Tools icon sits in the menu bar, how dragging files onto Goblin works, which buttons appear at the bottom of the menu bar dropdown, and whether Goblin opens archives. In the sidebar the pane reads Tools, with a count of pinned tools under it.
To get here, press ⌘, while Goblin is in front, then choose Tools in the sidebar.
Choose which tool cards show and where#
The Tool cards card at the top of the pane shows a small preview of each card on the Tools tab: Capture, Displays, Sound, Keep Awake, Pick Color, Measure, Windows, Files, Archives, Writing and Fix-its. Each preview has two small buttons under it: a pin and an eye.
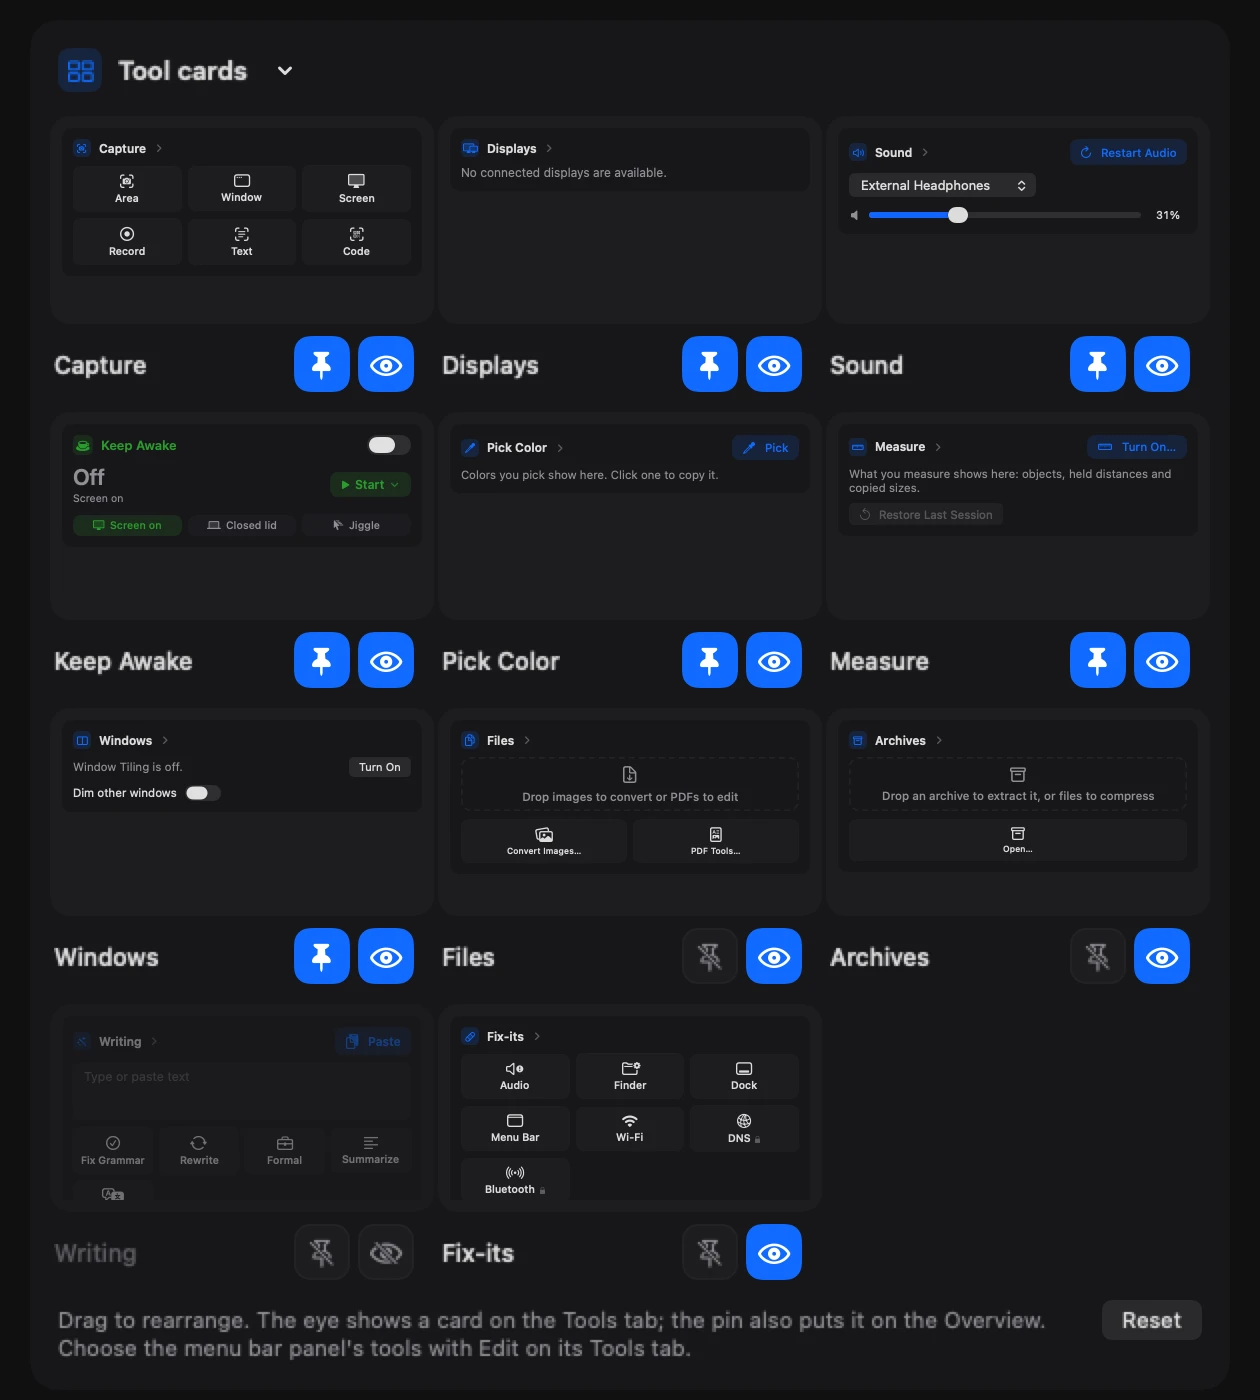
To hide a card from the Tools tab:
- Open Settings›Tools.
- In Tool cards, find the card.
- Click the eye under its preview. The preview dims and the eye is crossed out.
Click the eye again to bring the card back. A hidden card is only hidden from the All Tools page of the Tools tab. The tool still has its own page in the Tools tab's sidebar, and you can still pin it to the menu bar and use it from the menu bar panel.
To show a card on the Overview:
- Open Settings›Tools.
- In Tool cards, find the card.
- Click the pin under its preview. It fills in when the card is on the Overview.
Click it again to take the card off the Overview. Out of the box the Overview shows Displays, Sound, Keep Awake, Capture, Pick Color, Measure and Windows.
To change the order:
- Open Settings›Tools.
- Drag a preview onto the one whose place you want. It lands before that card when you move it up and after it when you move it down.
The Tools tab and the Overview use the same order. Press Reset (beside the line under the previews) to put the order, the hidden cards and the pins back as they came. It is greyed out when nothing has changed.
Note: These controls arrange the Tools tab and the Overview. The menu bar panel's Tools tab has its own list: open it and click Edit (see The menu bar panel). You can also arrange the cards from the Tools tab itself; see Arranging the cards.
Add the Tools menu bar item#
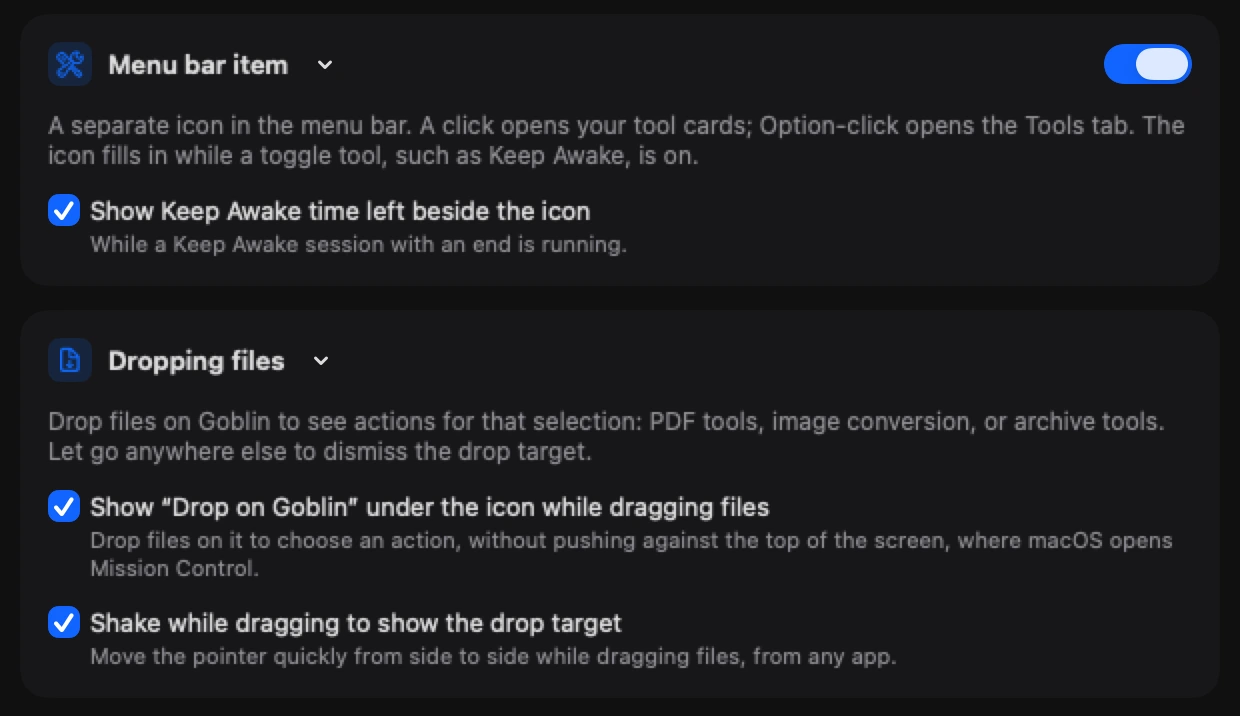
The Menu bar item card adds a second icon to the menu bar, separate from Goblin's own. It is off by default.
- Open Settings›Tools.
- In the Menu bar item card, turn on Tools menu bar item. A wrench-and-screwdriver icon appears in the menu bar.
- Click the icon. A panel opens with your tools, Edit at the bottom left and All Tools… at the bottom right.
To open the Tools tab directly, hold ⌥ and click the icon. All Tools… in the panel does the same. Click Edit in the panel to choose which tools show and their order, then Done.
The icon is outlined normally and fills in while a tool that switches on and off, such as Keep Awake, is on. Window Tiling is left out of that, because it stays on all day and the icon would never go back to outlined.
To remove the icon, turn Tools menu bar item off.
Show Keep Awake time beside the icon#
- Turn on Tools menu bar item first. The checkbox below stays greyed out while the icon is off.
- Tick Show Keep Awake time left beside the icon.
The time shows next to the icon while a Keep Awake session with an end is running. A session with no end shows nothing. See Keep Awake.
Turn dropping files on Goblin on or off#
Drag files from Finder or another app onto Goblin’s menu bar icon to open a compact menu of actions for that selection. Drop on a tool tile, or release on the target first and click an action afterward. Cancel drop leaves the files where they are. This menu is separate from the main panel; it does not open the Tools tab.
The Dropping files card controls two ways to show that menu. Both options start on.
| Setting | What it does | Default |
|---|---|---|
| Show “Drop on Goblin” under the icon while dragging files | Shows a small target below the icon. Hover over it to expand the file actions, or drop onto it and choose an action afterward, without pushing against the screen’s top edge. | On |
| Shake while dragging to show the drop target | Move the pointer quickly from side to side while dragging files to show the file-action menu. | On |
To turn either off:
- Open Settings›Tools.
- In the Dropping files card, untick the checkbox.
Dragging straight onto Goblin’s menu bar icon still works with both off. The small target is not shown while the main panel is already open, and the Tools tab does not need to be enabled in your panel layout.
See Drop files on Goblin for the image, PDF, video and archive actions and how to cancel.
Choose the dropdown buttons#
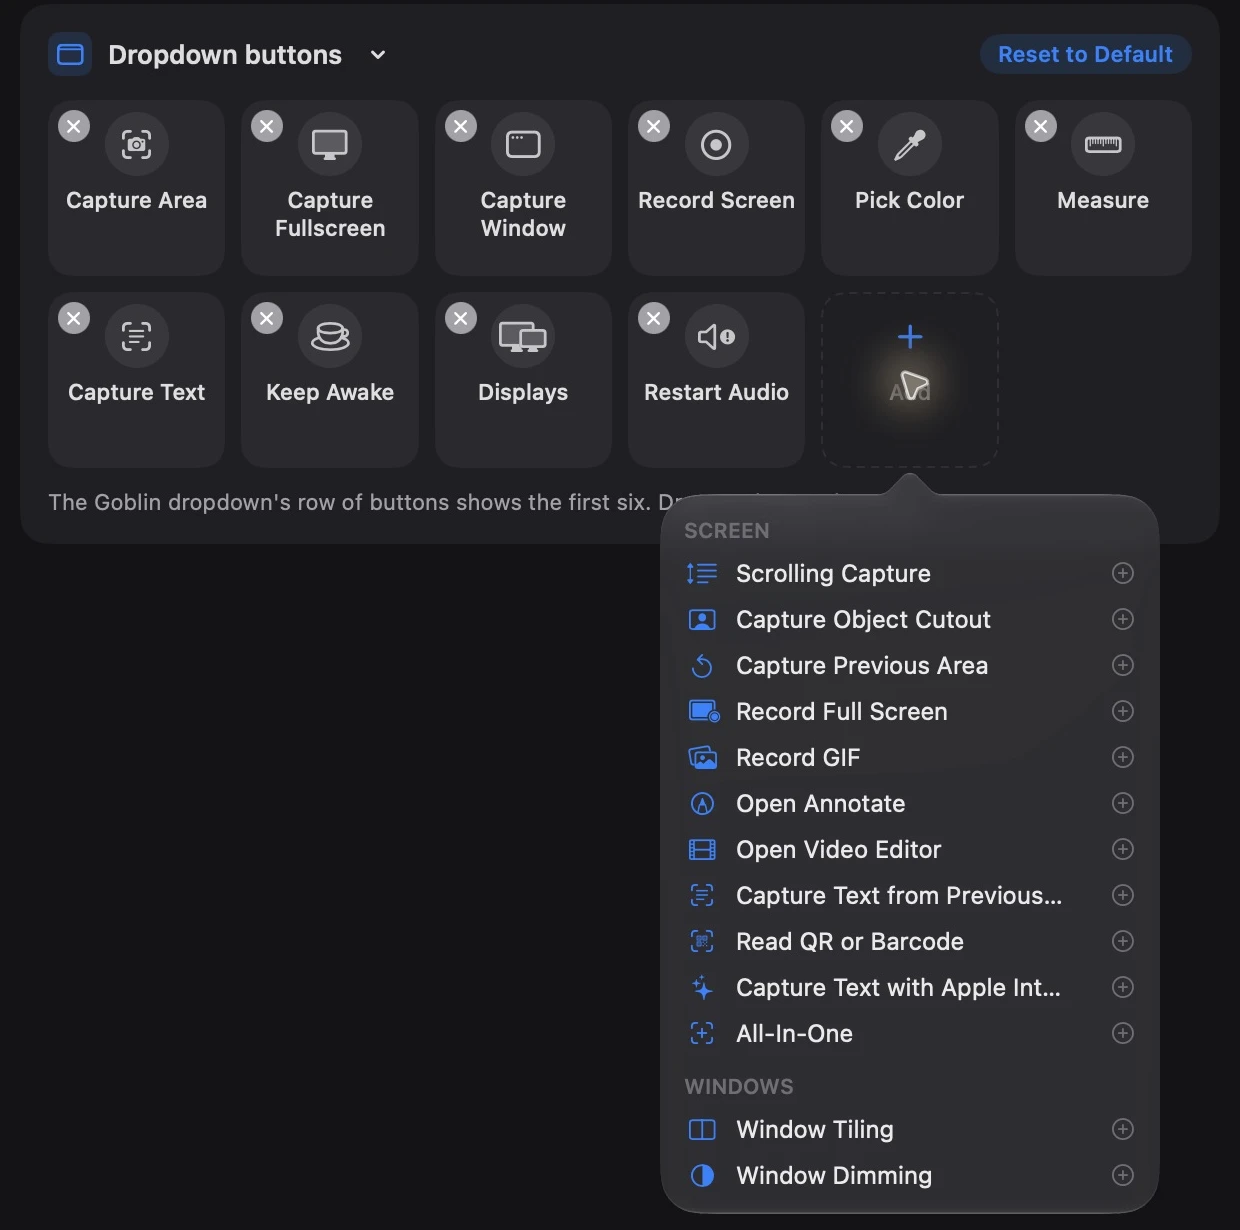
The Dropdown buttons card is the list of tools you have pinned. The row of buttons at the bottom of Goblin's menu bar dropdown shows the first six of them that work as a button. Displays and Sound are left out of that row, since they are sliders and need more room than a button has; they stay in the list, and show in the Tools tab and the panel.
To remove a button:
- Open Settings›Tools.
- In Dropdown buttons, click the small × at the top left of the tile.
To add one:
- Click the dashed Add tile at the end of the grid. A list opens with every tool that isn't pinned, grouped as Screen, Windows, Devices, Files, Text, Fix-its and Power (Keep Awake).
- Click a tool. It joins the end of the list and leaves the picker. The picker says Every tool is pinned. once there is nothing left to add.
To reorder, drag a tile onto another. The first six tools that work as buttons are the row, so put the ones you want most at the start.
To go back to the starting list, click Reset to Default. It is greyed out when the list is already that. The starting list is Pick Color, Measure, Capture Text, Keep Awake, Displays and Restart Audio, so the row shows five buttons: Displays is left out.
A Mac that has never saved a list starts differently. Its row begins with the old capture buttons (Area, Screen, Window and Record, or whichever you had chosen in Capture's settings), followed by the tools above, so the first six are those four plus Color and Measure. Reset to Default replaces that with the shorter starting list.
While a recording runs, the row becomes the time recorded with Pause and Stop. See Menu and desktop.
Every pinned tool is also a tile in the menu bar panel's Tools tab. A tool name in the list that this version of Goblin doesn't know, from a newer Mac on iCloud sync, is kept and comes back when that tool is available.
Make Goblin open archives#
The Archives card decides which app opens a zip, 7z or similar file when you double-click it. Archive Utility opens them until you change this, and Goblin never changes it on its own.
- Open Settings›Tools.
- In the Archives card, turn on Open archives with Goblin.
- Double-click a zip file in Finder. It opens in Goblin's archive window.
Turn the switch off to give the file types back to Archive Utility. The switch shows what macOS reports for zip files at that moment, so it can change if you set a different app in Finder's Get Info window; it isn't a setting Goblin saves.
The switch covers zip, 7z, rar, tar, gzip, tar.gz, bzip2, tar.bz2, xz, tar.xz, Z and cpio files. Disk images and installers are never changed, so double-clicking them still mounts or installs them.
If macOS refuses some of the types, the card says "macOS wouldn’t change" and how many. If Archive Utility can't be found when you turn the switch off, it says Goblin can't hand archives back to it.
For Open in Goblin, Extract Here and Compress with Goblin… in Finder's right-click menu, turn Goblin on in System Settings›General›Login Items & Extensions›Added Extensions (Finder). That is a macOS setting, not a Goblin one. See Archives.