 Goblin
Drives keep a record of their own condition. Drive Health reads it and tells you in plain words whether each drive says it's fine, and for SSDs, how much of their rated life is used. It's worth a glance now and then, and before you trust an old external drive with a backup.
Check whether a drive is healthy#
- Click Disk in the tab bar of the main window, or press ⌘4.
- If the tab has a sidebar, click Activity at the top of it.
- Find the Drive Health card in the row of cards under the chart.
- Click the card to see every figure the drive shares.
When it worked, the card reads Healthy, Worn, Failing or Not reported. The card appears once the first read has finished.
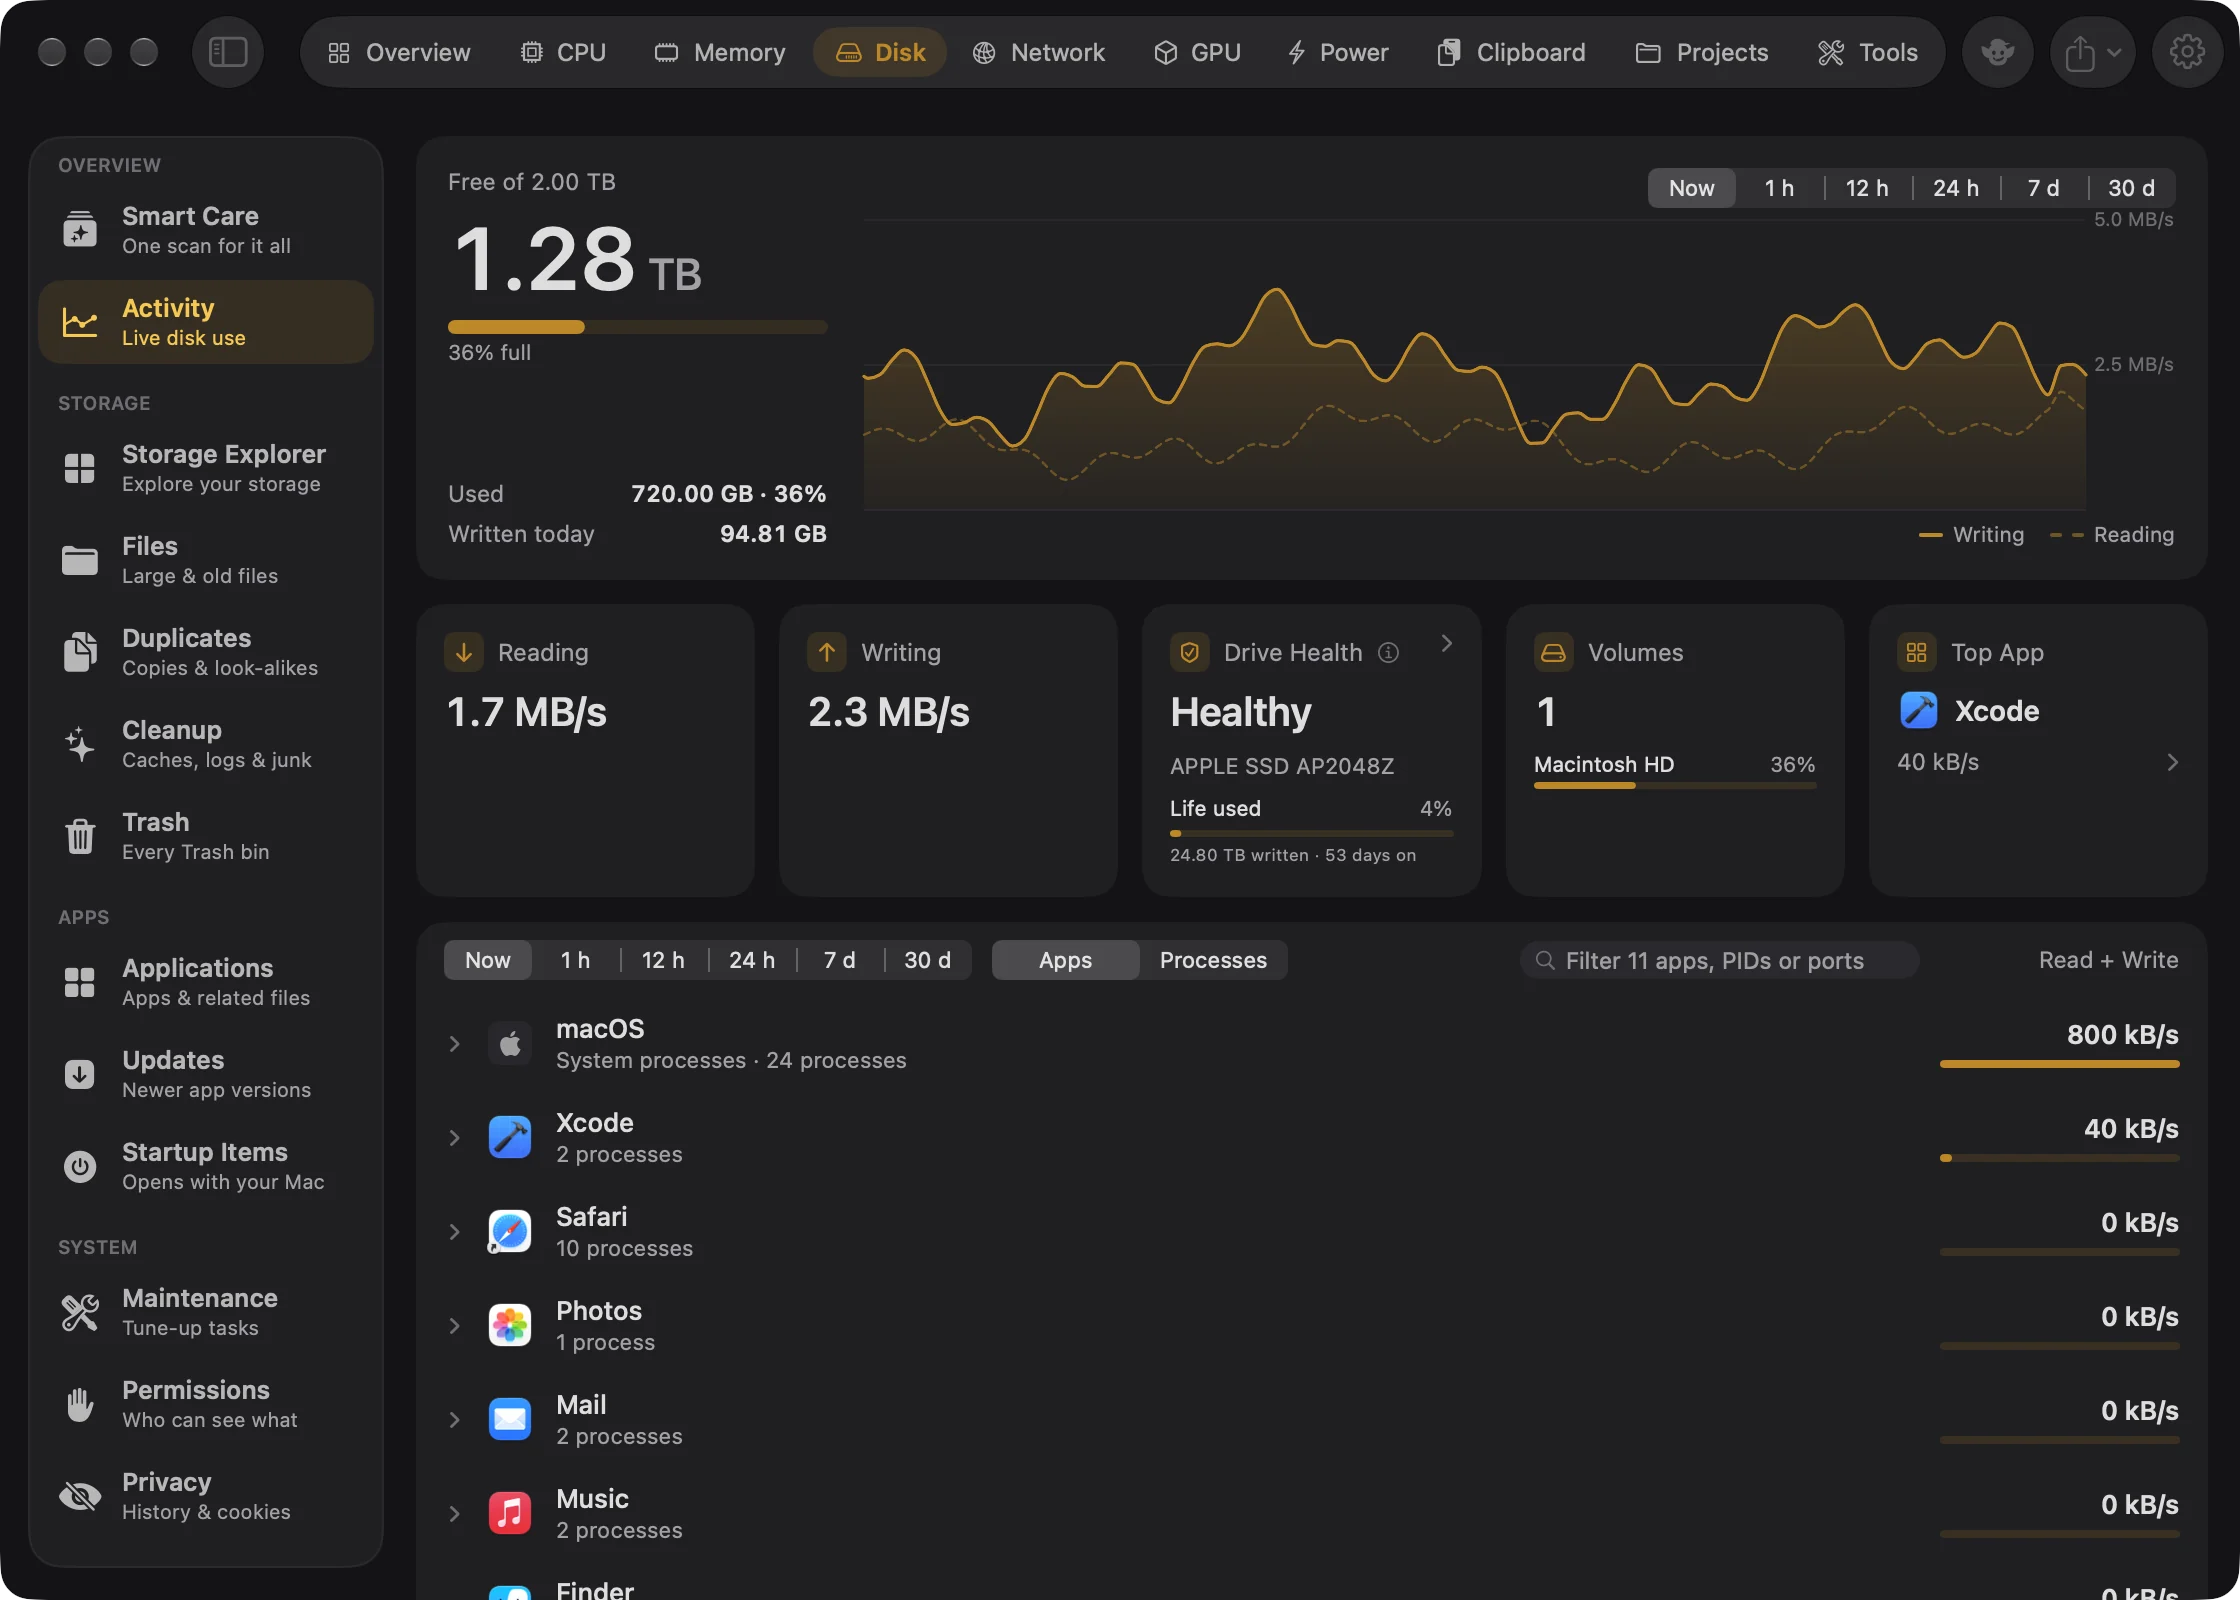
The Drive Health card#
The card's figure is the worst status among your drives:
| Status | What it means |
|---|---|
| Healthy | The drive's own self-check (called S.M.A.R.T.) reports no problems. macOS calls this "Verified". |
| Worn | The drive is fine today, but it's wearing out: see the warnings below. |
| Failing | The drive's self-check expects it to stop working soon. Back it up now. |
| Not reported | The drive doesn't pass its self-check to the Mac. Many external drives and USB enclosures don't. |
Under the figure is the drive's name, or "3 drives" when there are several. The icon turns into a red warning triangle when any drive needs attention.
- With one SSD that shares its wear figures, the card shows Life used as a percentage with a bar, then the data written and how long it has been powered on, such as "12.3 TB written · 329 days on".
- With several drives, up to three rows show each drive's name and status, with "4% used · 12.3 TB written" for SSDs that share it.
The ⓘ button explains what the check is. Click the card for the details.
Details#
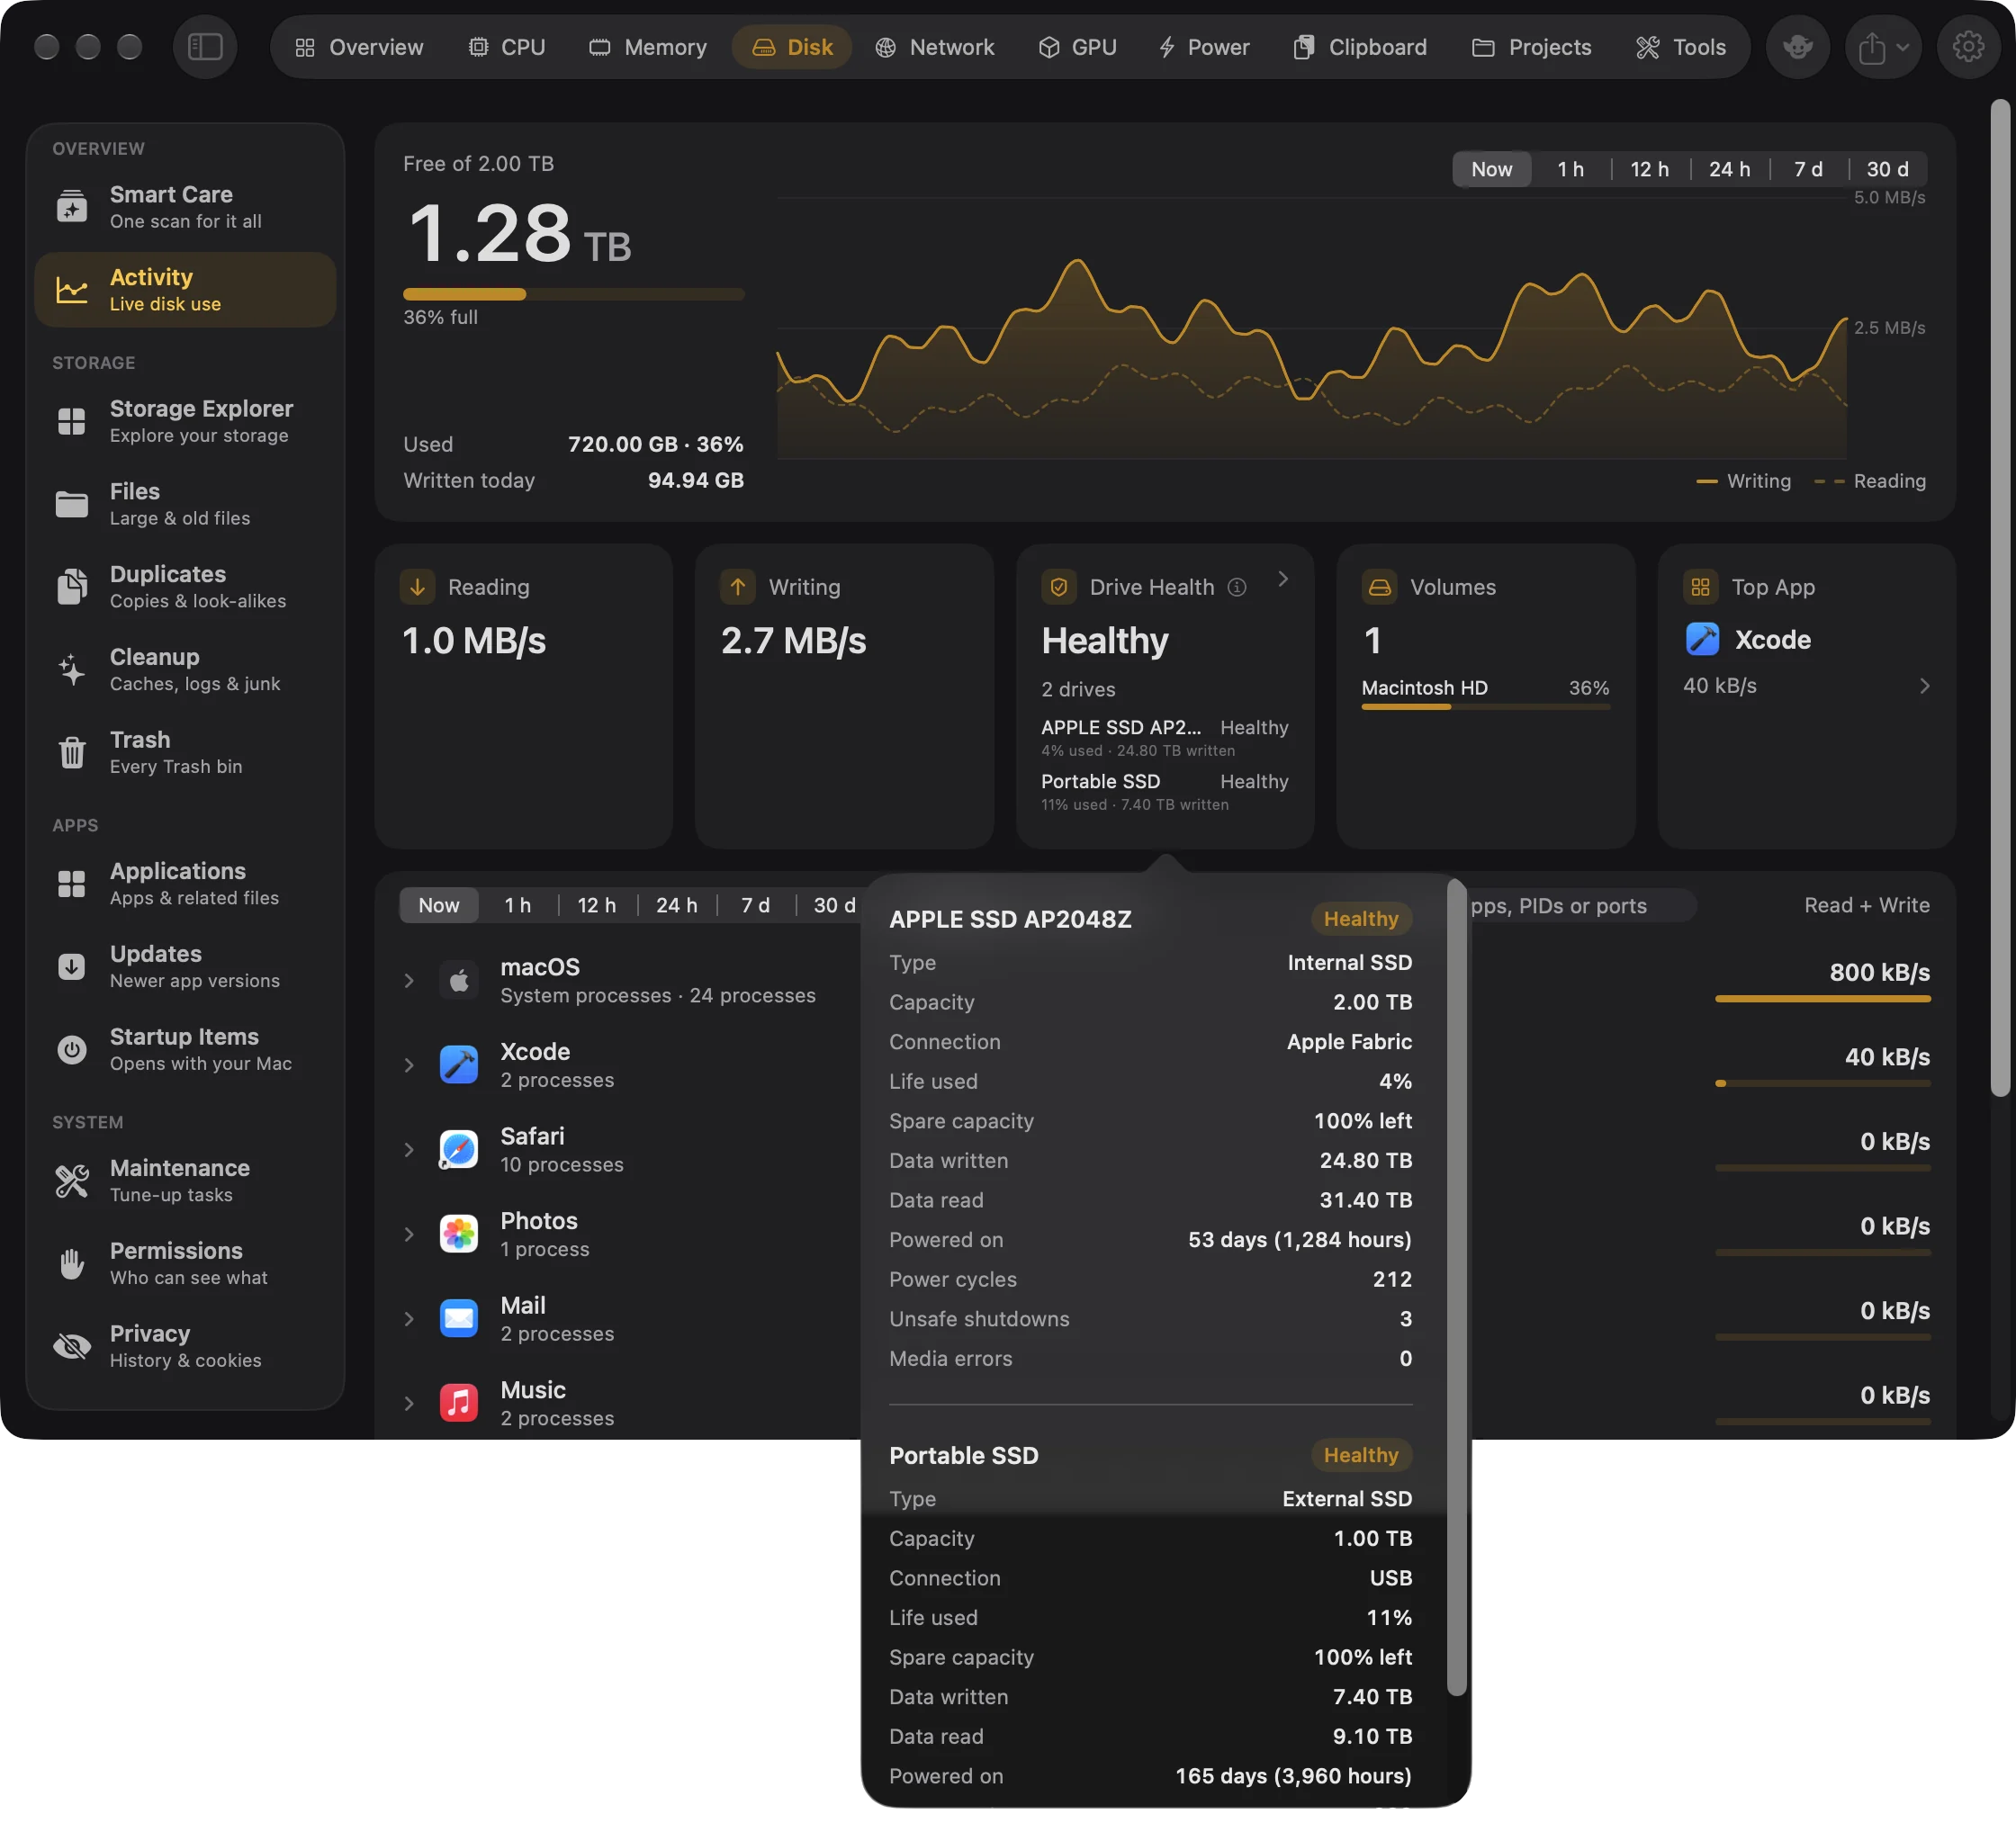
The details list every drive with its status, and a red warning when there is one. For each drive:
| Row | What it shows |
|---|---|
| Type | Such as "Internal SSD" or "External drive". |
| Capacity | The drive's size. |
| Connection | How it's attached, such as "Apple Fabric", "USB" or "PCI-Express". |
NVMe drives that share their wear figures, such as the internal SSD of an Apple silicon Mac, add:
| Row | What it shows |
|---|---|
| Life used | How much of its rated life the drive has used. Drives are designed to go past 100%, so the figure can too. |
| Spare capacity | The spare space it keeps for replacing worn cells, such as "100% left". |
| Data written, Data read | Everything ever written to and read from the drive. |
| Powered on | How long it has been on in total, such as "329 days (7,887 hours)". |
| Power cycles | How many times it has been switched on. |
| Unsafe shutdowns | How many times it lost power without shutting down properly. |
| Media errors | Errors the drive found in its data and couldn't correct. |
A drive without these figures says "This drive doesn't share wear details with the Mac." (internal) or "This drive passes only a pass-or-fail check to the Mac. Many external drives and enclosures hide the rest." (external).
Only physical drives are listed: disk images and the virtual volumes APFS makes are left out. Goblin reads the figures every 10 minutes while you're looking and every 30 minutes otherwise. The card appears once the first read has finished.
Warnings#
A drive gets a warning, and its card turns red, for the first of these that applies:
- Its self-check says it's failing: "The drive's own S.M.A.R.T. check says it could stop working."
- It reports a critical warning: "The drive is reporting a critical warning."
- Its spare capacity has fallen to the level where the drive raises the alarm: "Its spare capacity for replacing worn cells is nearly used up."
- It has used 90% or more of its rated life, for example "It has used 92% of its rated life."
Goblin also sends a notification, "\<Drive\> is reporting that it is failing" or "\<Drive\> is wearing out", followed by the warning and "Back it up now." It repeats at most once a day for a failing drive, and once a week for a worn one. Clicking it opens the Disk tab.
Note: This notification has no switch of its own. It's sent while Watch for apps that misbehave is on in Settings › Alerts, and turning that off silences it too.
Connected drives#
New in 1.1: Connected drives are listed with their free space and an Eject button, on the Overview and in the menu bar panel.
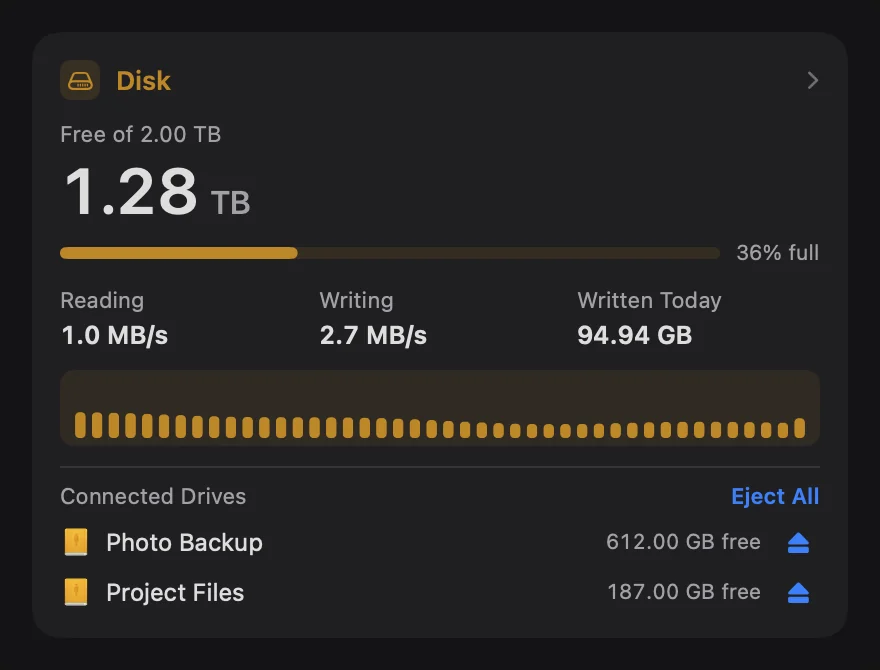
Eject a drive#
- Plug the drive in.
- Open the Overview (⌘1) and find the Disk card. In the menu bar panel, find the Connected Drives box.
- Click the eject button beside the drive. With more than one drive, Eject All ejects them all.
When it worked, the drive leaves the list.
When an external drive is connected, the Overview's Disk card gets a Connected Drives list at the bottom, and the menu bar panel shows a Connected Drives box. Each row has the drive's icon, its name, its free space and an eject button. With more than one drive there's also Eject All.
- Eject works like Finder's Eject. While it works, the button shows a spinner.
- If macOS can't eject a drive, for example because a file on it is open, its reason appears in red under the drive until you try again or unplug it.
- A successful eject plays a short sound. Turn it off with Sound effects in Settings › General.
- The list counts USB drives, SD cards and other removable or external drives, including read-only ones, but not disk images or the startup disk. A Time Machine drive shows its real free space.
The panel box only appears while a drive is connected. You can move or hide it in Settings › Layout. The list isn't included when you copy the dashboard as a picture.
Storage Explorer's drive cards have an eject button too. To clear the hidden junk macOS leaves on drives, or to have Goblin do it every time you eject, see External drives. Alerts for a drive being connected or nearly full are in Settings › Alerts.