 Goblin
Every time a Mac writes to a USB stick or external drive, it leaves hidden files behind: ._ files beside your documents, .DS_Store files in each folder, a Trash folder, a Spotlight index. On a Mac you never see them. On a camera, a TV, a car stereo or a Windows PC, they show up as clutter or take space you need. Goblin finds and clears them, can do it automatically each time you eject, and tells you about drives that fill up.
Cleaning works on writable external or removable drives: not the startup disk, not disk images, and not read-only drives.
Clear junk from a drive#
- Plug in the drive.
- Open the Disk tab in the main window. In the sidebar, under Storage, choose Cleanup.
- Press Scan. Goblin scans your Mac, then shows "Checking connected drives…".
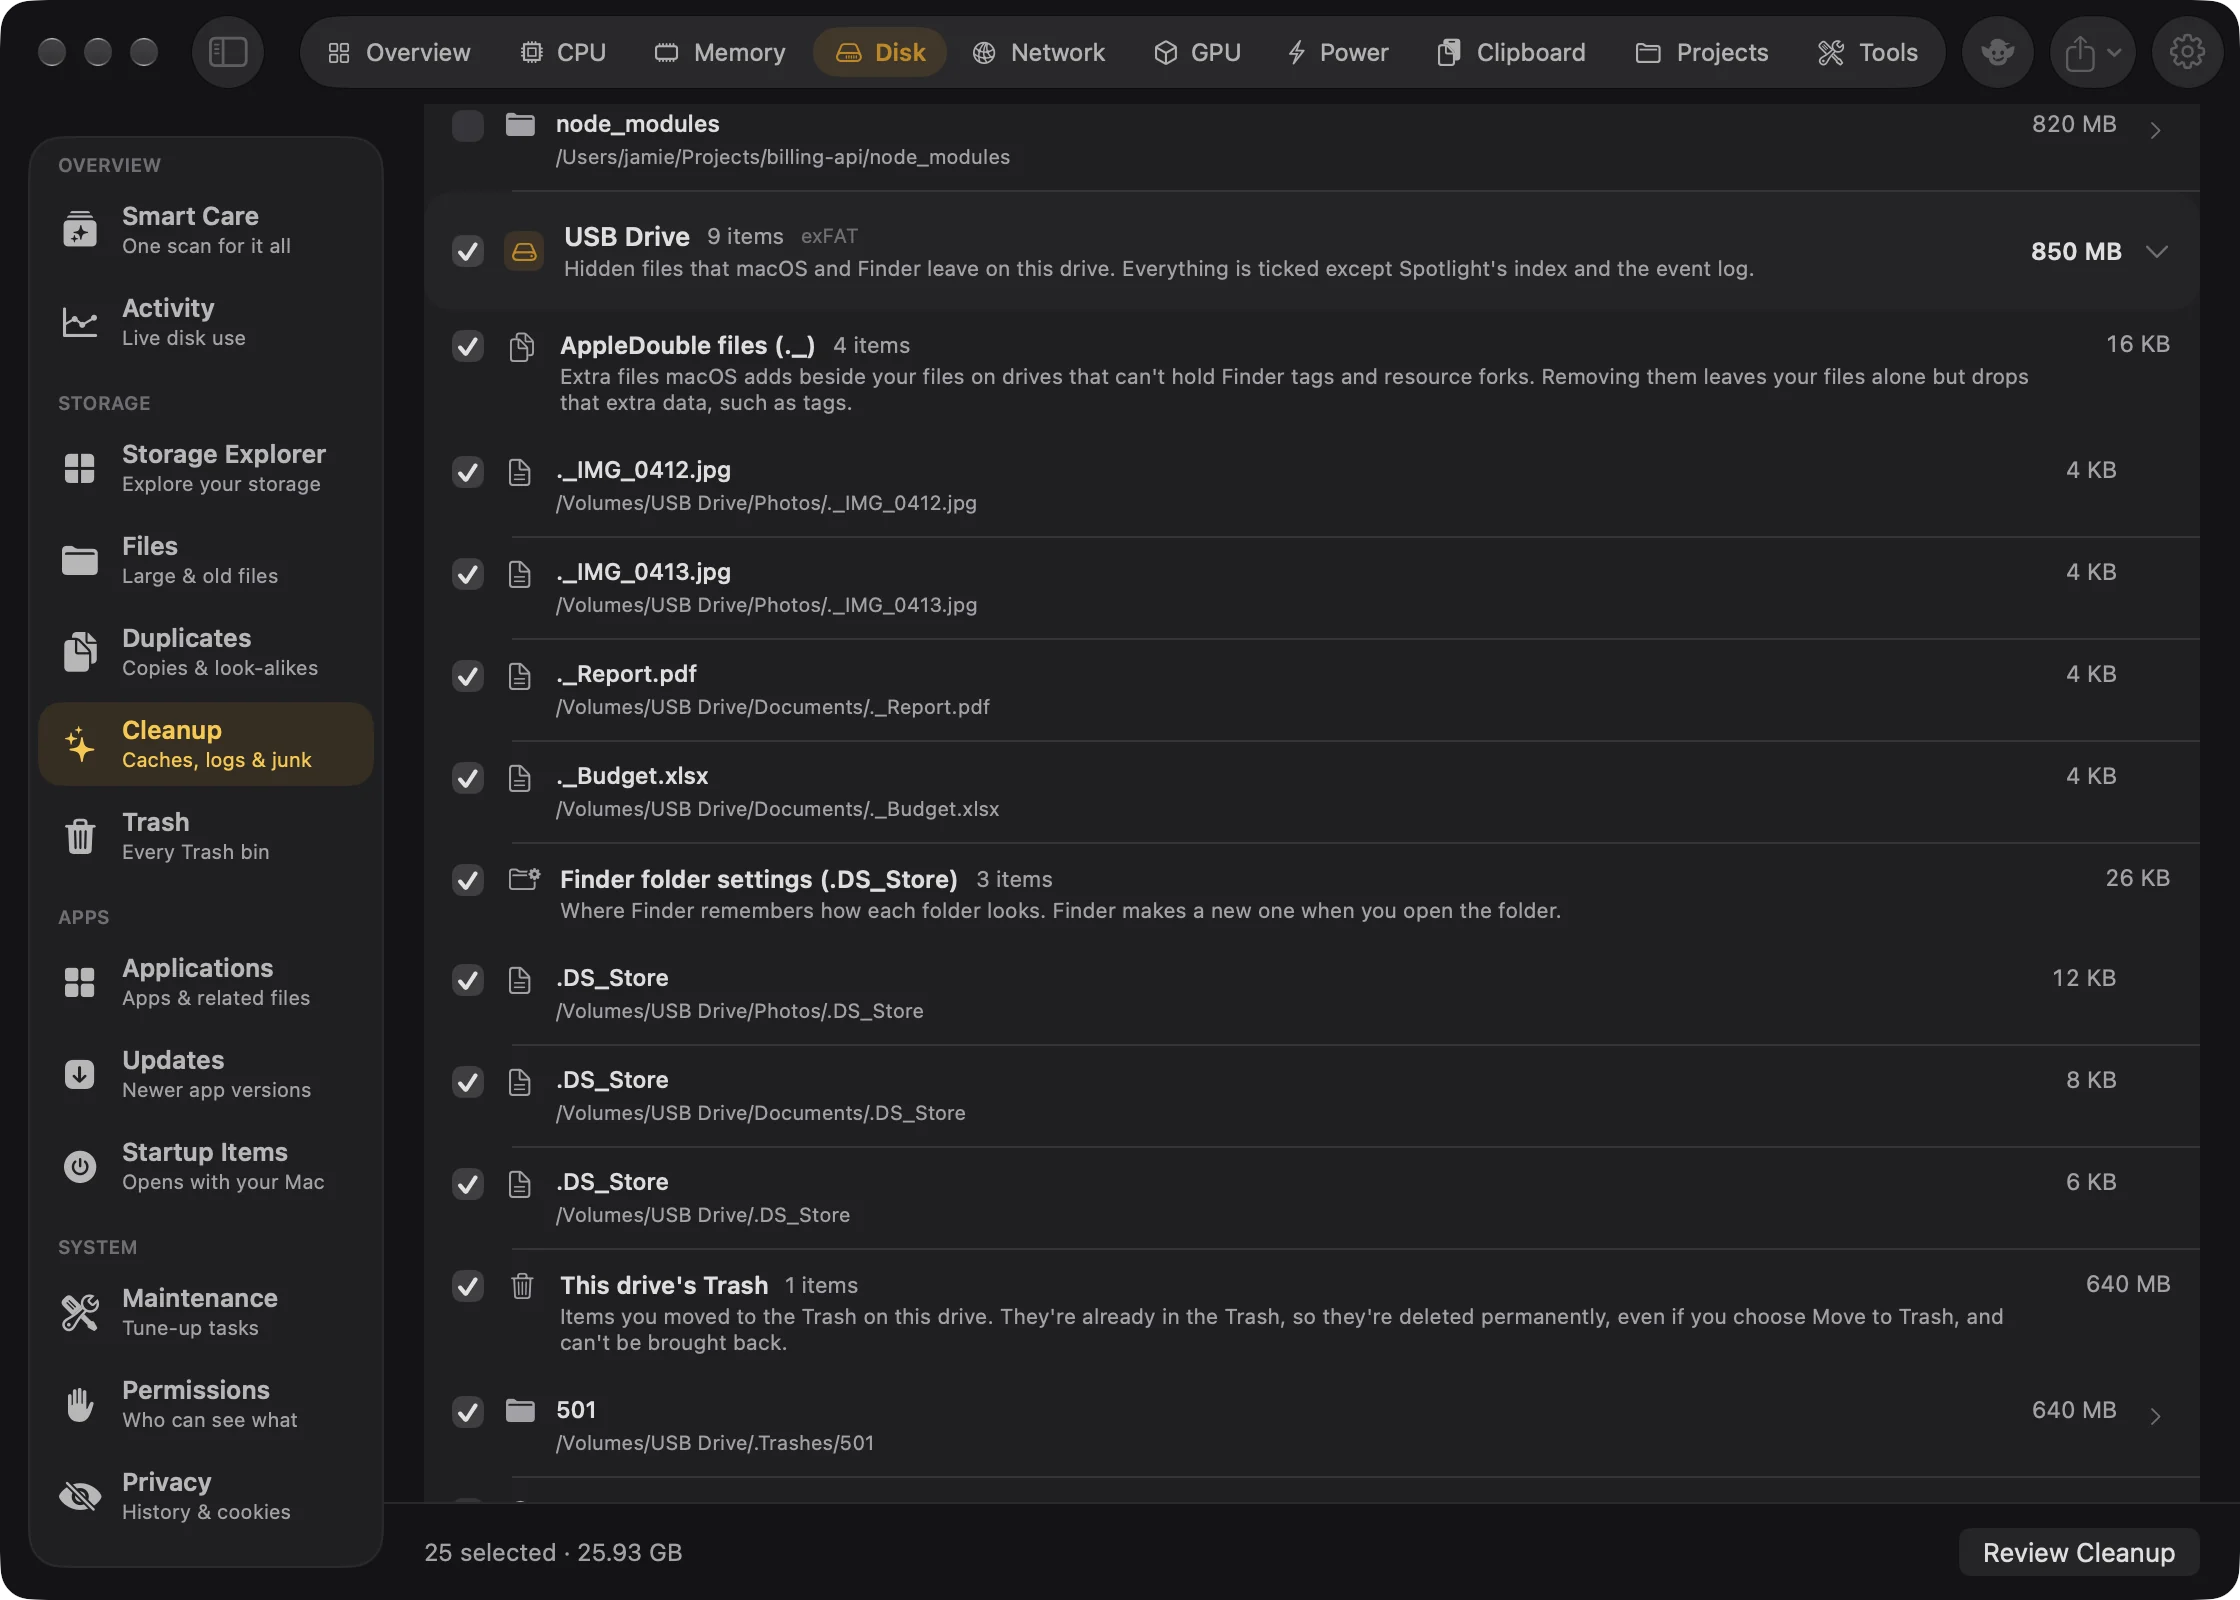
- Scroll to the end of the list. Each drive has its own group, with its name, how many items, its format (FAT, exFAT, APFS, Mac OS Extended or NTFS) and the total size.
- Tick the box Select the junk on <drive> to tick the recommended items, or tick the kinds and items you want one by one.
- Press Review Cleanup in the footer.
- Check the list in the review sheet and confirm. See Reviewing a removal.
| Kind | What it is | Ticked |
|---|---|---|
| AppleDouble files (._) | Extra files macOS adds beside your files on drives that can't hold Finder tags and resource forks. Removing them leaves your files alone but drops that extra data, such as tags. Only on FAT, exFAT and NTFS drives, and only real AppleDouble files. | Yes |
| Finder folder settings (.DS_Store) | Where Finder remembers how each folder looks. Finder makes a new one when you open the folder. | Yes |
| This drive's Trash | Items you moved to the Trash on this drive. They're already in the Trash, so they're deleted permanently, even if you choose Move to Trash, and can't be brought back. | Yes |
| Temporary items | Scratch folders Finder and apps leave behind. | Yes |
| Spotlight index | Spotlight's search index for this drive. Removing it makes Spotlight index the drive again, which can take a long while. | No |
| File system event log | macOS's record of recent changes on this drive. It's rebuilt, but backup tools use it to skip a full check. | No |
A drive with nothing to clear shows "No junk found on <drive>". If Goblin isn't allowed to read the drive: "Goblin can't read <drive>". Allow Goblin to use removable volumes in System Settings›Privacy & Security, then scan again.
What Goblin skips and its limits#
- It never follows links, and skips Time Machine and backup folders, Windows'
$RECYCLE.BINandSystem Volume Information, and the inside of packages. - It looks at up to 300,000 files and for up to 20 seconds per drive, and lists the first 5,000 items. If it stops early, the group says so; clean what's listed and scan again for the rest.
- A junk folder with more than 50,000 files can't be ticked. Remove it in Finder.
Clean a drive when you eject it#
Goblin can tidy each writable external drive as it's ejected, however you eject it: from Finder, the menu bar, Goblin or another app.
- Open Settings›Alerts.
- In the separate When you eject a drive card, turn on Clean junk from a drive when I eject it.
New: Coming in the next update. Eject cleanup moves to its own card in Alerts.
| Setting | What it does | Default |
|---|---|---|
| Clean junk from a drive when I eject it | Deletes ._ files, .DS_Store files, temporary-items folders and your items in the drive's Trash as the drive is ejected. | Off |
Warning: This deletes for good. Nothing goes to a Trash and there is no removal review.
Goblin records the date, drive, removed item count and size in ~/Library/Application Support/Goblin/EjectCleaning.log, along with failures or an early stop. This record does not list each removed file.
Also worth knowing:
- It never touches the Spotlight index or the event log.
- It never holds up the eject. It has about 2 seconds: a little over one to look, the rest to delete. Whatever isn't done in time stays, and the drive ejects as normal.
- Read-only drives are skipped.
Turn on drive alerts#
Two alerts are about connected drives. Both are off unless you turn them on, and arrive as notifications.
- Open Settings›Alerts.
- In the Watch your Mac card, turn on A drive is connected, A connected drive is almost full, or both.
| Setting | What it does | Default |
|---|---|---|
| A drive is connected | Tells you a drive was plugged in, with its size and free space: "<drive> connected". Only drives connected after Goblin started count, at most once a minute per drive. Click it to open the Disk tab. | Off |
| A connected drive is almost full | Warns when a drive other than the startup disk has under 5 GB and under 5% free: "<drive> is almost full". At most every 12 hours per drive. | Off |
When Goblin isn't on screen, it checks drives less often, so A drive is connected can arrive a few minutes after you plug a drive in.
For an external drive, the almost-full notification has a Clean junk from it button. It opens Disk›Cleanup and scans the connected drives so you can review their junk.
Empty the Trash on a drive#
Each drive with a Trash folder shows up as its own bin on the Trash page, with its size and largest items, and its own Empty… button.
Eject a drive#
You can eject from three places. Pick whichever is nearest:
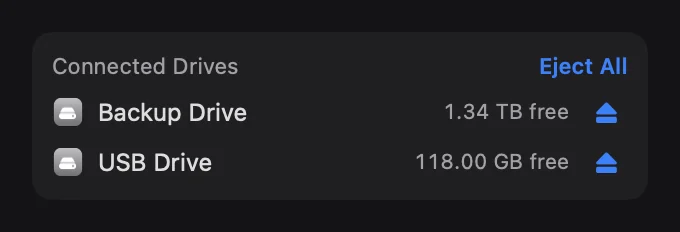
- Overview: while an external drive is connected, the Disk card ends with a Connected Drives list. Press the eject button on the drive's row.
- Menu bar panel: the Connected Drives box has the same rows and eject buttons.
- Storage Explorer: the drive's card has an eject button.
Ejecting works like Finder's Eject. If macOS can't eject a drive, for example because a file on it is open, its reason shows in red under the drive in the lists. From Storage Explorer you get an alert, "Couldn't eject the disk.", with macOS's reason.
New in 1.1: A Connected Drives list, with an eject button on each drive and Eject All when there's more than one.
A successful eject plays a short sound, unless Sound effects is off in Settings › General.
Eject all drives#
- Open the Overview tab, or the menu bar panel.
- In Connected Drives, press Eject All. It only appears when more than one drive is connected.
The panel box is part of the default layout. To hide it, or to move it, see Settings › Layout.