 Goblin
The Trash section shows every Trash bin Goblin can find: yours, and the one on each connected drive. You see how much each holds, its largest items and when they were thrown away, and you can empty one bin or all of them. Nothing is removed until you choose to empty it and confirm.
See what's in the Trash#
- Click Disk in the main window's tab bar, then Trash in the sidebar (under Storage).
- Press Scan at the top right. It reads your Trash and the Trash on each connected drive.
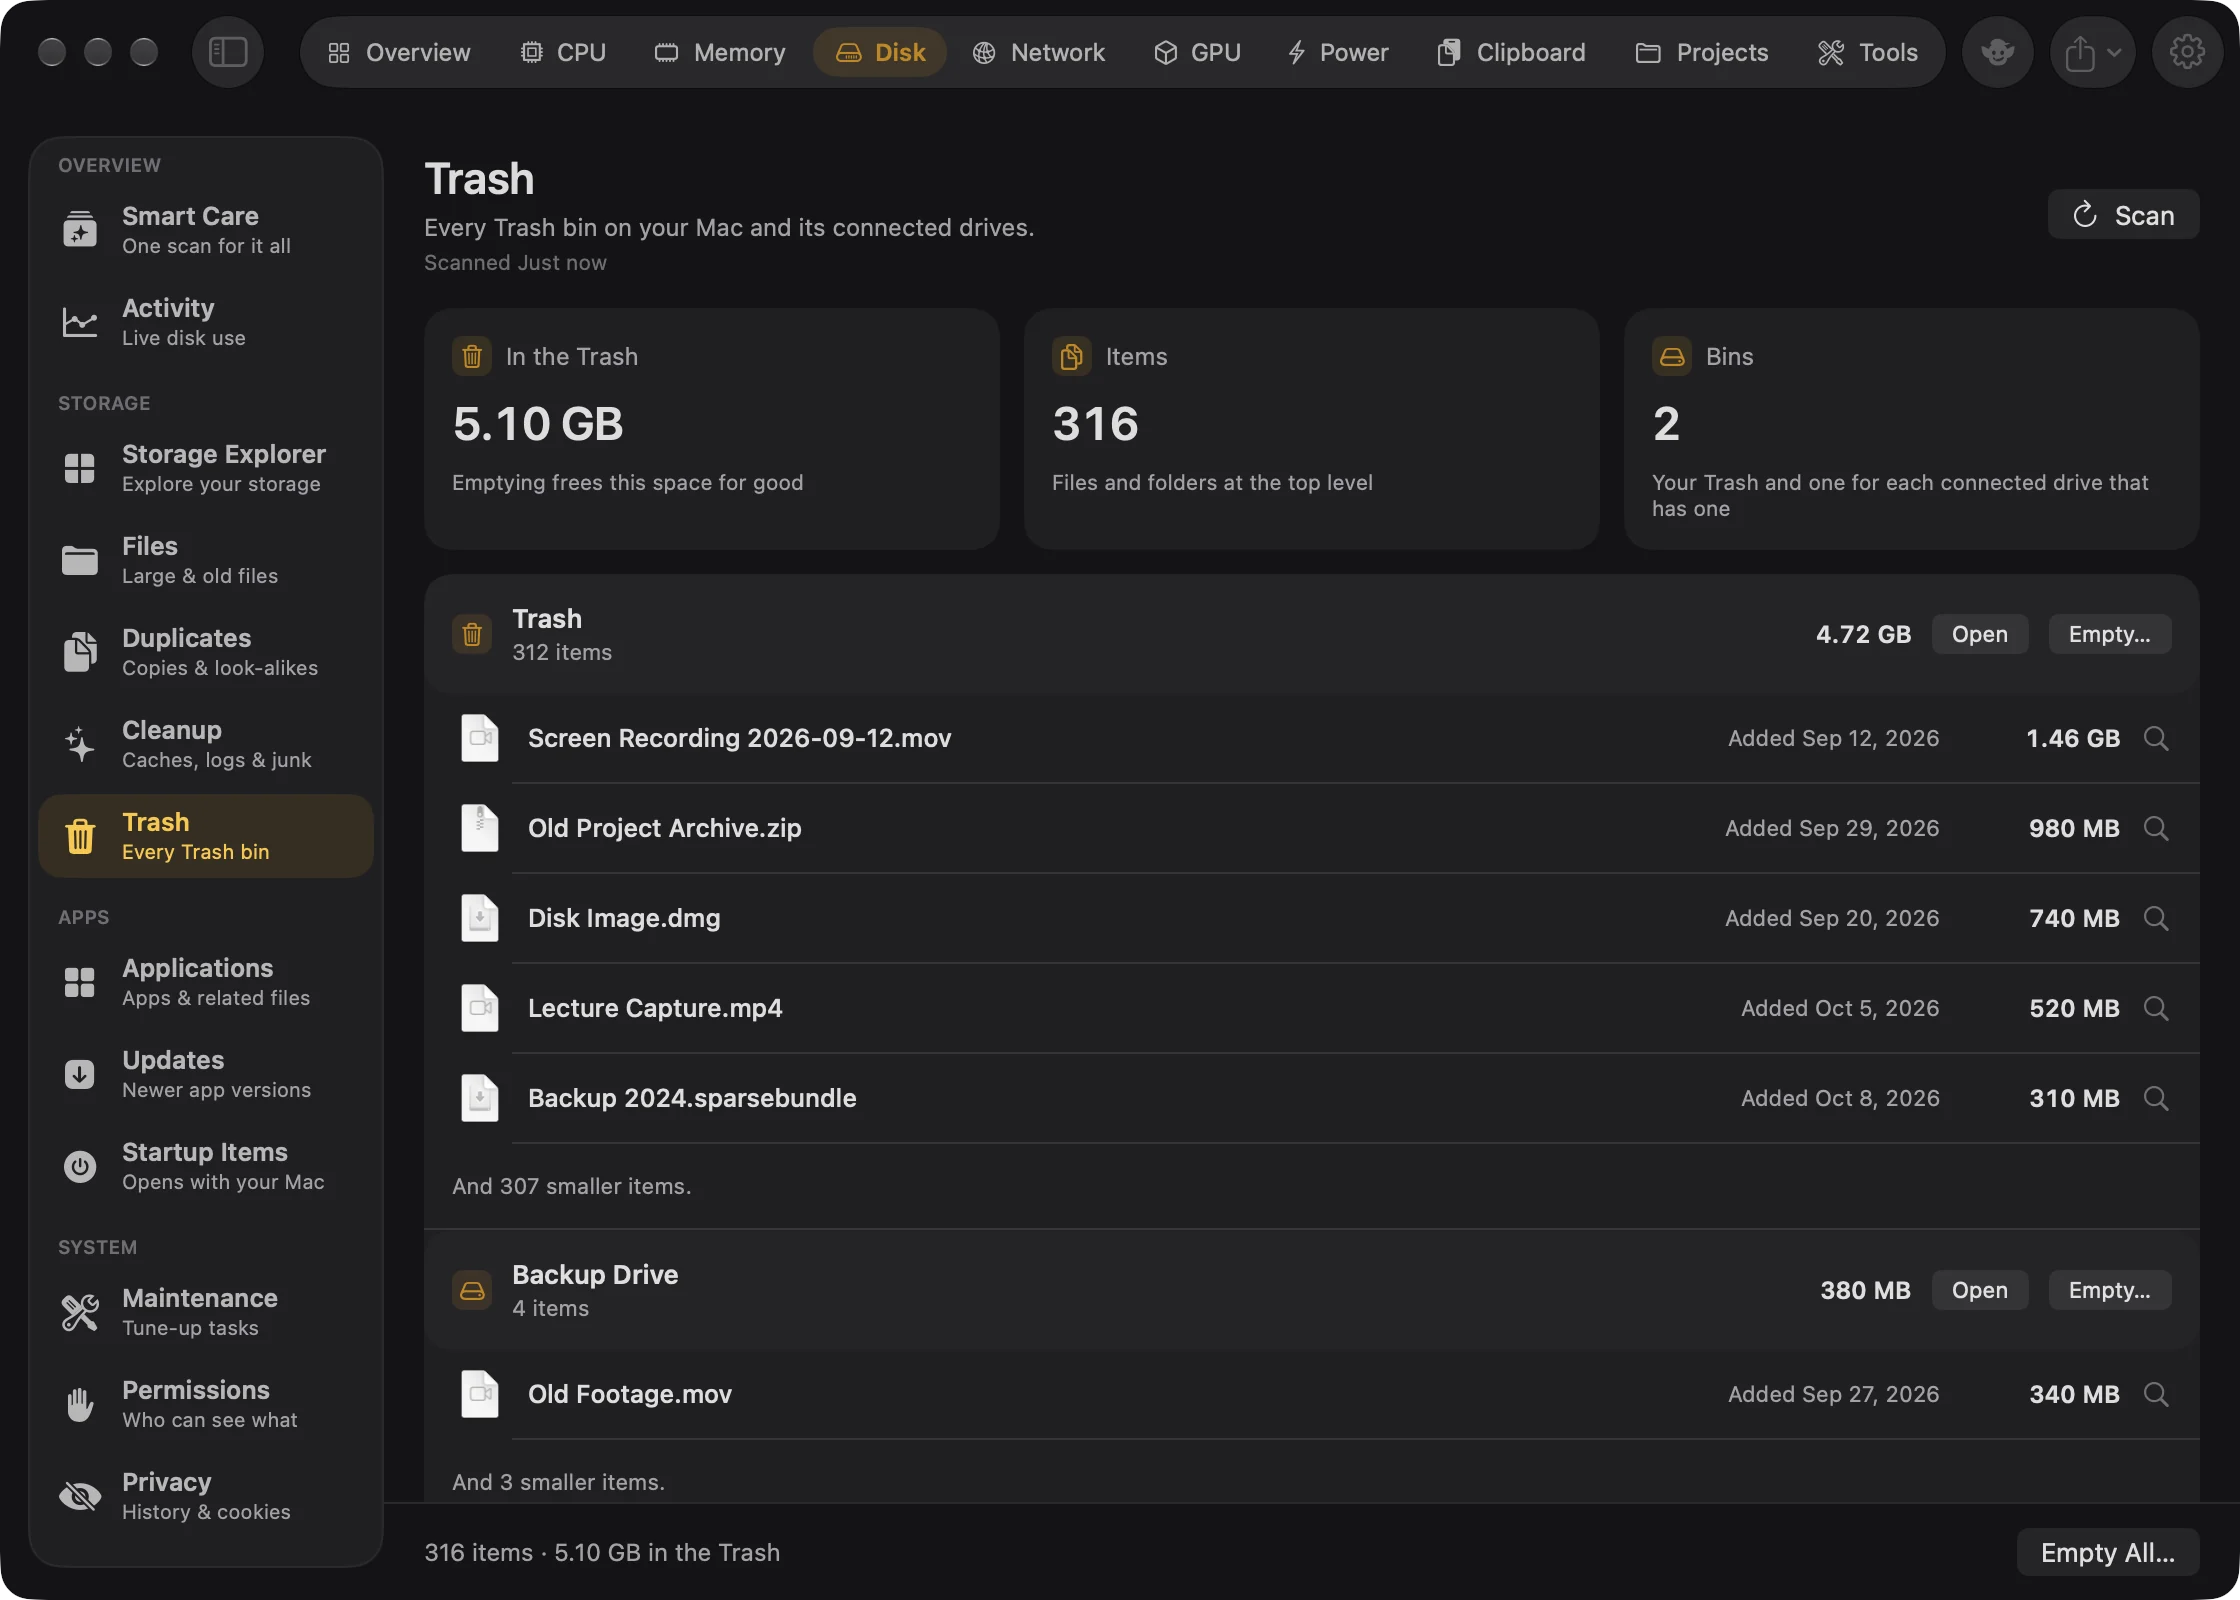
- Read the three cards at the top, then the card for each bin. Press Scan again whenever you want a fresh reading.
What you see#
Three cards sit at the top:
- In the Trash: the total size. Emptying frees this space for good.
- Items: the files and folders at the top level of every bin.
- Bins: your Trash, plus one for each connected drive that has one.
Then one card per bin. Trash is your own (~/.Trash). Each drive's bin is named after the drive. Goblin looks on every local, writable drive other than the startup disk; network drives are skipped. A bin's card shows:
- how many items it holds, or that it's empty;
- its size, an Open button that shows it in Finder, and Empty…;
- its 10 largest items, each with the date it was added to the Trash, its size and a magnifier that shows it in Finder;
- "And N smaller items" for the rest.
Sizes are the space the files use on disk. Files linked more than once are counted once, and links aren't followed.
Let Goblin read your Trash#
If a bin says "Goblin can't read this Trash yet", Goblin needs Full Disk Access. Until then, the numbers leave out what's in your Trash, so it can look emptier than it is.
- On the card Goblin needs Full Disk Access to read your Trash, follow its instructions, or open System Settings›Privacy & Security›Full Disk Access.
- Drag Goblin into the list, or click + and choose it. If Goblin isn't in the list, show it in Finder and add it.
- Turn Goblin's switch on. macOS may ask you to quit and reopen Goblin.
- Press Scan again after changing access.
When it worked, the bins show their items and sizes. See Full Disk Access.
Kept by apps#
Some apps keep their own trash, which Finder's Trash doesn't include. A Kept by apps card lists them for information. Goblin doesn't delete these; empty them in the app.
- Mail · Trash: the deleted messages in Mail's trash mailboxes, with their size. Mail may also keep them on your mail server.
- Photos · Recently Deleted: photos and videos Photos keeps for 30 days. They live inside your Photos library, so Goblin doesn't measure them.
Open Mail and Open Photos take you there.
Empty a Trash bin#
- In Disk›Trash, press Scan if you haven't yet.
- To empty one bin, press Empty… on its card. To empty every bin, press Empty All… in the footer.
- Read the question. Goblin asks "Empty your Trash?", "Empty the Trash on <drive>?" or "Empty every Trash?", with how many items and how much space will be deleted permanently.
- Press Empty Trash to go ahead, or Cancel.
- A card shows the progress, then the result.
Warning: Emptying deletes the files for good. They don't go anywhere you can get them back from.
The result reads "Emptied N items, <size> freed." or "The Trash was already empty." If some items stayed, the result says how many, and Items that stayed lists each with the reason, such as "macOS wouldn't allow it. It may belong to another user or be locked by the system." Goblin then scans again.
How Goblin empties a bin:
- It only empties real Trash folders. It deletes the items itself rather than asking Finder, so there's no Automation prompt.
- If an item is locked, Goblin unlocks it and makes its folders writable, then tries again. Items macOS locked at the system level stay.
- Each emptied bin is recorded in Removal History as deleted permanently, and counts toward the total cleared with Goblin.
New in 1.1: Items in your own Trash that belong to the system, such as an app Finder moved there that its installer owned, are deleted too. Goblin asks for your password once for all of them ("Goblin needs your password to delete N items in your Trash that belong to the system."). Cancel to leave them where they are. Drive bins aren't retried this way. With Goblin's helper allowed under System Tasks in Settings › General, there's no password prompt.
The big-Trash warning#
Goblin keeps an eye on your own Trash and tells you when it passes a size you choose.
Change the warning size#
- Open Settings›Alerts.
- In the Watch your Mac card, find The Trash is getting big.
- Set Over to the size you want, from 1 to 100 GB. Turn the row's switch off to stop the warning altogether.
The setting is described in Settings › Alerts.
| Setting | What it does | Default |
|---|---|---|
| The Trash is getting big · Over N GB | Warns when your Trash holds more than this (1 to 100 GB). | On, 10 GB |
Goblin measures only your own Trash, in the background, at most every 30 minutes. While it stays over the limit, the warning comes at most once a day: "Your Trash is using <size>" with "Emptying it frees that space. Goblin never empties it without asking." It appears as a notification (if notifications are on) and in Worth a Look on the Overview.
The Trash dropdown#
New in 1.1: A big Trash also brings a dropdown from Goblin's menu bar item.
At the same moment as the warning, a dropdown drops from Goblin's menu bar item, titled "Your Trash is using <size>". Its one row shows the Trash with how many items it holds and their size, read afresh when it opens. It doesn't take the focus from the app you're in.
- Empty Trash asks once more, in the same place: the line changes to "Everything in your Trash is deleted for good. This can't be undone." and the buttons to Cancel and a red Confirm. Confirm closes the dropdown and empties your Trash with the spell below. Cancel goes back a step.
- Ignore closes it. Goblin mentions it again tomorrow if the Trash is still big.
A click anywhere else closes it too. If Goblin's item isn't in the menu bar, the dropdown hangs from the right end of the menu bar instead. See Alert dropdowns.
Turn off the Trash dropdown#
- Open Settings›Alerts.
- In the last card, turn off Show a dropdown when the Trash is getting big. It's on by default.
The warning itself stays. Details are in Settings › Alerts.
Emptying from a warning: the spell#
- When the warning appears, click Empty Trash… on the Overview's status banner or in Worth a Look (it sits next to Show Disk). In the Trash dropdown, click Empty Trash instead.
- Goblin asks "Empty your Trash?" with how much will be deleted for good. Press Empty Trash. In the dropdown, press Confirm.
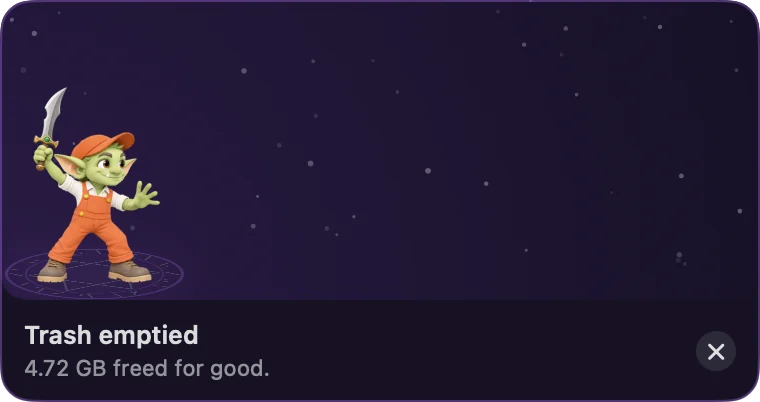
- Watch the card in the bottom-right corner. When it worked, it reads Trash emptied.
Goblin then casts a spell in a small card in the bottom-right corner of the screen. It never takes focus, so you can keep working. The card shows the Trash with "Emptying your Trash…" and how much is on its way out. If Goblin hasn't read the Trash yet, it reads it first. Then he strikes the Trash and the card says how it went:
- Trash emptied · "<size> freed for good." (or "The Trash was already empty")
- Couldn't empty all of the Trash · how much was freed and which item couldn't be removed, with the reason
- Couldn't empty the Trash · macOS didn't let Goblin read your Trash. Turn on Full Disk Access, then try again.
The warning clears once the Trash really is empty. The card stays for at least 5 seconds, longer while the pointer is on it, and has a close button. With Reduce Motion on, it shows the result without the animation. The Empty… buttons on the Trash page don't play the spell.
Apps in the Trash#
When you drag an app to the Trash, its support files stay behind in your Library. Goblin notices and offers to remove them. See Uninstall from Finder.
New in 1.1: An app in the Trash can be uninstalled from there, together with what it left behind, and apps the system owns are deleted after one password prompt. See Uninstalling apps.