 Goblin
 can change a monitor's brightness, volume and contrast, and switch its resolution and refresh rate, from one place. The daily controls are on the Tools tab, under Displays, in the main window and in the menu bar panel. See Tools. Settings›Displays holds what sits behind them: turning the controls on, linking screens, keyboard keys and shortcuts, and screen saver dimming. What is available depends on the display and its connection.
Turn display controls on or off#
- Open Settings›Displays. (Press ⌘,, then click Displays.)
- In Display Controls, click Enable display controls so it is on or off.
- To keep the controls but hide them from the menu bar panel, turn off Show displays in the menu bar panel's Tools tab.
With display controls off, Tools›Displays shows Display controls are turned off. and an Enable Display Controls button.
| Setting | What it does | Default |
|---|---|---|
| Enable display controls | Enables adjustments. Off disables display controls. | On |
| Show displays in the menu bar panel's Tools tab | Shows the displays in the panel's Tools tab. | On |
| Refresh Displays | Checks connected displays again. Use this after connecting a monitor or when a reading is missing. | none |
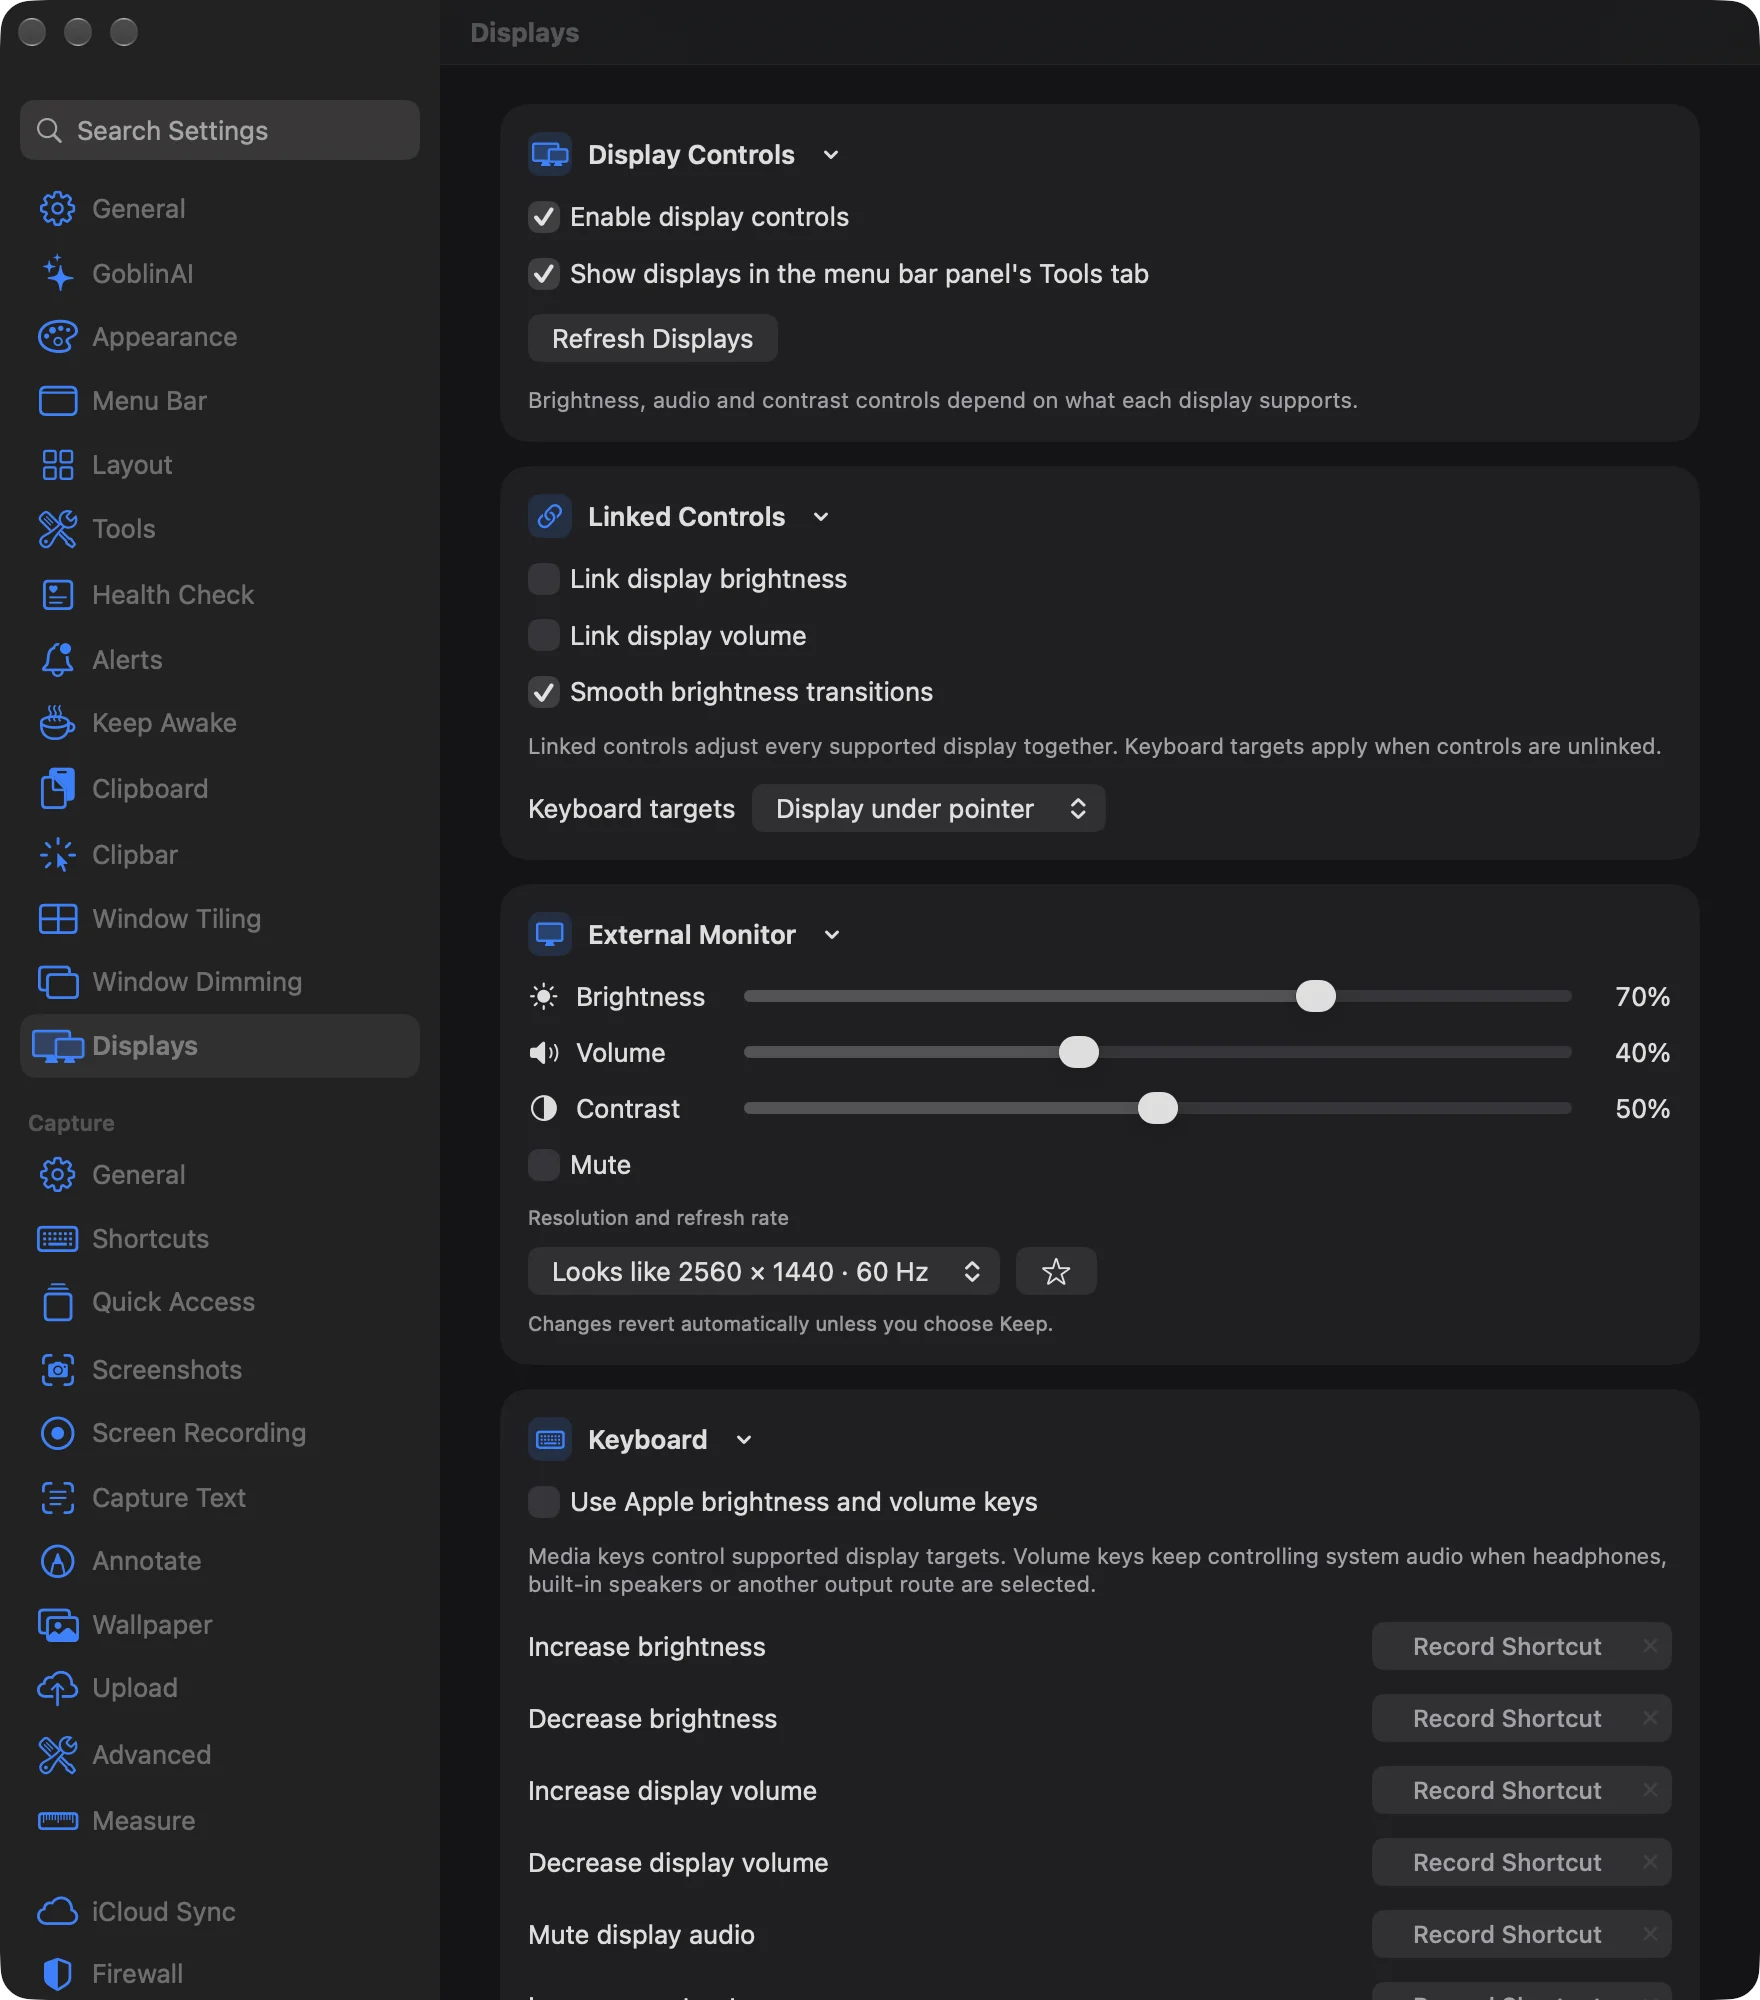
If you connect a monitor and it doesn't appear, click Refresh Displays. The card shows Finding connected displays… while it looks, and No connected displays are available. if none are found.
Adjust a display's brightness, volume or contrast#
- Open Settings›Displays and find the card named after your display.
- Drag Brightness, Volume or Contrast. The percentage updates as you drag.
- Click Mute to silence a display's speakers, where it is shown.
You can do the same on the Tools tab, under Displays. Each display has Brightness, Volume and Contrast sliders and, where supported, Mute. An unavailable control explains why in Settings. A missing reading disables its slider; it is not a zero reading. A label such as Last set or Estimated shows when the monitor doesn't report its level, and Goblin updates the estimate as you adjust it. The compact panel omits unsupported sliders.
Change a display's resolution or refresh rate#
- In a display's card (in Settings or on Tools›Displays), find Resolution and refresh rate.
- Open the menu and choose a mode. Scaled modes say Looks like followed by their size, and the refresh rate shows in Hz where available.
- The screen changes and a box asks Keep this display mode? with a countdown.
- Click Keep to accept it. Click Revert to go back, or wait: Goblin reverts by itself when the countdown ends.
Note: If you can't use the screen after a change, wait. Goblin switches back when the countdown ends.
Changing modes temporarily disables the other mode choices. If modes or the current mode cannot be read, the control says so.
To save a mode as a favorite:
- Choose the mode so it is current.
- Click the star beside the menu (Favorite this mode).
- The mode appears as a button below it. Click that button any time to switch back.
To remove a favorite, click the crossed star beside it (Remove favorite mode). A favorite that is no longer available is disabled.
Link brightness or volume across screens#
- Open Settings›Displays and find Linked Controls.
- Turn on Link display brightness, Link display volume, or both.
- Move a slider on any supported display. The others follow.
| Setting | What it does | Default |
|---|---|---|
| Link display brightness | Adjusts brightness across supported displays together. | Off |
| Link display volume | Adjusts volume across supported displays together. | Off |
| Smooth brightness transitions | Smooths brightness changes. | On |
| Keyboard targets | Which displays the keys and shortcuts change when controls are unlinked: Display under pointer, All external displays or All displays. | Display under pointer |
Use your Mac's brightness and volume keys on monitors#
- Open Settings›Displays and find Keyboard.
- Turn on Use Apple brightness and volume keys.
- If Allow Accessibility… appears, click it and follow the setup, then click Check Permission Again.
- Press your brightness or volume keys. The displays chosen under Keyboard targets change.
Volume keys keep controlling system audio when headphones, built-in speakers or another audio route are selected.
Give display controls their own shortcuts#
- In Keyboard, find the action: Increase brightness, Decrease brightness, Increase display volume, Decrease display volume, Mute display audio, Increase contrast or Decrease contrast.
- Click the box beside it. It says Record Shortcut until you set one.
- Press the keys. Include ⌘, ⌃ or ⌥.
To remove one, click the × beside its box. Custom shortcuts work independently of the Accessibility permission, and a conflict with another shortcut shows beside the box.
| Setting | What it does | Default |
|---|---|---|
| Use Apple brightness and volume keys | Sends media-key adjustments to supported display targets. Requires Accessibility permission. | Off |
| Custom shortcuts | Assigns shortcuts to the seven actions above. | None |
The Keyboard card on Tools›Displays shows the current status of the keys, such as whether they're on, and has a Displays Settings… button that opens this pane.
Dim displays during the screen saver#
- Open Settings›Displays and find Screen Saver.
- Turn on Dim displays while the screen saver runs.
- Drag Brightness to the level you want, from 1% to 100%.
- To choose which screens dim, turn off Use all displays with brightness readback and tick the displays.
| Setting | What it does | Default |
|---|---|---|
| Dim displays while the screen saver runs | Temporarily lowers supported displays to the chosen brightness. | Off |
| Brightness | Sets the screen saver brightness from 1% to 100%. | 20% |
| Use all displays with brightness readback | Includes every display that reports its brightness. Off lets you choose individual displays. | On |
Dimming needs a display that reports its brightness. Displays already dimmer than the chosen level stay dim. Their previous brightness returns when the screen saver stops. At least one display stays selected when choosing individual displays. These choices and favorites stay local to this Mac. For dimming other windows while you work, see Window Dimming.