 Goblin
's firewall decides which network connections your apps are allowed to make. It sees every connection as it opens, checks it against your rules and blocklists, and either allows it, denies it, or holds it and asks you in a connection alert. It also gives Connections full detail: every connection, with hostnames, instead of samples.
The firewall is optional and off until you turn it on. While it's off, Goblin installs and runs nothing for it: there are no rules, no alerts, no Rules screen, no firewall card in the menu bar panel, and nothing asks for Location Services. Connections still works, sampled from macOS with no permission needed.
Turning it on#
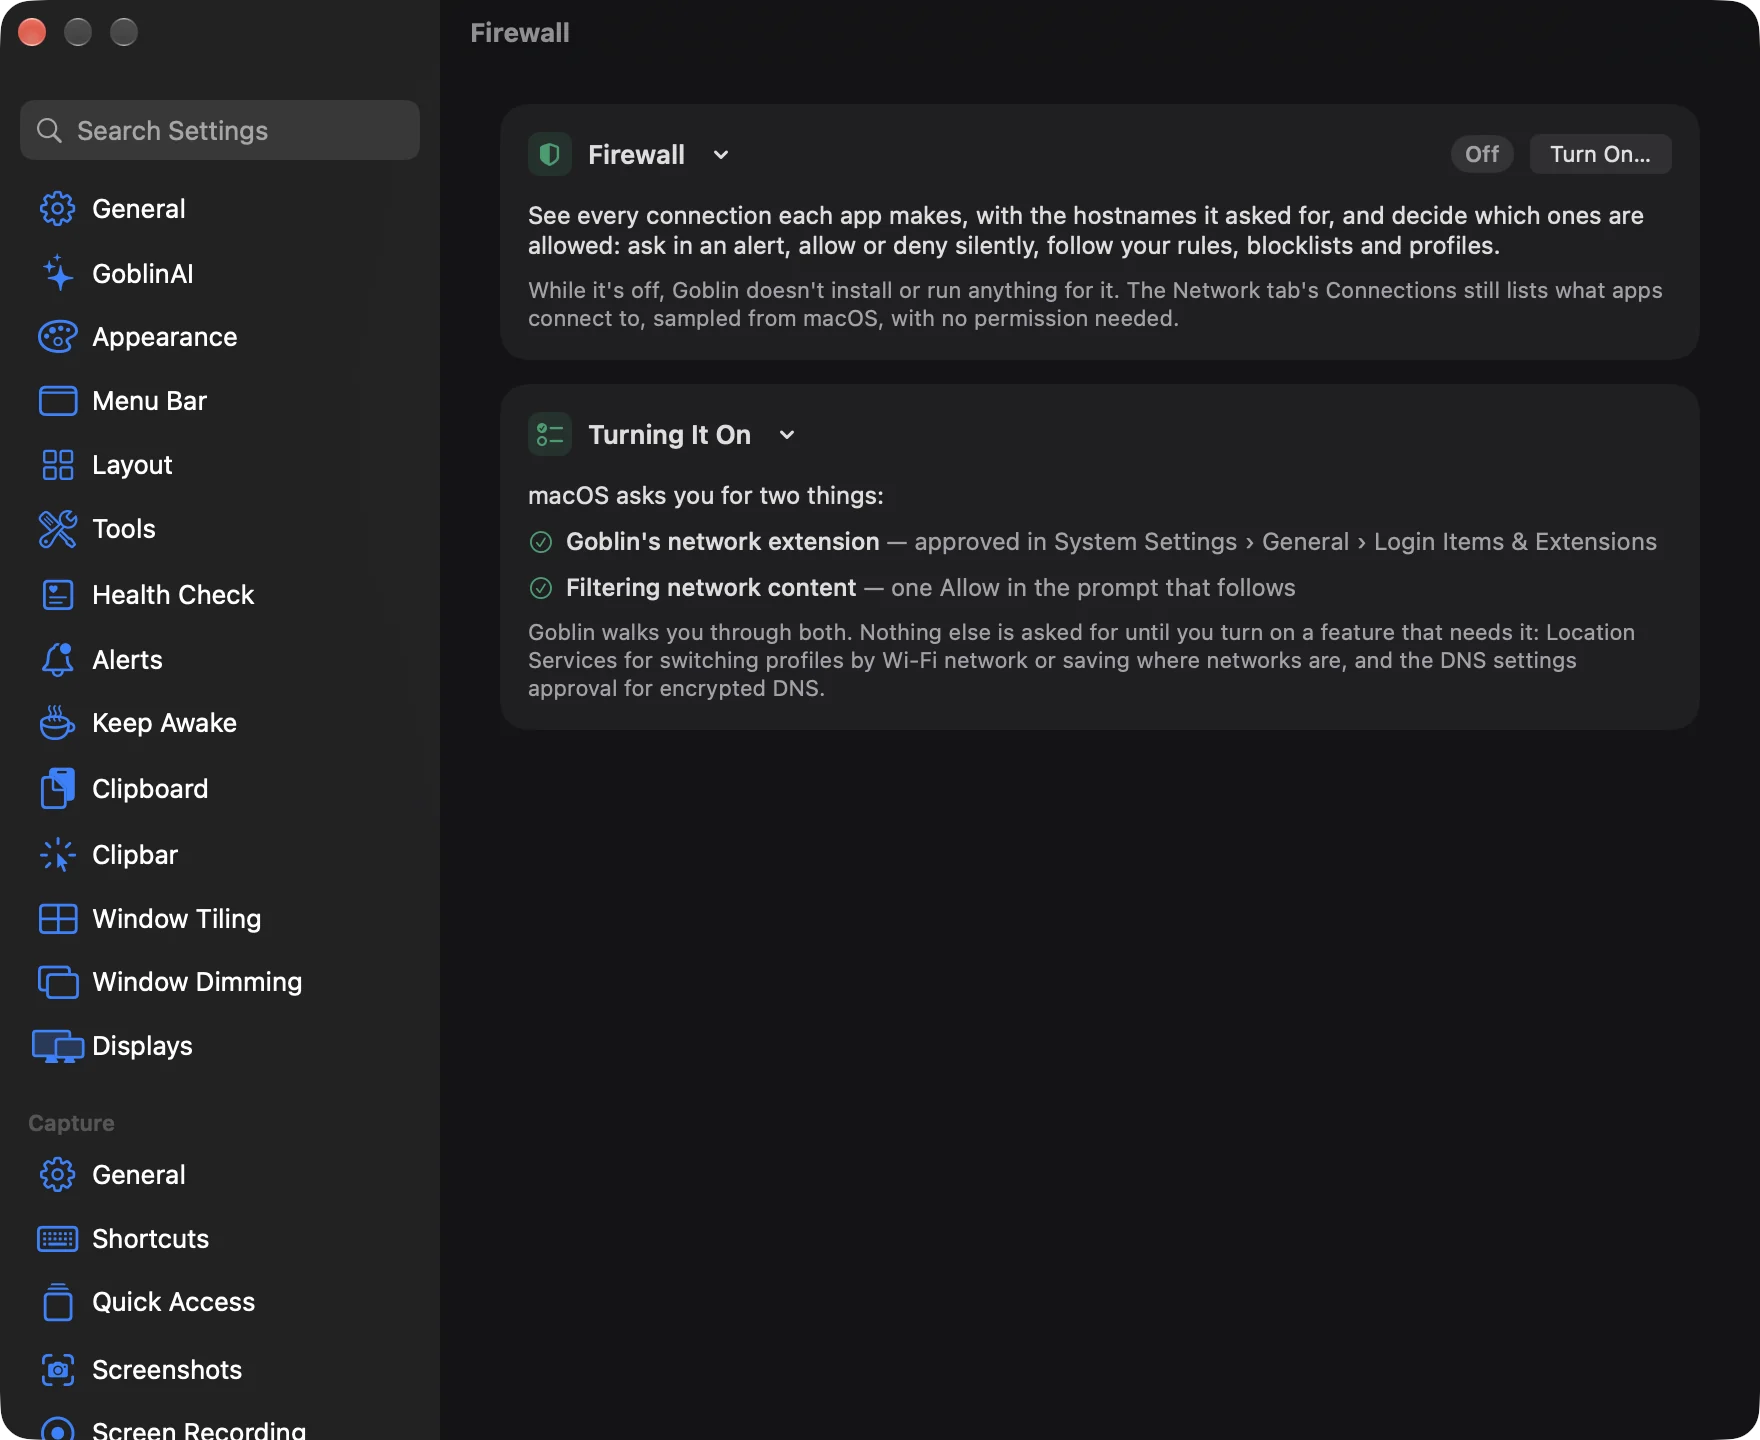
- Open Settings with ⌘, and click Firewall in the sidebar. While the firewall is off, the pane shows a Firewall card marked Off and a Turning It On card listing what macOS will ask for.
- Click Turn On… on the Firewall card.
- Unless Goblin's network extension is already running, the setup sheet Installing Goblin's Network Monitor opens. Carry on with Approve the network extension in System Settings.
When it worked, the setup sheet ends with "Goblin's Network Monitor is on", the Firewall card reads On with the extension Active, and a Rules item appears in the Network tab's sidebar.
You can also start from the main window: open the Network tab, choose Connections, and click Turn On… on the Firewall row at the bottom of the banner.
Note: Goblin must be in your Applications folder. macOS only installs this kind of helper from there, and the sheet tells you to move Goblin first if it isn't.
What macOS asks for#
Two approvals, both yours to give, because Apple doesn't let an app switch them on by itself:
- Goblin's network extension, switched on in System Settings›General›Login Items & Extensions. macOS may ask for your password or Touch ID.
- Filtering network content: one Allow in the prompt that follows.
Nothing else is asked for until you use a feature that needs it: Location Services for switching profiles by Wi-Fi network, saving where networks are, or finding your place on the map, and a separate approval for encrypted DNS.
Approve the network extension in System Settings#
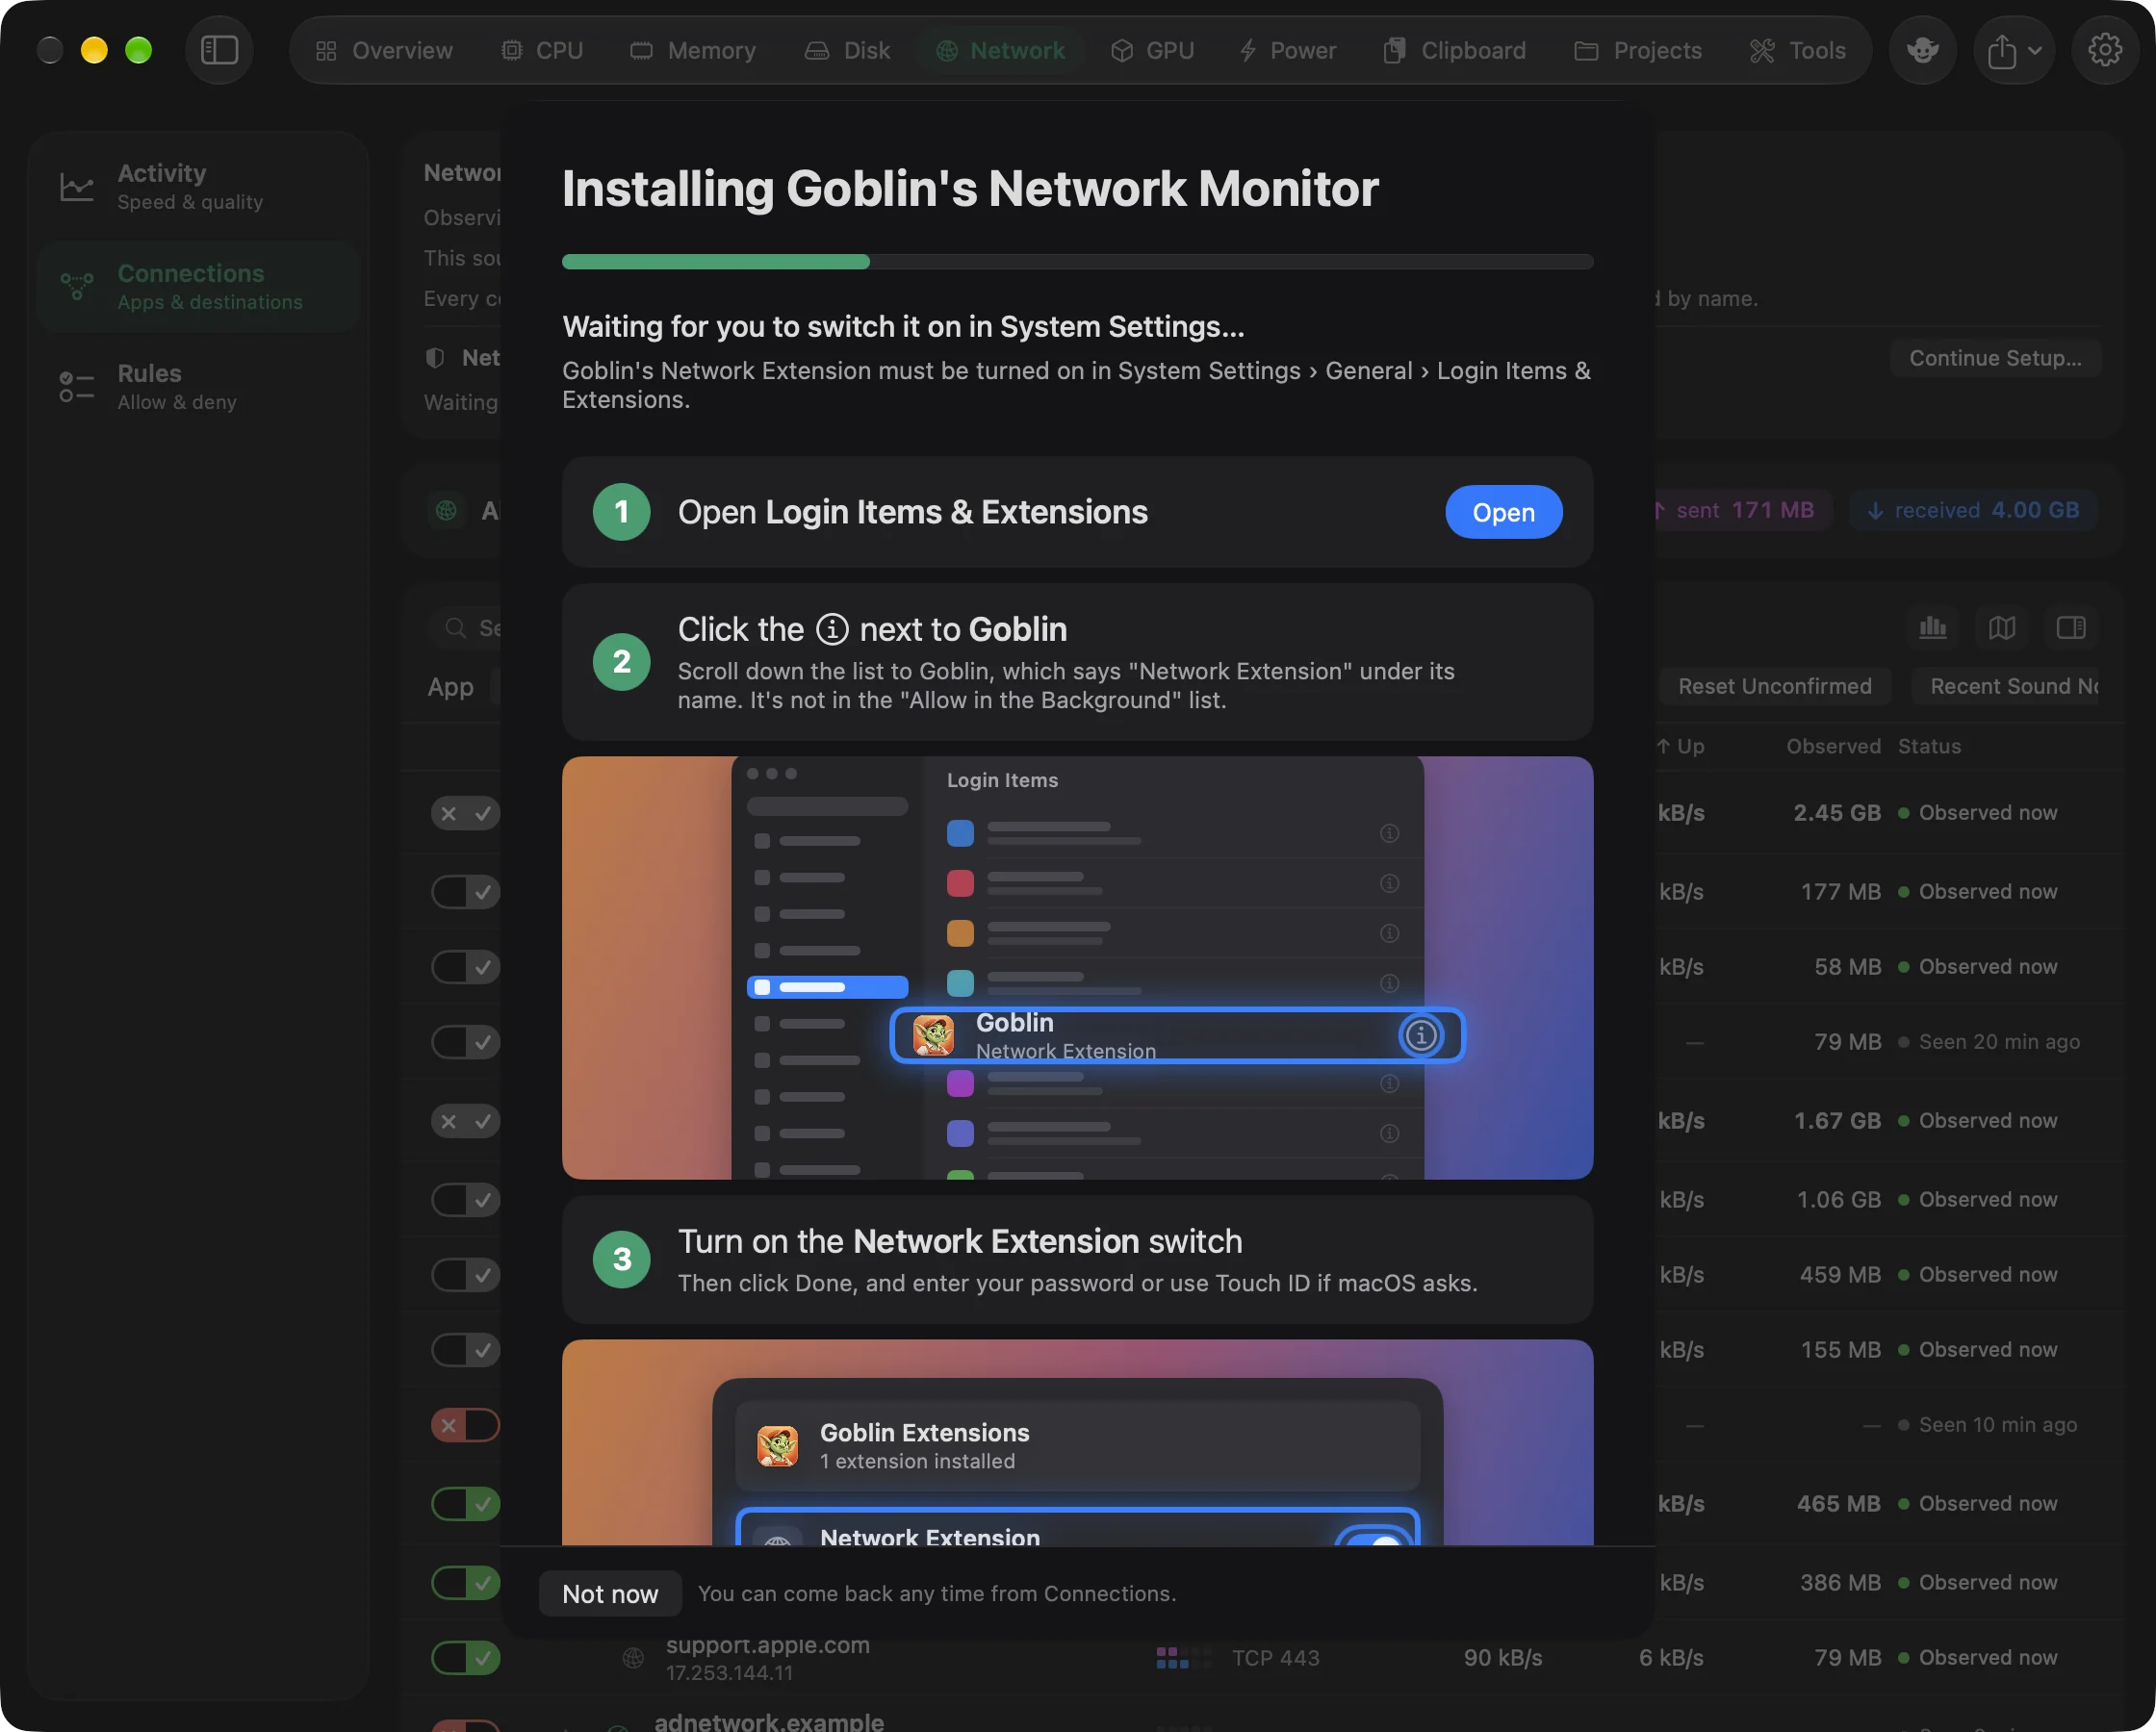
The sheet is titled "Installing Goblin's Network Monitor". A progress bar and a status line say where you are, and each step ticks itself off. Goblin checks every 4 seconds and whenever you come back to it, so you don't need to tell it you're done.
- In the sheet, click Install under step 1, Install the network monitor. If it fails, the button becomes Try Again.
- When step 2, Switch it on in System Settings, appears, click Open on the first card, Open Login Items & Extensions. System Settings opens at that list. Goblin changes nothing there; you do.
- Scroll down the list to the Extensions section and find Goblin, which says "Network Extension" under its name. It's not in the "Allow in the Background" list above it.
- Click the ⓘ next to Goblin.
- Turn on the Network Extension switch, then click Done. Enter your password or use Touch ID if macOS asks.
- Back in Goblin, step 3 reads Click Allow when macOS asks. When the macOS prompt "Goblin would like to filter network content" appears, click Allow. If you dismissed the prompt or clicked Don't Allow, click Ask Again in the sheet and then Allow.
- When the sheet says "Goblin's Network Monitor is on" with four ticked steps (installed, switched on, allowed to filter, and running), click Done.
Can't find it, or stuck? opens tips, and opens by itself if macOS has been waiting a while. If the list in Login Items & Extensions is grouped by category, click the ⓘ next to Network Extensions and turn on Goblin Network Monitor. Also look in Privacy & Security. The buttons are Try Again, Open Settings, Open Privacy & Security and Copy Diagnostics, which copies Goblin's view of the install for support.
What this does and doesn't do explains that Goblin sees which app connects where, the address and port, and how much data. It doesn't look at or keep what's inside your connections, like pages, messages or passwords. It only blocks something if a rule or your chosen mode says so.
Not now closes the sheet. To come back, use Set Up… in Settings›Firewall or in the Connections banner (the banner says Continue Setup… if you already did part of it). The sheet also opens by itself once, the first time you open Connections with the firewall on and the extension not set up.
Take the welcome tour again#
After setup, a short tour helps you choose a starting point. It opens by itself the first time the extension is active. To take it again:
- Open Settings›Firewall and stay on the General pane.
- Under Welcome Tour, click Take the Tour…. The button is greyed out, with "Available once the network monitor is on", until the extension is active.
- On Select your favorite rule groups, tick the groups you want. macOS Services and iCloud Services are recommended and preselected. They let the Mac's own services, such as name lookups, time, updates and iCloud sync, keep working. Applications from Apple and Third Party Applications make a group with an allow rule for each installed app of that kind. Click Continue.
- On Choose your preferred operation mode, pick Silent Mode (recommended, which is Silent Allow) or Alert Mode, then click Continue. Your choices are applied now.
- Click Continue through the remaining pages, which show how the connection alert, the Internet Access Policy, the Network tab and Silent Mode work.
- On the last page, Ready., click Done, or Open Firewall Settings to go to Settings›Firewall.
To leave everything as it is, click Skip on the first page. After the mode page, Skip Tour jumps to the end, and Back steps back. Take the Tour Again on the last page starts over.
Operation modes#
The mode decides what happens to a connection that no rule covers. Connections a rule or blocklist covers follow the rule, whatever the mode.
| Mode | A connection without a rule… | Good for |
|---|---|---|
| Alert | Is held while Goblin asks you in a connection alert. | Deciding app by app, and learning what your apps do. Expect many alerts at first. |
| Silent Allow | Is allowed, and listed under Suggestions in Rules. | Getting started quietly. Nothing breaks; you review later. |
| Silent Deny | Is denied, and listed under Suggestions. | A locked-down Mac where only what you've allowed may connect. |
A fresh install starts in Silent Allow. In the Silent modes, no alert appears for connections without a rule. Ask rules and changed programs still bring up an alert in any mode.
Changing the mode applies to new connections. Connections already open keep their verdict.
Warning: In Silent Deny, anything you haven't allowed is cut off, including apps you use every day. Keep the macOS Services group on, or the Mac may not get online at all.
Change the operation mode#
Pick whichever place is closest:
- From Rules. Open the Network tab, choose Rules, and use the Mode picker at the top.
- From Settings. Open Settings›Firewall›General and choose from Operation Mode: under Filtering.
- From the menu bar panel. Open the panel's Network tab, click the Operation Mode tile in the Firewall card, and choose Alert, Silent Allow or Silent Deny.
- From the menu bar item. Right-click Goblin's menu bar item and choose a mode under Operation Mode.
- From Terminal. Run
goblin network mode alert,goblin network mode silent-alloworgoblin network mode silent-deny, once Allow access via Terminal is on. See The goblin command.
When it worked, the picker shows the new name, and a checkmark sits beside it in the panel and the right-click menu.
The filter switch#
Filtering turns rule-based decisions off without turning the firewall off. With filtering off, every connection is allowed, whatever your rules say, and is still listed in Connections. It's "watching only". Use it when you suspect a rule is breaking something and want to check quickly.
Turn filtering off and on#
- Open Settings›Firewall›General.
- Under Filtering, switch Filtering: off. The label beside it changes to Off, and the note reads "Watching only: every connection is allowed, and still listed in Connections."
- Try the app that was failing. If it works now, a rule or the mode was blocking it.
- Switch Filtering: back on. The label reads On again.
Other places to flip the same switch:
- The Filter switch in the Rules header.
- The round shield button on the panel's Firewall card. It's filled while filtering is on and shows a slashed shield when it's off.
- Turn Filtering Off or Turn Filtering On, under the Filtering heading in the menu bar item's right-click menu.
goblin network filter onorgoblin network filter off.
By default, the menu bar icon shows a warning sign while filtering is off, so you don't forget. The cue is set under Status Menu in Firewall settings.
If you've turned off Allow Settings Editing in Firewall settings › Security, changing the mode or the filter switch asks for Touch ID or your password first.
While Goblin isn't running#
The extension runs separately from the Goblin app. It keeps enforcing the last set of rules it confirmed, even after you quit Goblin. Connections that would need an alert get the automatic answer from Automatic Confirmation in Firewall settings (Allow unless you changed it), since there's nobody to ask. Notification, sound and hide rules need the app, so they pause until Goblin runs again.
The network extension row#
While the firewall is on, the bottom of the Connections banner shows Network extension with its state:
| State | What you can do |
|---|---|
| Off | Set Up… opens the setup sheet. |
| Needs approval | Continue Setup…. The row says "Waiting for you to switch it on in System Settings." |
| Starting | Wait a moment. |
| Active | Show Its Connections (if Connections is still on nettop) and Turn Off. |
| Unavailable | Check Again. The reason is shown. |
When active, the detail line reads like "Version 1.0.9 · 412 flows tracked · 9,310 seen since start · rules revision 57".
Note: This row's Turn Off only switches off the extension's filter. The firewall itself stays on: the Rules screen stays, its rules show Not enforced, and nothing is filtered until you click Set Up… again. To turn the whole firewall off, use the steps below.
Turning it off#
- Open Settings›Firewall and stay on the General pane.
- On the Firewall card at the top, click Turn Off…. If Allow Settings Editing is off, Goblin first asks for Touch ID or your password.
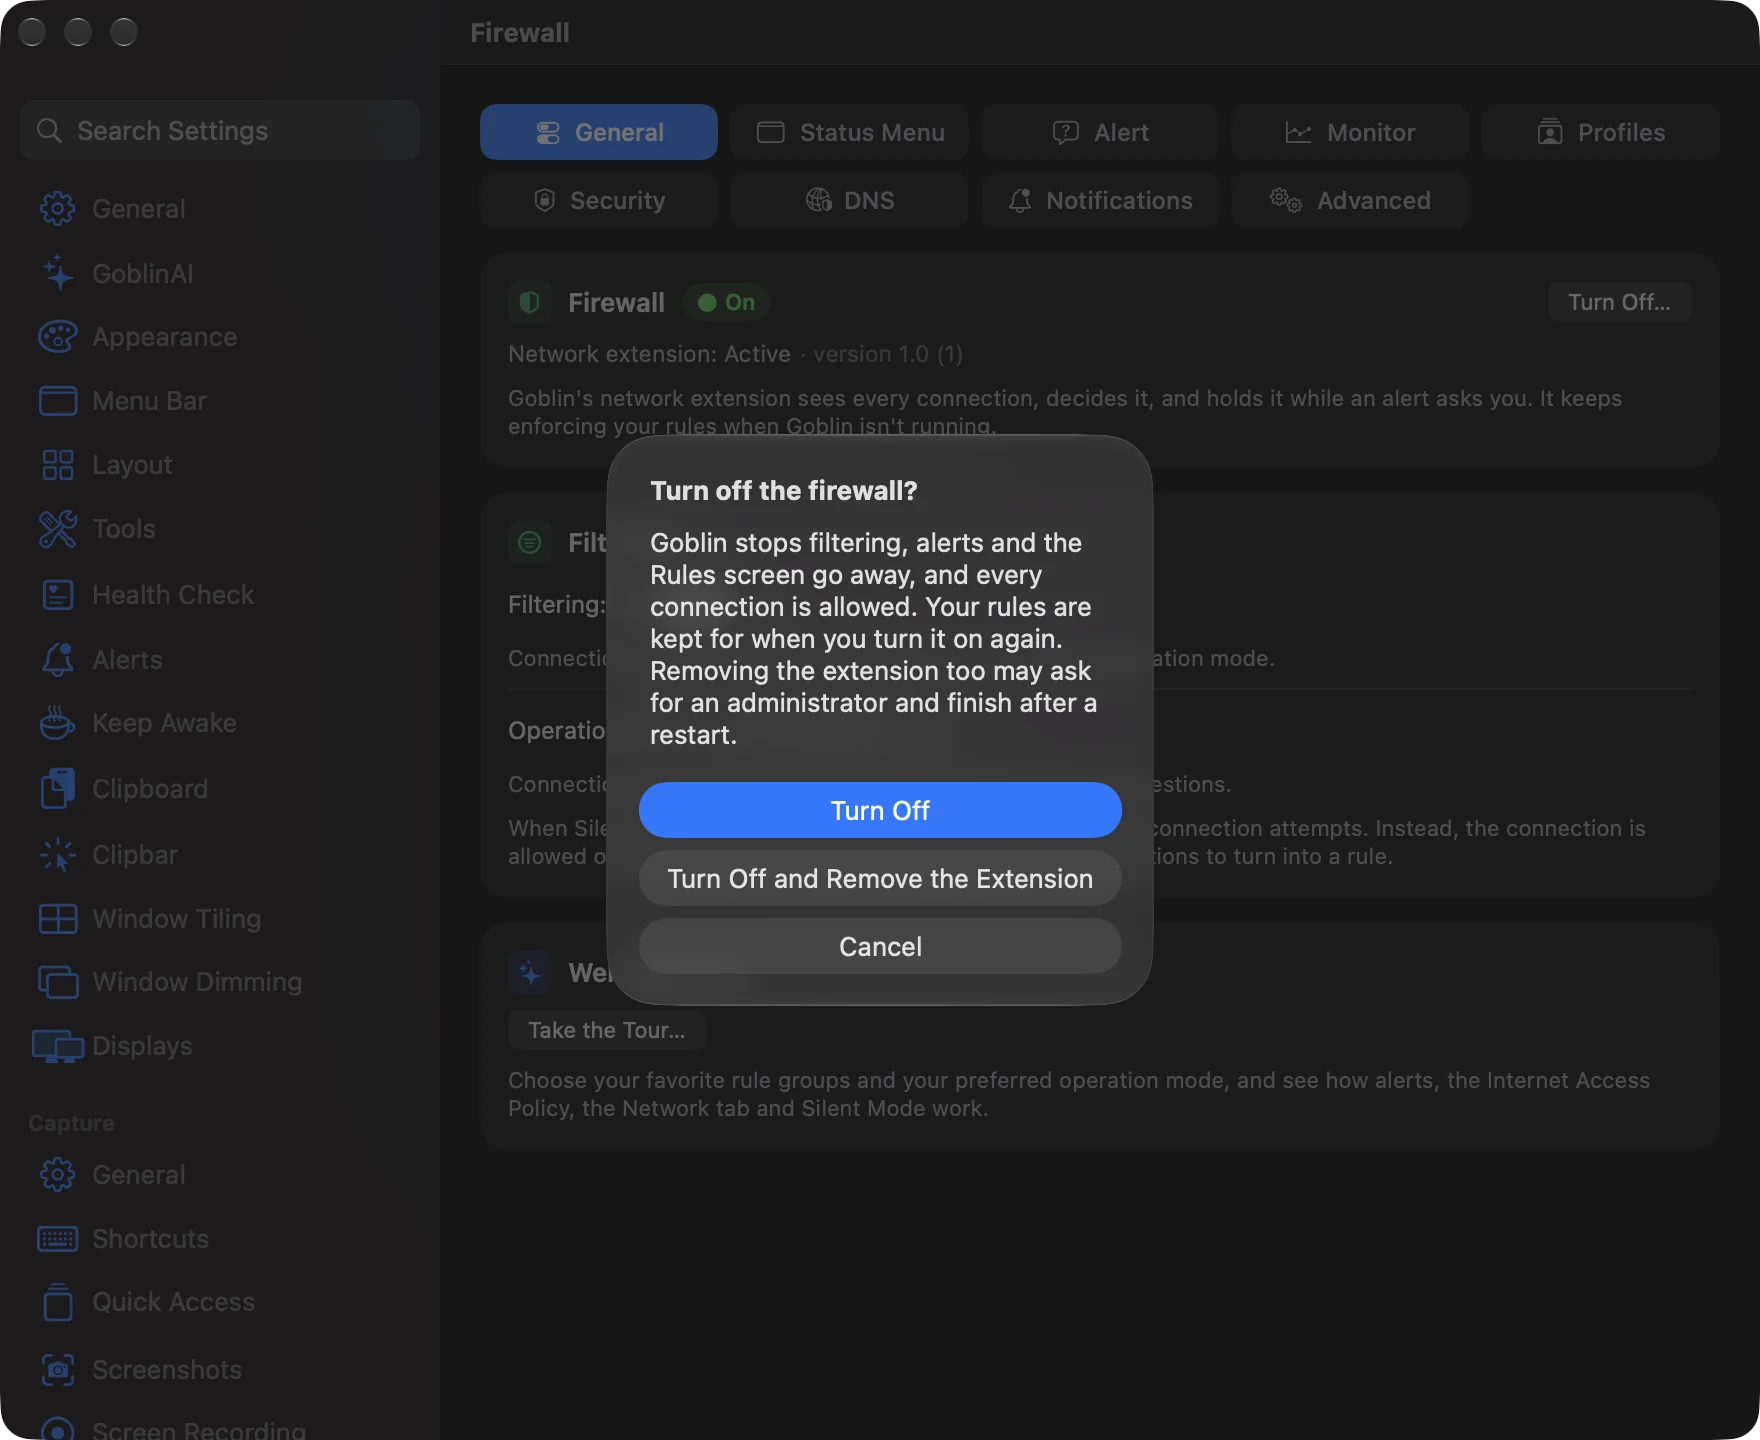
- In the dialog "Turn off the firewall?", choose one:
- Turn Off: Goblin stops filtering, every connection is allowed, alerts and the Rules screen go away, and Connections goes back to sampling with nettop. The extension stays installed.
- Turn Off and Remove the Extension: the same, and the extension is uninstalled too. macOS may ask for an administrator password, and the removal may finish after a restart.
When it worked, the pane changes to the "off" view: the Firewall card is marked Off with a Turn On… button, and Rules leaves the Network tab's sidebar.
Either way, your rules, profiles and blocklists are kept for when you turn the firewall on again.
Note: Encrypted DNS is separate from the filter. Turning the firewall off doesn't turn it off; switch it off first if you no longer want it.
Remove the network extension#
Removing only the extension leaves Goblin's firewall switch on, so the Rules screen stays and shows rules as not enforced. To remove it:
- Open Settings›Firewall and click Advanced in the strip along the top.
- Under Network Extension, click Uninstall…. The button only appears in a build that carries the extension.
- In the dialog "Uninstall the network extension?", click Uninstall. macOS may ask for your password and finish removing it after a restart.
Goblin then stops filtering and can't show connections until you set the extension up again with Set Up…. To switch the whole firewall off instead, use the steps above.
The Network Extension switch in System Settings › General › Login Items & Extensions turns the extension off on macOS's side the same way, and leaves Goblin's firewall switch on.